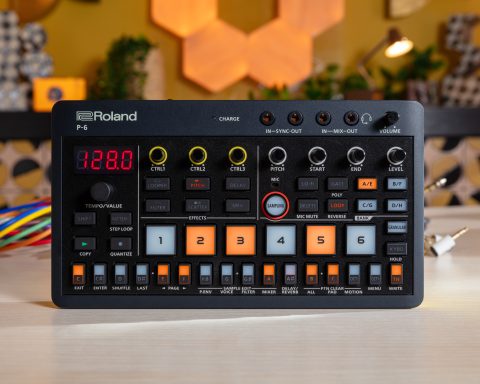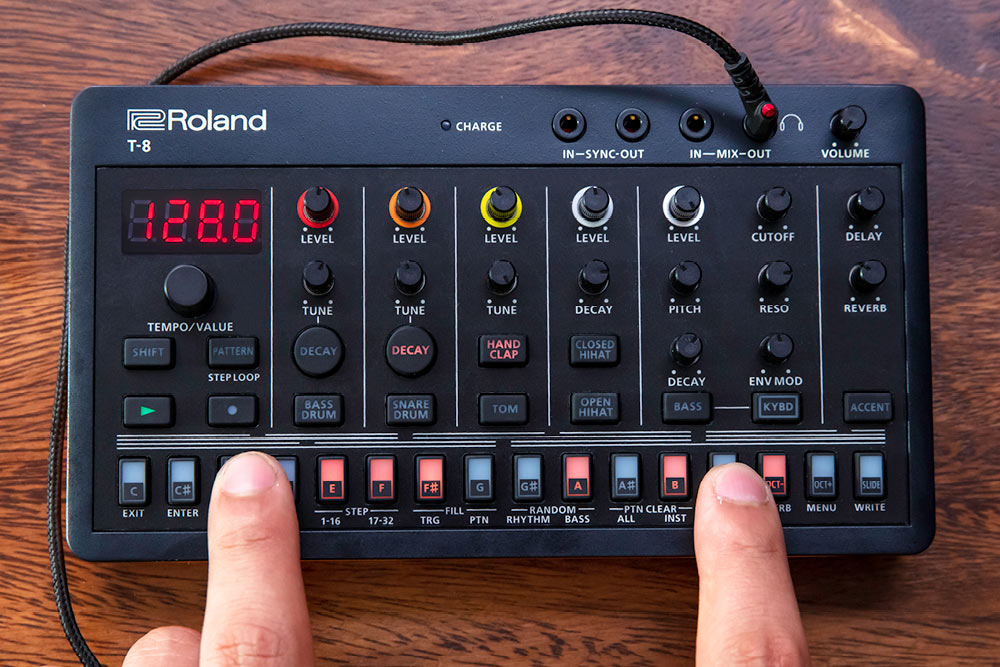
The T-8 is Roland’s most miniaturized re-envisioning of its classic machines, combining the best of the TR drum sounds plus a TB-303 style bass track. On its own, it’s a tiny, powerful drum machine, allowing for complex beatmaking using iconic Roland sounds. The T-8 is a beat machine with six drum tracks and one bass track. Behind its front panel are numerous shift functions for rhythmic experimentation and dynamic live performance.
GUIDE
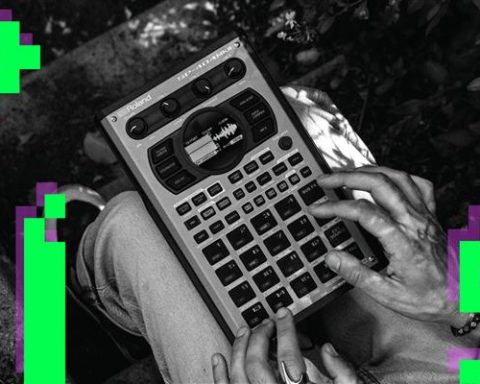
Meet the T-8 Beat Machine

For those looking to escape the computer, the T-8 is a great way to get away from the screen: pair it with a portable synthesizer and you’ll have a proper setup for building tracks. As accompaniment, the T-8 can add rhythmic foundation as a base to build upon—complete with a bass track, using its simplified, programmable rendition of the Roland TB-303. As a teaching tool, it’s powerful for learning the basics of beat programming, allowing for various composition techniques, including live recording and classic “TR-style” step sequencing.
"The T-8 is Roland's most miniaturized re-envisioning of its classic machines, combining the best of the TR drum sounds plus a TB-303 style bass track."
Finally, as an addition to a phone, tablet, or laptop-based studio setup, the T-8 brings a hands-on drum and bassline sequencer. Not only that, but because it functions as an audio interface via its USB-C port, it brings low-latency audio into your computer. This makes it useful for musicians who like working or performing away from their studio with just a laptop and an AIRA Compact.
Making a Beat
Hold the PATTERN button to select a pattern, select banks 1-4, and then press steps 1-6 to choose a pattern. To delete a pattern, press SHIFT + STEP 11 [PTN CLEAR ALL], and you’ll start fresh. Now, select a drum instrument. Let’s begin with the KICK. Start programming the steps on which you want it to trigger. Each step represents a 16th note, with the downbeat on the 1, 5, 9, and 13. You can add other drum sounds with the step sequencer or press the RECORD button and tap them in live via the individual instrument buttons. Press a lit step button again to erase it. Follow suit for the other tracks, and start building up a beat.
NOTE: If you want to swap out the instrument sound on either the TOM or CLAP tracks, press MENU, turn the VALUE knob to TOM or CLAP, and press Enter to change the sound. There’s an alternate tom on the TOM track and a choice of either a noise tom or a high tom on the CLAP track.
"To add slides and accents after you've recorded in your notes, press SLIDE or ACCENT buttons while recording the parts to which you want them applied."
Making a Bassline
Let’s make a bassline. First, select the BASS track. Press KYBD to play bass notes on the step keys, then press the RECORD button when ready to lay it down. To add slides and accents after you’ve recorded in your notes, press the SLIDE or ACCENT buttons while recording the parts to which you want them applied.
Alternatively, you can also enter notes using the step sequencer. Turn off KEYBOARD mode, turn on the notes you want to trigger, and change each pitch by holding a step and turning the knob to the desired note. To extend the duration of a given note, hold the step button to the right of the one you want to extend. Then, turn the knob to the right to TIE to create a tie. You can do this on as many adjacent steps as you want to hold the note. Hold a step button to add accents or slides, and press ACCENT to toggle between the two options.
"Use a random bassline as a performance tool to break down a beat into chaos before firing into your next pre-made pattern."
Shaping a Bass Sound
Next, let’s shape your bass sound. Use the CUTOFF and RESO knobs to change the cutoff and resonance of your filter sound, as well as the ENV MOD (envelope modulation) and DECAY knobs to contour the sound of your bass further. To select between sawtooth or square waveforms for your bass sound, hold PATTERN + STEP 11 (PTN CLEAR ALL) to choose your desired waveform. You can hold the BASS + KYBD buttons and turn the knob to transpose your bassline in real time by a semitone.
Finally, to generate a random bass or drum sequence, hold SHIFT + STEP 9 for a spontaneous rhythm or SHIFT + Step 10 for a random bassline. Do this as often as you like until you find the combination you want. Or use it as a performance tool to break down a beat into random chaos before firing into your next pre-made pattern. When you enter unknown territory like this, it can also be handy to revert to the previous bassline. To do this, simply hit PATTERN + STEP15 [OCT+ (MENU)], and your baseline will revert to its last incarnation.
NOTE: This process works for rhythm tracks and patterns. You can generate random rhythms by pressing SHIFT + STEP 9 [G# (RANDOM RHYTHM)]. To reload a rhythm, hit PATTERN + STEP 14 [OCT- (REVERB)]. And to reload a whole pattern, hit [PATTERN] + STEP 16 [SLIDE (WRITE)].
Advanced Programming
Substeps
These advanced programming techniques will help you create even more complex and dynamic sequences on your AIRA Compact T-8. Adding shuffle or “swing” to your beat is simple: Hold SHIFT + STEP 3 (SHUFFLE / D) and turn the knob to adjust how much shuffle is applied. This parameter allows for both positive and negative shuffle values. It can get pretty wild at the extremes, but staying within 5% in either direction can add a nice, subtle bit of groove to your beat.
To add substeps or “ratchets” to a sequence, hold down one of the instrument buttons and then press a step to set the number of repeats/ratchets that will fire on that step (the settings cycle through in this order: OFF – 1_2 – 1_3 – 1_4 – FLAM). This can be an incredibly effective tool for changing the energy of a pattern and another way of effectively accenting a step without simply making it louder.
"Probability is another way to make a sequence more dynamic and less repetitive. Used carefully, this can add a level of subtle unpredictability to your groove."
Probability
Probability is another way to make a sequence more dynamic and less repetitive. To determine the probability of a given step, hold that step button and turn the knob to reduce the chances of that note playing each time the sequence repeats; used carefully, this can add a level of subtle unpredictability to your groove.
For more dramatic results, you can also set the master probability to control probability settings for all notes in a pattern by holding the PATTERN button and turning the knob to your desired setting. This functions as a performance tool to dramatically reduce the overall “density” of the sequence and then bring it back up to its full arrangement. Likewise, you can use master probability to reveal programming that’s hidden when set to 0.
Velocity
Varying the velocity of the notes in a pattern is another helpful way to make things sound less robotic and more alive. To change the velocity of a step, hold a step, press the ACCENT button twice and twist the knob to change its velocity. Over multiple steps, this technique can help create more dynamic, natural-sounding volume variation in the sequence.
Note Shift
Once your beat sounds good, another excellent technique is pattern shift, which can flip rhythms. Hold any instrument button and turn the knob left or right to nudge the sequence one click in either direction until you find the right pocket for that particular track in your sequence. This works particularly well with basslines to find the best place for the bass notes to sit in with the rest of the beat. It’s also a good “in-the-moment” technique to shift or flip the feel and revert to the original placement.
"Another excellent technique is pattern shift, which can flip rhythms. Hold any instrument button and turn the knob to nudge the sequence until you find the right pocket."
Last Step and Reload
Finally, changing the last step in a track is a way to create polymetric sequences and can be set separately for rhythm or bass. With this approach, your rhythm or bass are assigned different numbers of steps and play against one another, phasing in and out of alignment. To go about this, choose a rhythm or bass track, hold the SHIFT + STEP 4 (LAST) buttons, and then turn the knob to set the length of that instrument track.
Try keeping your rhythm at 16 steps with kick drum triggers on the downbeat (1, 5, 9, 13) while making your bass track an odd length (5, 7, or 9 steps). Add a few steps to the bass track, and see how the two tracks line up differently with each successive loop.
Effects: Delay, Reverb, Overdrive
To help bring your mix to life, the T-8 has three onboard effects: delay, reverb, and overdrive. You can set the amount of reverb and delay send on each instrument; you might want more delay on your snare or hi-hats than on your kick drum, so dialing in these amounts is essential. To set delay or reverb to individual instruments, hold SHIFT + STEP 13 (DELAY) or STEP 14 (REVERB), and use the knob to dial that channel’s amount up or down.
For overdrive, use the shortcut PATTERN + STEP 10 (RANDOM BASS) to turn the overdrive on for the selected instrument, then turn the knob for the overdrive’s drive and level settings. Dialing in these overdrive settings is a great way to add distortion and textural complexity to bring your mix to life, particularly on bass sounds.
"To help bring your mix to life, the T-8 has three onboard effects: delay, reverb, and overdrive."
Sidechaining
The T-8 also includes a powerful sidechain feature, perfect for creating pumping dynamics in your mix. Typically, a kick drum will “duck” the level of the bassline, letting it punch through the mix as the bass swells down and then back up again with each hit. Sidechaining is also powerful as a creative effect, mainly when applied to delay and reverb. Where ducking produces a pumping effect, gating will provide a choppier, harder-edged rhythmic effect on the sound and sounds especially good when it’s chopping up a long delay and/or reverb tail.
To get to the T-8’s sidechain settings, press PATTERN + STEP 12 (PTN CLR INST / B). Adjust the overall depth, and turn the knob to access other menu options, including ducking and gate depth for each instrument, as well as the timing of the sidechain and the sidechain source. You can effectively switch from a “ducking” to “gating” effect by turning up the gate depth. Apply these different types of sidechaining to your FX track, and try using various sidechain sources (kick, bass) to experiment with how to integrate this for creative effect. Overall, this feature can create a more dynamic and energetic mix and compelling interplay between the different instruments and FX tracks.
"Once your beat sounds good, you can use the
T-8's real-time performance features to bring it
to life."
Real-time Performance Features
Once your beat sounds good, you can use the T-8’s real-time performance features to bring it to life. First, hit SHIFT + PATTERN together to access STEP LOOP mode. Try pressing and holding any single step to repeat that step or any combination of steps to loop the time between those beats. This is great for creating dynamic rhythms and stutter effects to deconstruct your beat in real time.
Muting
Another invaluable performance feature is muting. You can hold SHIFT + any instrument to mute that track. Likewise, you can press SHIFT + STEP 15 (MENU) to access MUTE MODE, where you can quickly mute and unmute individual tracks without holding the shift button — great for a performance setup. With either of these methods, muting is a great way to play a sort of “hide and seek” with your beat. Tease parts in and out before bringing some or all of them back in for a pivotal moment.
Fills
Finally, to use a FILL pattern to switch up your beat, hold SHIFT + STEP 8 (FILL PTN) to assign a pattern to be used as a fill, and then hit SHIFT + STEP 7 (FILL TRG) to trigger that fill. Fills are typically short, improvisational transitions between parts of a song—essentially a brief drum solo, which fills a gap between musical phrases and sustains the listener’s attention.