The historic flavor of the JUPITER-8 remains as popular today as when it arrived in the ’80s. Its massive, majestic patches grace records across nearly every conceivable genre. Fortunately, the JUPITER-8 sound is alive and well—and very accessible. Explore five iconic JUPITER-8 poly presets ranging from smooth pads and punchy brass to silky analog strings and power plucks. All examples use the Roland Cloud JUPITER-8 Model Expansion, making them perfect to use in a DAW with ZENOLOGY or Roland hardware that supports the ZEN-Core Synthesis System.
GUIDE
An Era-defining Sound
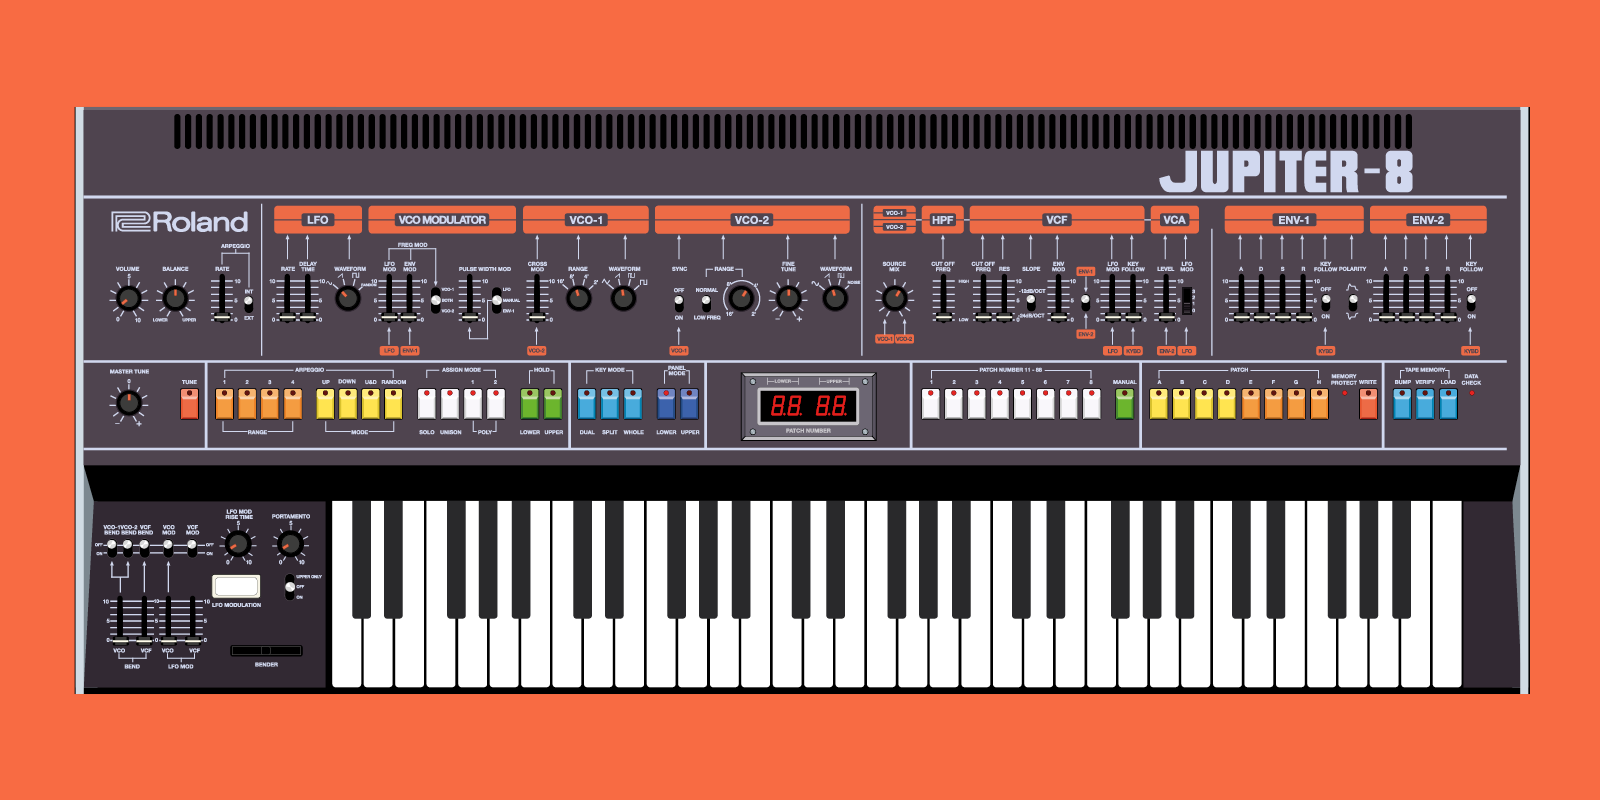
After years of creating groundbreaking instruments like the PROMARS, SH-2, and JUPITER-4, Roland redefined the synth game with 1981’s JUPITER-8. While only produced for three years, ending in 1984, the JUPITER-8 became one of the most popular analog polysynths of all time. It appears on everything from rock albums by Journey, Toto, and Rush to R&B classics by Stevie Wonder and Michael Jackson. The JUPITER-8 also became a cornerstone of the new wave movement exemplified by Duran Duran, Depeche Mode, and Thomas Dolby.
"While only produced for three years, ending in 1984, the JUPITER-8 became one of the most popular analog polysynths of all time."
Smooth Pad
Since the earliest days of polysynths, smooth sawtooth pads have become a key element in countless genres, including rock and pop. Their warmth can fill out a track’s chord progression even when used very low in a mix. Artists ranging from the Pet Shop Boys to Prince used them prominently in their mixes. This particular sound is straightforward to create and easily modified to suit a range of production styles.
Step One
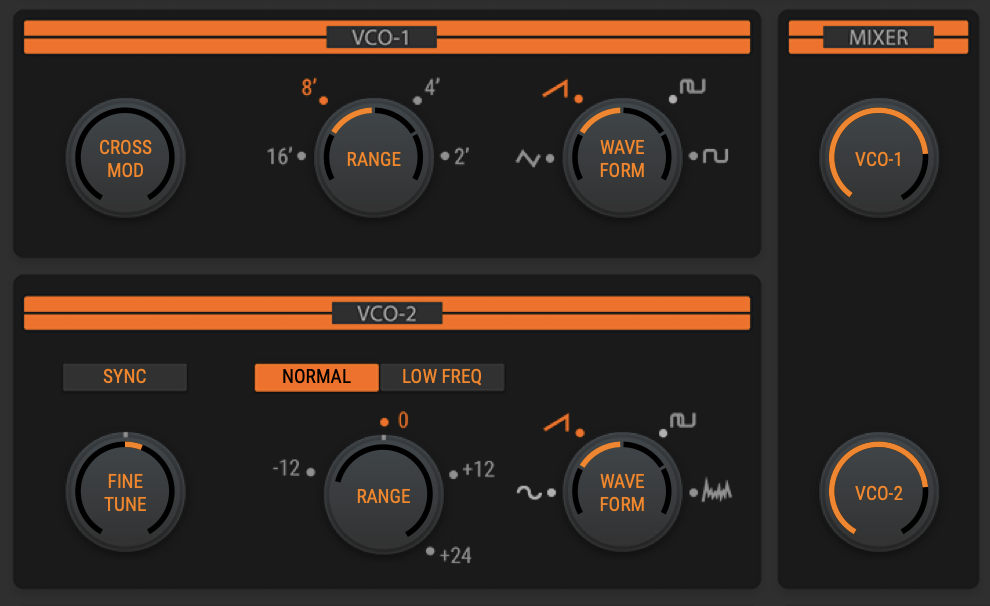
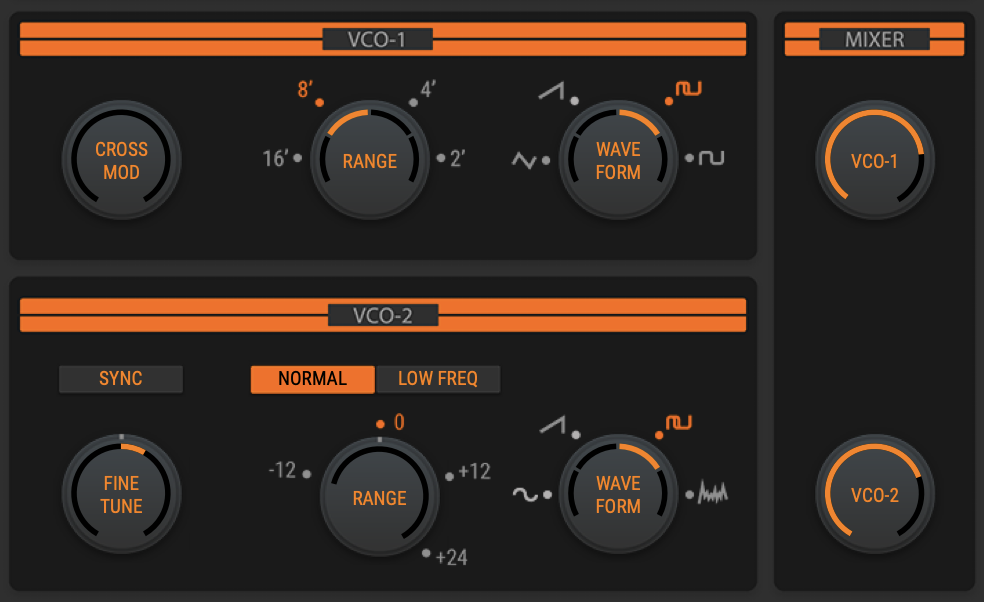
On the JUPITER-8, the default preset is “INIT TONE.” The initialized oscillator settings are two sawteeth at the same octave and pitch, with only one oscillator audible in the mixer. From here, it’s easy. Begin by setting the volume of both oscillators to equal levels (around 200 for both) and then slightly detune the Fine Tune of VCO-2 to a value of +/- 7. This detuning will make the sound a bit bigger and warmer.
Step Two
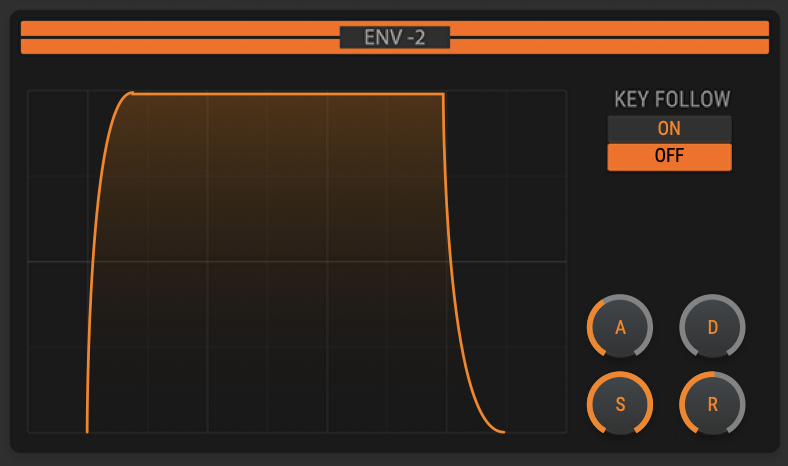
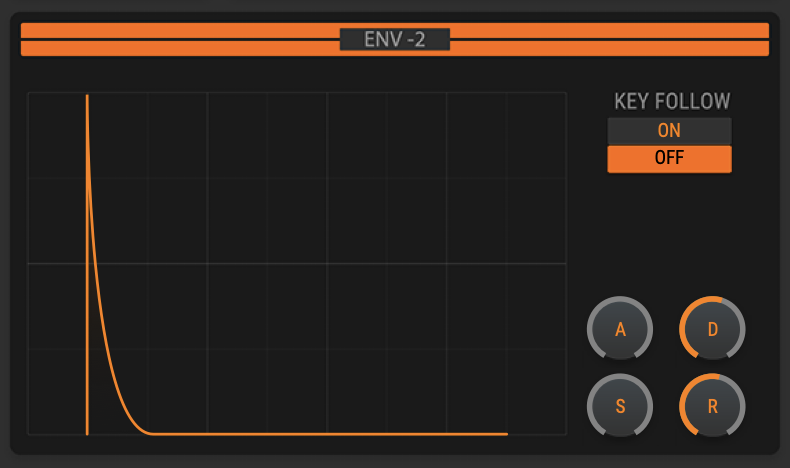
To soften the amplifier envelope (Env-2), set the Attack to around 400 and the Release to about 500-550. Leave the Sustain at maximum. This will give you the “pad” curve.
Step Three
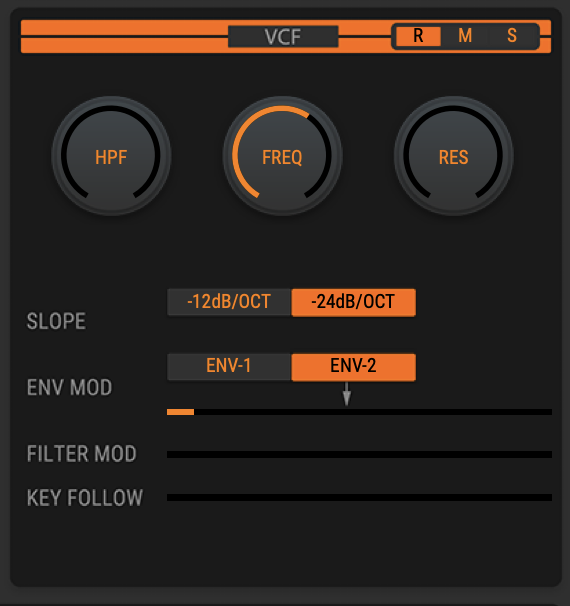
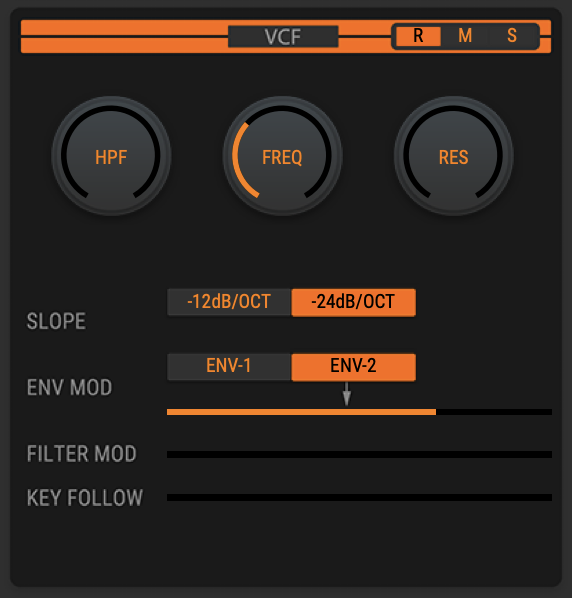
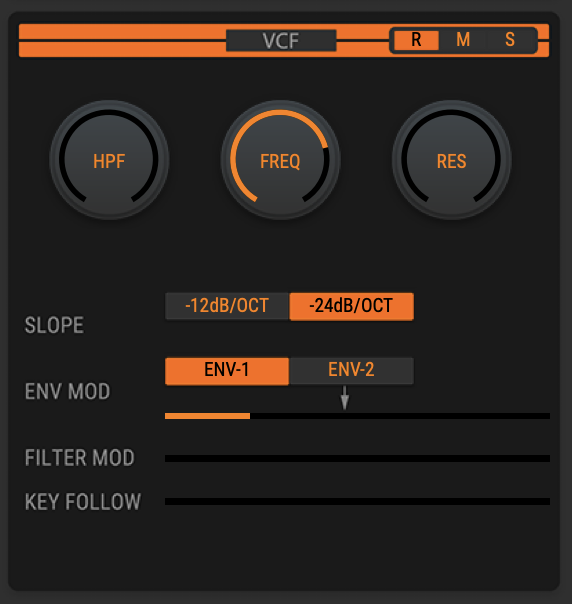
Lowering the VCF Freq (filter cutoff) to 600-700 will smooth out the sound and give the pad more warmth and fewer high frequencies. From there, increase the Env Mod to around 70 and assign it to Env-2. This will add a touch of filter animation to the attack portion.
NOTE: With these settings in place, increasing the Res (resonance) parameter will add “color” to the sound. Adjusting the HPF (high-pass filter) will reduce the lows.
Finishing Touches
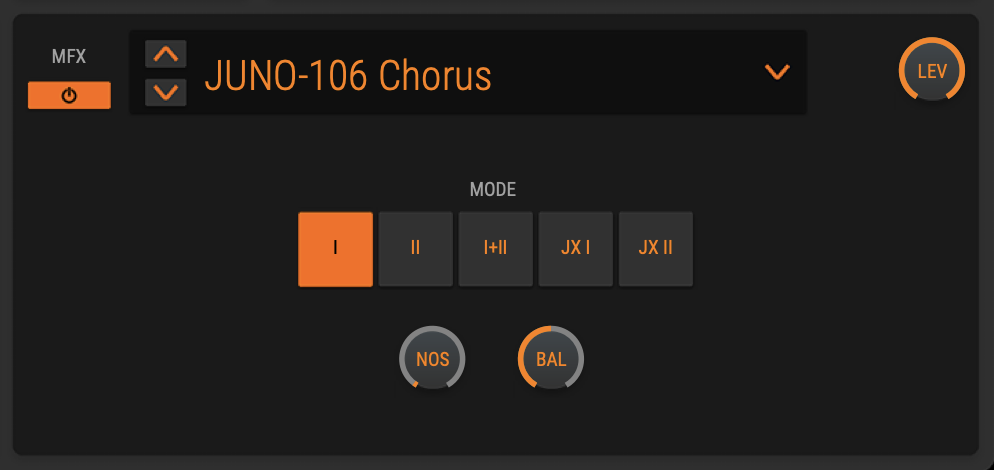
While the pad feels more vintage with the MFX (multi-effects) off, selecting the JUNO-106 Chorus and leaving its default settings in place will give the sound further warmth and thickness.
Smooth Pad Sound Example
Brass Stab
In both arena rock and modern synthwave, brass stabs are a time-tested method to quickly add a vintage ’80s vibe to tracks. “Wild Pogo,” a track I made for YouTube’s Audio Library is based on this preset and has hundreds of thousands of plays. That’s how much some people appreciate this iconic element. Recreating it authentically requires learning a few design tricks. So, let’s dig in.
Step One
Again, the “INIT TONE” patch opens with both oscillators at sawtooths, so increase the volume of both to 200 again, then increase the Fine Tune of VCO-2 to a value of +/- 7. This added detuning will make the sound a tad “phatter.”

Step Two
This is where things gets tricky. One of the critical aspects of that “big brass” sound is adding a touch of pitch motion to one of the oscillators at the sound’s attack. This is a valuable design tool to have in your utility kit.
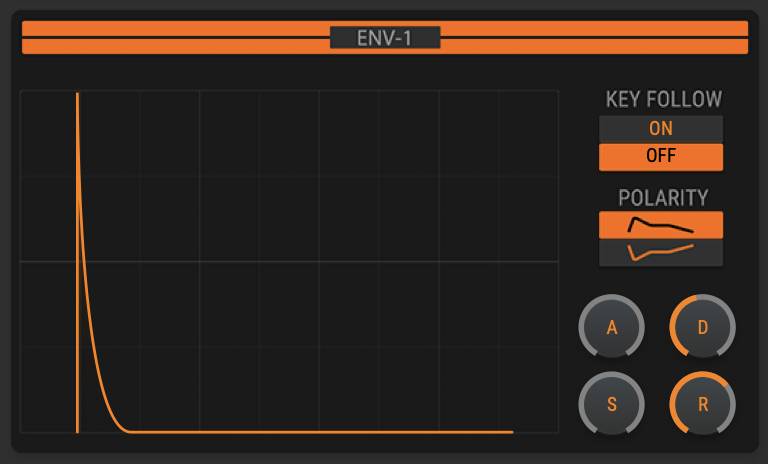
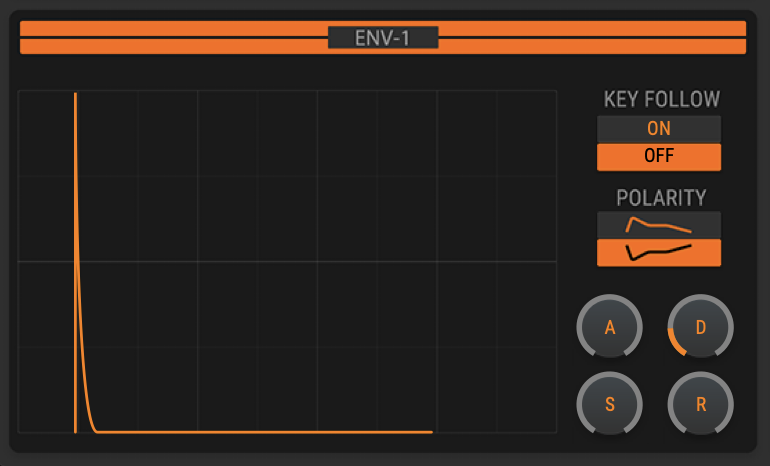
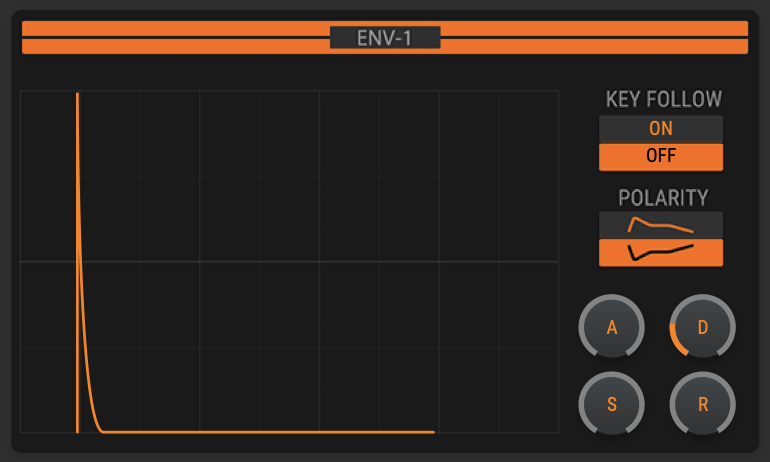
First, set Env-1 to an instant attack with no sustain or release. Then give it a quick decay, around 200. The next step is essential: Invert the polarity of the envelope by selecting the “upside down” icon. With these settings, the envelope will now do a swift rise up.
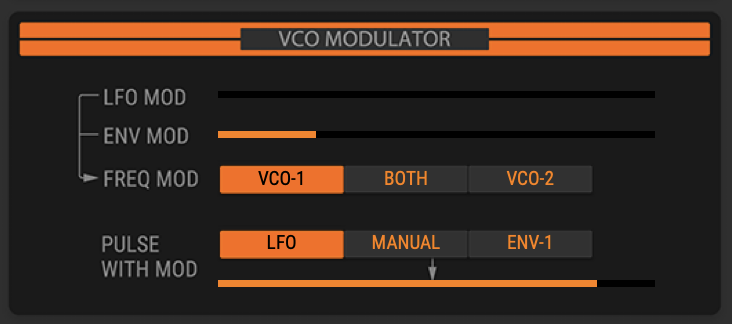
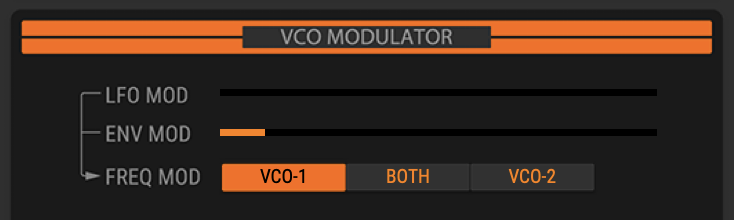
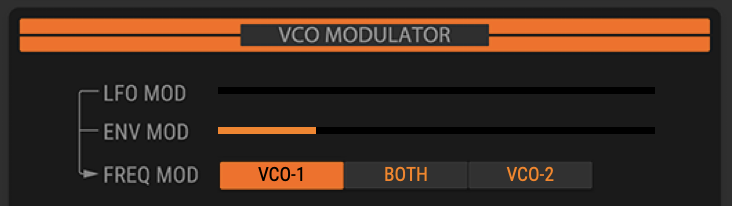
Next, in the VCO Modulator, we raise the Env Mod to around 10 (just a touch) and assign the Freq Mod to VCO-1. Since the Env Mod source is always Env-1, our inverted envelope will add a tiny bit of pitch rise to the VCO-1.
Step Three
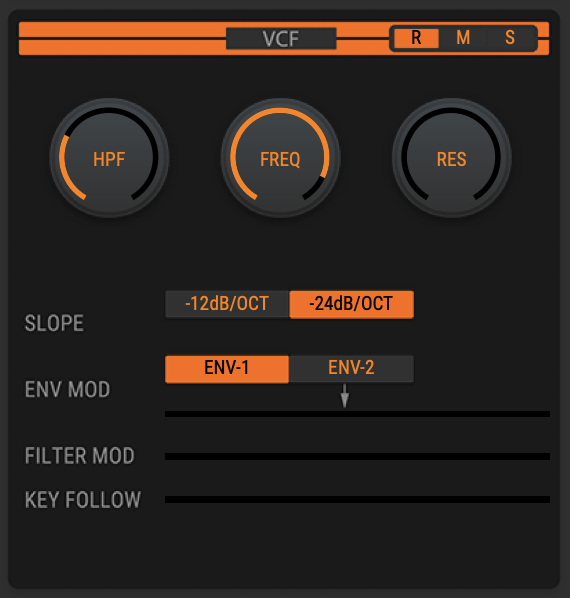
Now that we’ve configured the oscillators correctly, it’s time to set up the VCF. Here we want a reasonably low Freq (cutoff) setting, around 350. This way, Env-2 can serve as both the amplifier envelope and the filter envelope to create the brassy effect. Then, we select Env-2 as the Filter Mod source and raise it to a value between 700 and 750.
Step Four
By now, the sound should be quite brass-like. Still, for the final adjustments, we’ll set Env-2 to an Attack of around 180, no Decay, full Sustain, and a Release at around 180. At this point, you’ll have the standard version of this brass stab.

Finishing Touches
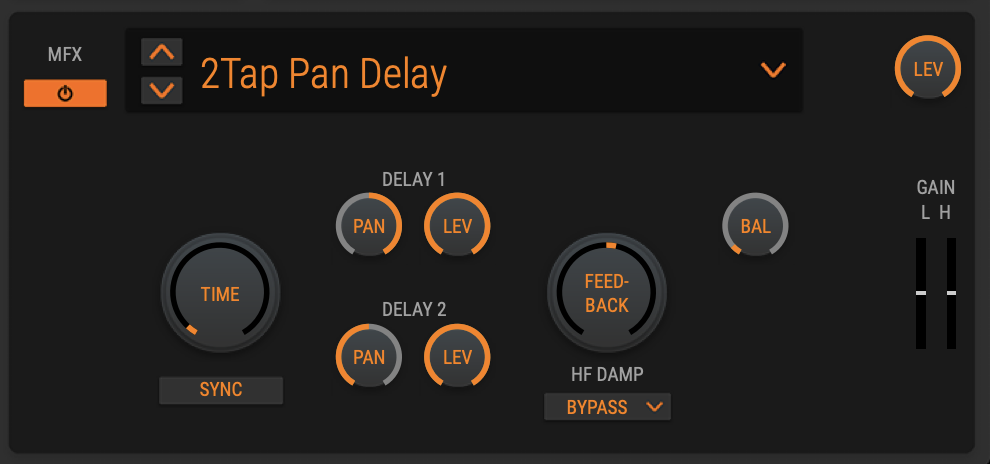
While this sound is pleasing the way it is, adding a touch of slapback delay will give the sound more stereo width and ambience. Select the 2Tap Pan Delay, turn off the Sync parameter, and adjust the Time to a value of around 100-150msec. At this point, you’ll have a vintage brass stab that should blend well in almost any mix.
Brass Stab Sound Example
Analog Strings
Since the mid-’70s, analog strings have appeared in everything from disco to yacht rock. In the ’80s, they appeared in New Wave classics like Joy Division’s “Love Will Tear Us Apart.” While some of the era’s hits featured other synths, the JUPITER-8 and ZEN-Core’s effects suite let us recapture this legendary sound.
Step One
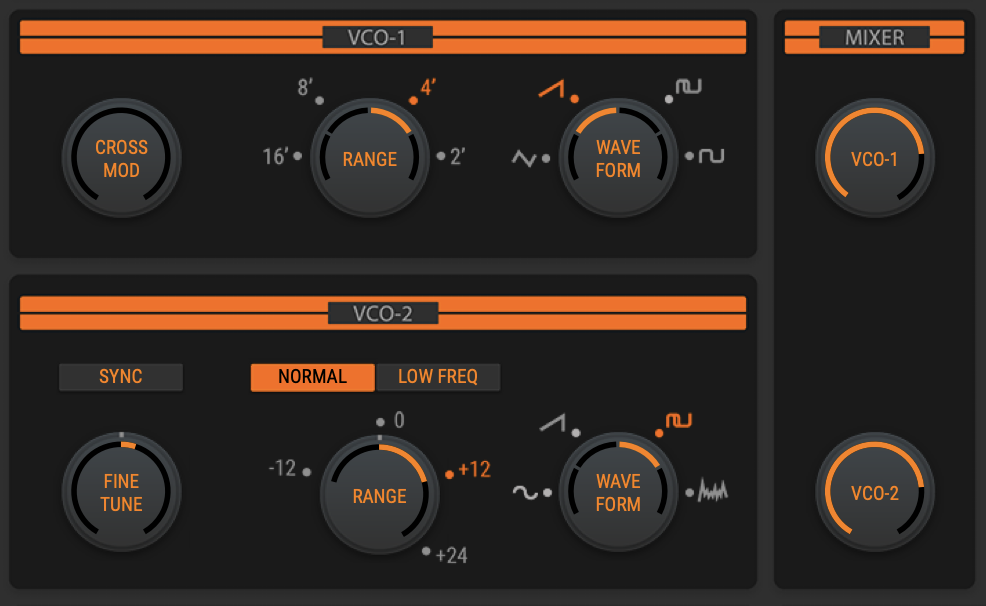
Beginning with INIT TONE, we’ll tune both oscillators (VCO 1 and 2) an octave up by setting VCO-1 to 4′ and VCO-2 to +12, with a touch of Fine Tune offset to +6. Make sure the Mixer levels are both set to 200, then change the waveform of VCO-2 to the Pulse wave. This Pulse wave is crucial in creating that shimmering reed-like tone from the original string machines of the ’70s and ’80s.
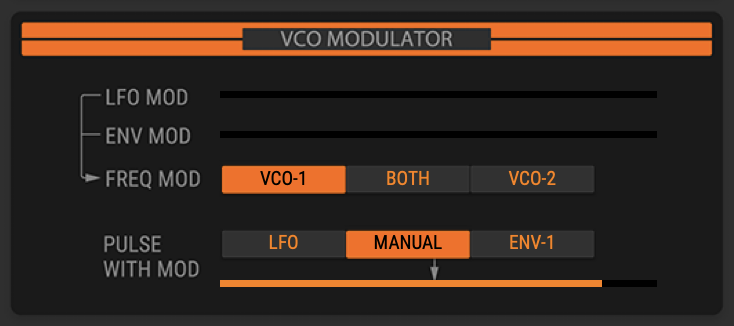
Next, we “thin” the Pulse wave in the VCO Modulator section by setting Pulse Width Mod to Manual and increasing its value to around 110.
Step Two
String envelopes are also relatively easy and similar to the Smooth Pad shape. Set the Attack to around 450, with no Decay, full Sustain, and a longer release of around 500.

Step Three
Dialing in the VCF settings is straightforward, but there is a twist. First, lower the Freq to around 800-900 to tame the extreme highs, then engage the HPF (high-pass) to a value of around 300. This setting may make the sound a bit small, but it’s vital for the final step.
Finishing Touches
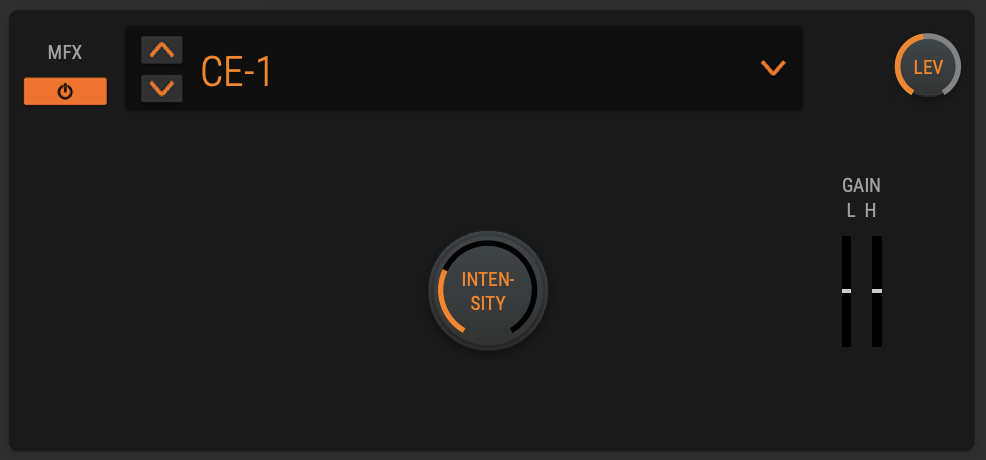
At this point, these strings will sound pretty thin and a bit dull. That’s because old-school string machines relied heavily on ’70s-era ensemble effects. Fortunately, the ZEN-Core engine includes a flawless recreation of Roland’s legendary CE-1. (The CE stands for “chorus ensemble”). Scroll through the MFX Chorus options and select that. The default settings are perfect for this sound. However, if you want it to feel more watery, increase the intensity of your preference.
Analog Strings Sound Sample
Hollow Pad
Pads with a “hollow” sound are a bit more exotic than the previous examples in this tutorial. Since they’re based on square waves, their odd-harmonic flavors give them a haunting, melancholy quality when configured with the appropriate filtering and envelope shape. Like the Brass Stab, this preset uses envelope modulation on the pitch but with a slightly different configuration.
Step One
With INIT TONE as your starting point, set both VCO 1 and 2 to the Pulse wave (which defaults to a square wave), Mixer at equal values (between 180 and 200), and Fine Tune at 10 for slight detuning.
Step Two
As with the Brass Stab, we’ll use Env-1 to add a touch of pitch motion to the beginning of the sound. Again, we set Env-1 to an instant Attack, full Sustain, and instant Release. Here, set the Decay to around 230-250.
Then, we return to the VCO Modulator section and apply the Env Mod to VCO-1 only, as with the Brass. We’ll want a deeper pitch sweep for this pad, so set the Env Mod depth to between 20-25, according to taste.
Step Three
Since this is another polyphonic pad sound, we’ll use the same general envelope shape as our other pad sounds. Set Env-2 to an Attack at 400, zero Decay, full Sustain, and release around 500-550.

Step Four
The VCF settings are also extremely simple. We want to roll off some of the high frequencies of the Pulse (square) wave to smooth and warm up the sound. A Freq value of around 750 will work here.

Finishing Touches
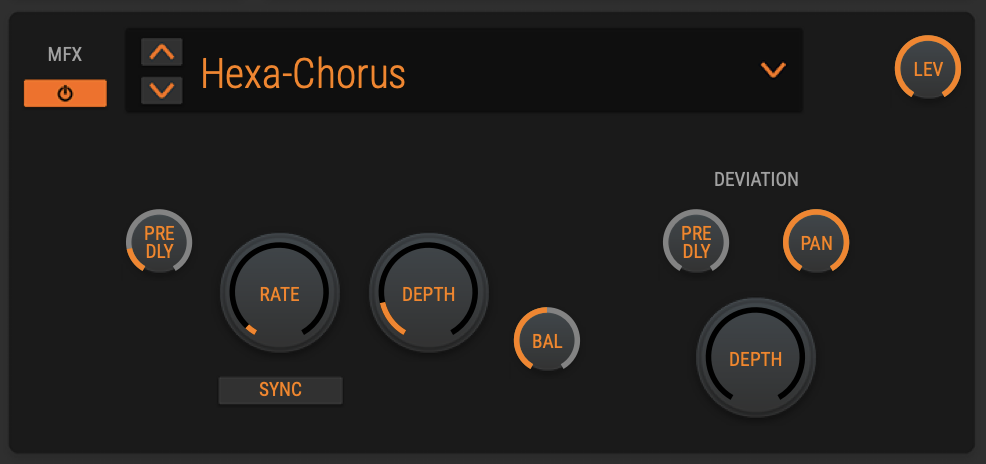
While this sound is fine, adding the ZEN-Core Hexa-Chorus will thicken it even more. The default settings are fine here, but if you want more flavor, increase the Deviation Depth parameter as needed.
Extra Credit
To change up this sound with a single adjustment, return to the VCO Modulator section. Then set the Pulse Width Mod to LFO and experiment with the depth slider. Around 100-110 sounds particularly sweet.
Hollow Pad Sound Example
Power Pluck
While the term “Power Pluck” is my own, it nicely describes this somewhat aggressive sawtooth-based polysynth patch. It’s featured prominently in Journey’s “Separate Ways,” which used the JUPITER-8 as the source of this massive lead. Best of all, it’s an effortless sound to design quickly.
Step One
Start with INIT TONE and follow the same dual sawtooth configuration we’ve used in earlier patches. Set the Mixer levels to 200 for both oscillators and add a touch of detuning with Fine Tune at 8. (It’s amazing how versatile this basic setting can be!)

Step Two
We’ll want a bell-like shape for Env-2 (amplifier envelope). Set the Attack and Sustain to zero, then set both Decay and Release to around 500-600.
Step Three
Since Env-1 will provide the pluck character on the VCF, we’ll lower the cutoff to around 750. This way, the Env Mod from Env-1 has room to create the sharp attack transient. Set this Env Mod slider to between 230-250.
Step Four
With Env-1 filter modulation in place, add that attack transient by setting its values to instant Attack, no Sustain, and both Decay and Release at around 470.
Finishing Touches
Now we’re there. We don’t need to add effects as this sound is authentic when dry. However, if you want to add spice, try using a tempo-synced delay, thick chorus, or even a phaser. This sound works beautifully with almost any effect.
Power Pluck Sound Example
"With these five sounds in your creative arsenal, you can use them as starting points for your original designs."
Continuing the Sonic Journey
With these five sounds in your creative arsenal, you can use them as starting points for your original designs. It could be as simple as fine-tuning the cutoff frequency or envelope parameters. Or maybe you’re attempting deeper adjustments to the oscillator waveforms and tuning. Either way, the patches are a solid introduction to customizing the JUPITER-8 to suit your production goals.
Download
JUPITER-8 Model Expansion Poly Patches
Try out the presets from this article with the ZENOLOGY JUPITER-8 Model Expansion. They will also work with hardware that supports the ZEN-Core Synthesis System.


