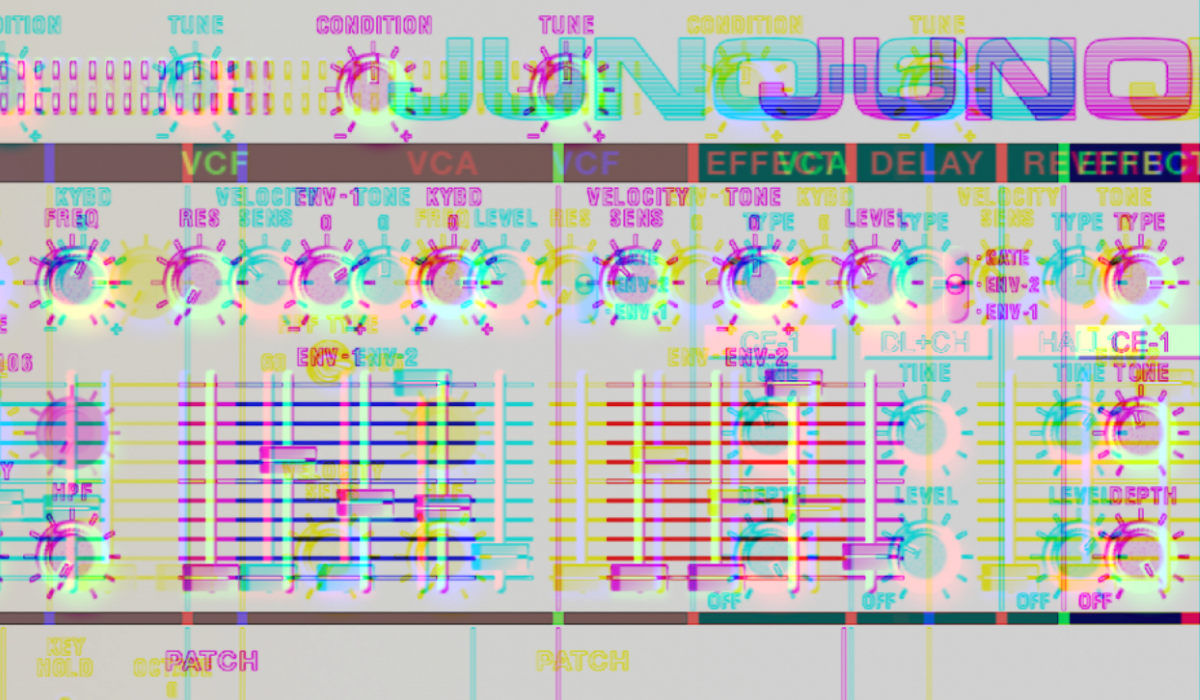
Building on the success of the legendary JUPITER-8, in 1982, Roland introduced the JUNO-6 and JUNO-60 polyphonic keyboards. Because of their affordability, stable tuning, analog filters, and big sound, they quickly became mainstays in the early days of electro-pop, R&B, synthwave, and even rock. After MIDI arrived, Roland revamped the JUNO series by introducing the JUNO-106 in 1984. Again, keyboardists snapped up this revision, and the JUNO-106 became a vital element of the emerging house, hip-hop, and techno scenes. The JUNO architecture and circuits make it a powerful instrument for creating thick analog bass lines. Learn to create five genre-specific bass sounds using the Roland Cloud JUNO-106.
GUIDE
Synthwave
The JUNO-60 and JUNO-106 keyboards were essential instruments in the original synthwave movement of the ’80s. The classic plucked bass of that genre is easy to replicate and is also great for other genres like melodic techno and progressive.
Step 1
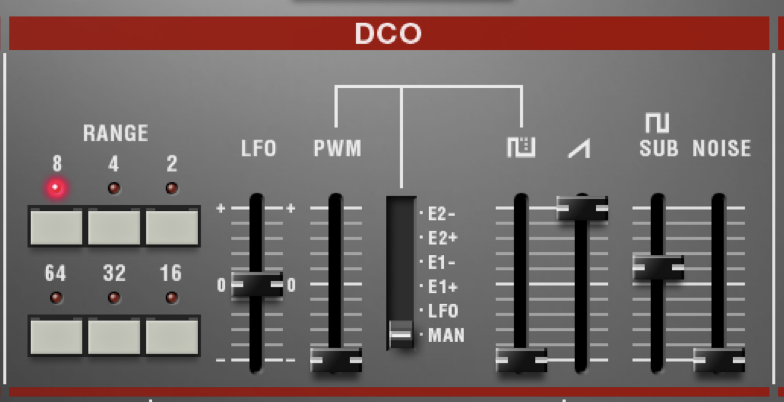
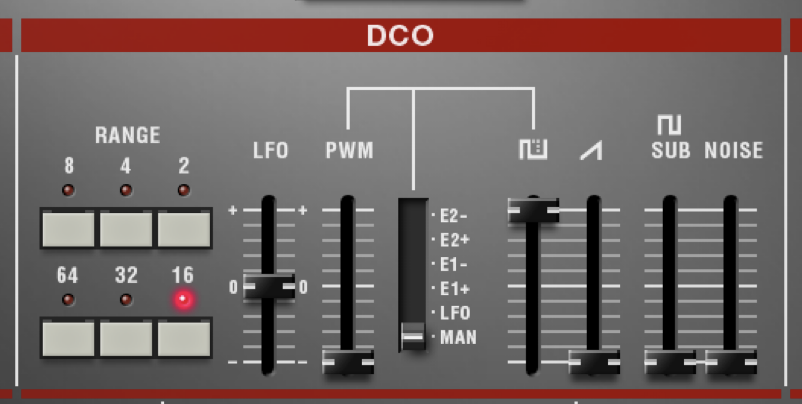
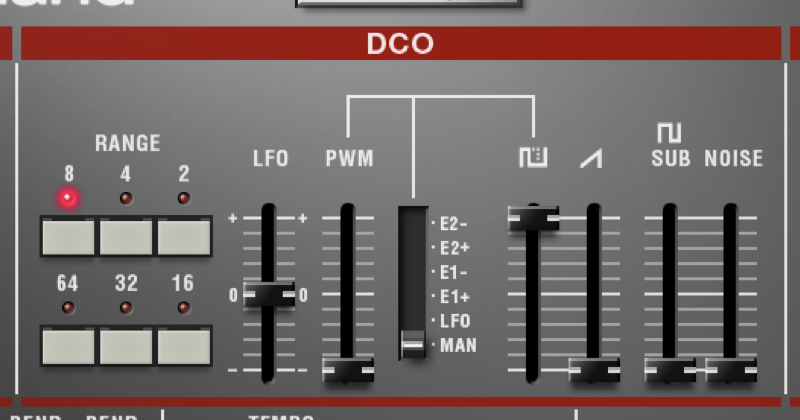
Start with one of the initialized JUNO presets and set the DCO to maximum sawtooth and minimum square. This gives the harmonics more snap. From there, raise the sub-oscillator to around 60-70%. It’s helpful to think of the sub-oscillator volume as a specialized “bass knob” since it’s one octave lower.
NOTE: Squares and pulse waves are equally valid, so these can be blended—or substituted—for the sawtooth, but for this example, we’ll focus on the familiar saw sound for the bass. Once you’ve set up the DCO, feel free to experiment with these.
"The JUNO-60 and JUNO-106 keyboards were essential instruments in the original synthwave movement of the '80s."
Step 2
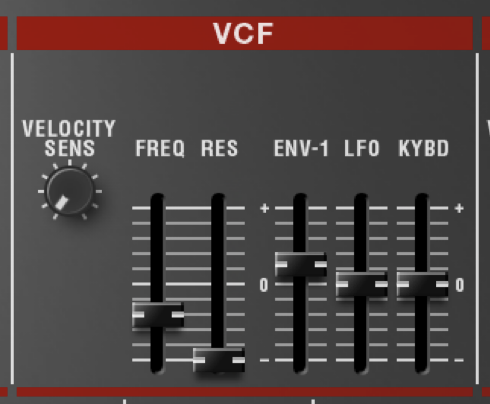
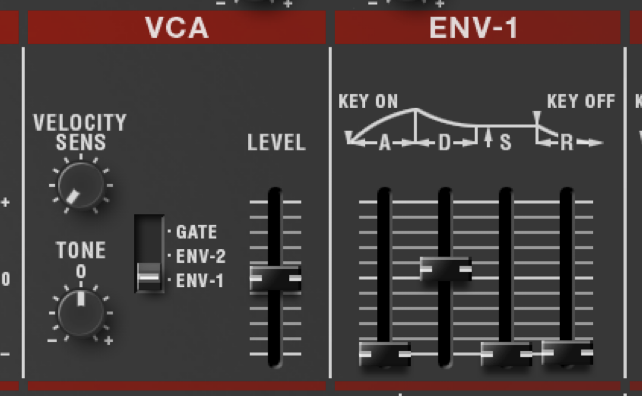
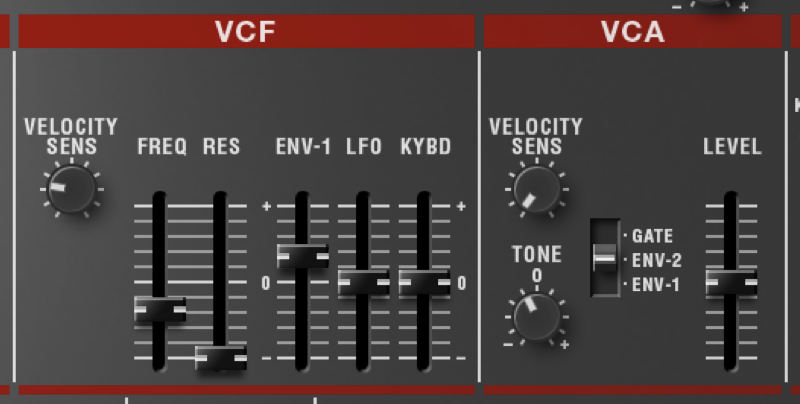
With the DCO configured, we’ll adjust the VCF to mute the bright harmonics. To start, lower the cutoff to around 20%. To add the plucky “snap” to the bass, we’ll use Env-1 to modulate the cutoff. Do this by setting the Env-1 mod value to around 30-50% positive (a parameter value of about 50-60). Higher modulation values will make the sound cut through a mix more, while lower values are great for a chilled-out vibe. Adding a touch of velocity control—around 20-30%—will give the bass more dynamics and let you tailor the groove within your DAW.
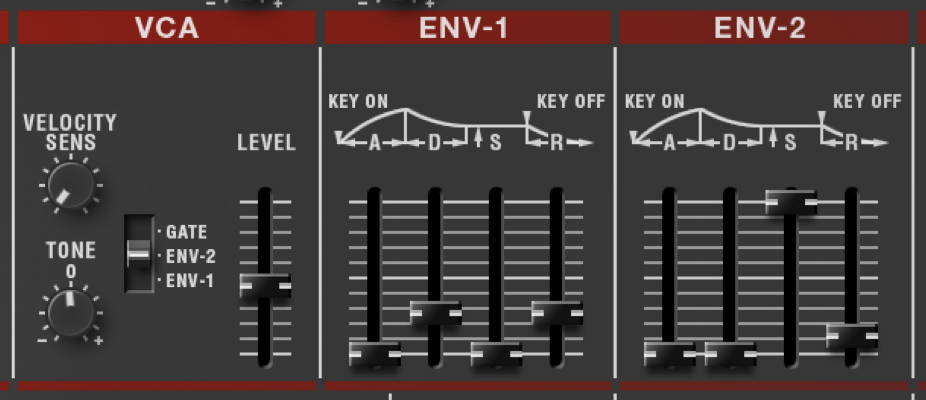
NOTE: While the original JUNOs only had one envelope for both VCF and VCA, the Roland Cloud versions have two. Because of this added flexibility, we’ll configure those envelopes separately.
Step 3
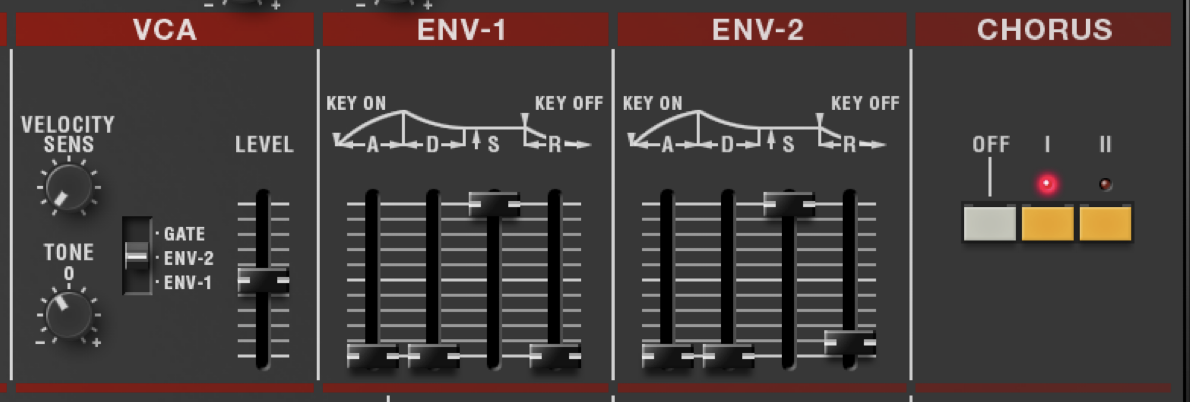
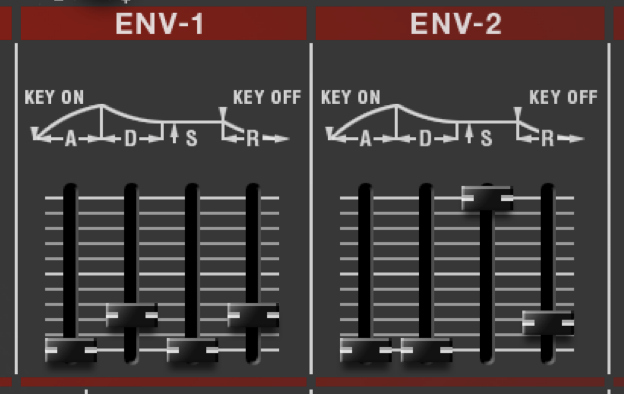
Since we have two envelopes available, Env-1 will control the filter and add the percussive pluck aspect, while Env-2 will control the volume. For the filter, start with the envelope values set to Attack: 0, Decay: 71, Sustain: 0, and Release: 71. These can be customized to taste later. For Env-2, set the Attack/Decay to 0, Sustain to 100%, and add a tiny bit of Release (value 31). In the VCA section, try turning the Tone knob slightly to the right (bass) for more low-frequency emphasis. Velocity amount is optional, based on your goals.
NOTE: By setting the amplifier envelope (Env-2) to maximum sustain, you can hold notes for longer than just the “pluck” amount controlling the filter. This approach adds versatility to using the patch for bass lines. For standard plucks, just set both envelopes to the same values.
Finishing Touches
Some bass presets benefit from chorusing; we’ll cover those later. However, leaving the chorus off will result in no delay-based phase cancellation. This adjustment makes the bass easier to mix and gives it more punch.
Synthwave Bass Sound Sample
Trap
While the go-to for classic trap basses is the 808 (or a sine wave), many more modern takes on this sound include a touch of distortion, overdrive, and processing. That type of saturation processing usually turns the clean sine wave into a more square-like shape, which means that the JUNO is also an excellent choice for these basses.
Step 1
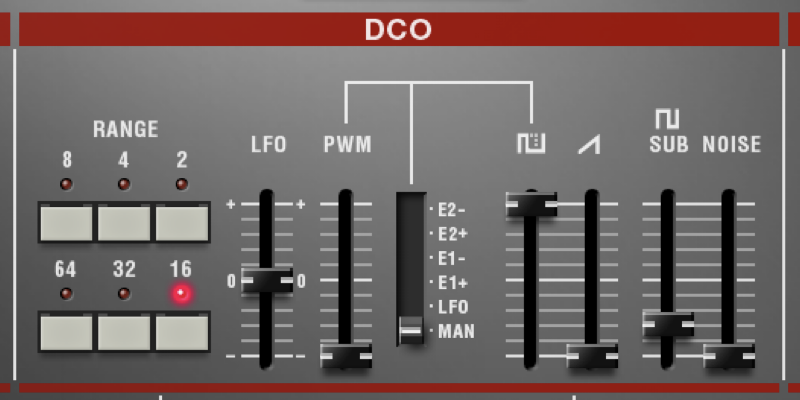
Start with a square wave at full volume, with an octave range of 16 (one octave lower).
Step 2
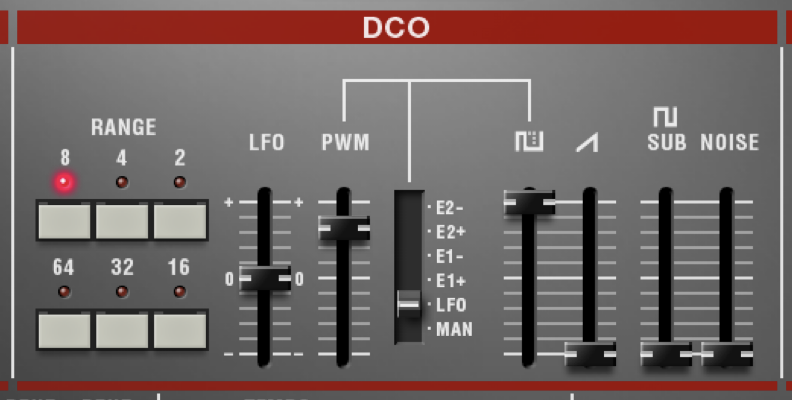
Set the VCF Frequency to a low amount to reduce the harmonics while keeping the waveform slightly square for pseudo-distortion effects. Add a tiny bit of Env-1 modulation to start (value of 35). In the final patch, this modulation parameter will allow you to precisely dial in how much “click” you want on the bass attack.
"Many modern takes on the trap sound include a touch of distortion, overdrive, and processing. JUNO is an excellent choice for these basses."
Step 3
The envelope settings are essential to recreating the 808 vibe. Env-1 has all parameters set to zero, making the Decay function a transient generator. For Env-2, we create a long decay (value 168) and long release (value 120), for more 808 credibility. On the VCA, you can turn the Tone knob slightly to the left to further increase the low end.
Step 4
The final step is crucial for making this patch work properly. Set the Key Assign mode to Mono. One of the most common mistakes in synthesizing trap basses is leaving polyphony on, which—when combined with long release times—creates phase intermodulation as the bass notes overlap. Setting the JUNO to monophonic mode prevents these overlaps, resulting in a much more usable tone.
Finishing Touches
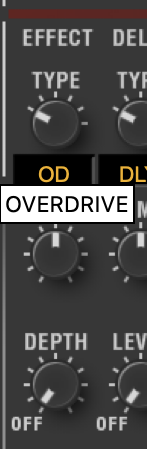
Again, we leave the chorus off. But here, the purpose is to use that effect slot for distortion or overdrive to customize further and enlarge the sound for your tracks. Additionally, setting the condition knob fully “off” will stabilize the sound and tuning for less variation within tracks.
Trap Bass Sound Sample
Acid
While the Roland TB-303 is the leader for acid-style basses, the JUNO is very close sonically—and a bit easier to sequence within your DAW. The secret is in understanding the core characteristics of the sound.
Step 1
Start with a square wave at full volume, with an octave range of 8. While the 303 includes both saw and square waves, the square is a bit more iconic and familiar for many.
Step 2
Set the VCF Frequency to a very low amount (value 23) and increase the Resonance almost to the maximum (value 204). From there, set the Env-1 to a fairly high positive depth for the classic 303 resonant sweep.
"You can create the popular 'Robot Vowel Bass' sound by starting with the above acid bass preset and switching Effect 1 to bit-crusher mode."
Step 3
To make the sound more legit, it’s essential to remember that the original 303 has only one envelope for both filter and amp, so we’ll set the VCA to use the same Env-1 that the VCF uses for modulation. To further emulate the decay-only envelope of the 303, set the Attack and Sustain to 0, with a touch of Release (value 5). At this point, the Decay slider will do all the work for the amp and filter, just like the original.
Step 4
The final critical parameters are setting the Key Assign to Mono and then setting the Portamento to around 20%—with the Legato switch on—to begin. With these parameters in place, you can recreate those trademark 303 slides by adding overlapping notes to your DAW’s 106/303 sequences. The Legato function ensures that only overlapping notes will glide, while staccato notes will be individually articulated.
Finishing Touches
The critical parameters for performing the sound from the front panel are Env-1 Decay, VCF Frequency/Resonance, and Portamento speed. For a dirty acid sound, use Effect 1 as a Distortion or Overdrive and Effect 2 for a touch of synced delay.
Acid Bass Pro Tip: Robot Vowel Bass
You can create the popular “Robot Vowel Bass” sound by starting with the above acid bass preset and switching Effect 1 to bit-crusher mode. The key parameters here are: Resonance, Decay, and depth of the Crush effect.
Acid Bass Sound Sample
Original Reese
The term “Reese Bass” has numerous different meanings, with many producers using digital soft synths and wavetables to create this sound. For purists, Kevin Saunderson initially designed and popularized by the Reese Bass on his track “Just Want Another Chance.” Then, in the early ’90s, the Reese Bass became a mainstay of the drum and bass movement. For these more classic Reese Basses, the JUNO does a great job of keeping the feel of the originals.
Step 1
The key to creating an analog Reese is to start with pulse-width modulation, so we’ll set the JUNO’s pulse/square level to maximum and then set the PWM source to LFO. Next, increase the PWM amount to a value above 200.
Step 2
With the pulse-width modulation depth set to a high value, it’s time to start playing with the LFO. Here you’ll want the LFO to begin immediately with a delay time of 0. The more important factor is to turn on tempo sync for the JUNO. This will ensure that the modulation tracks your song’s tempo—and can be automated in your DAW for different note values. Once you complete Steps 1 and 2, experiment with the LFO rate.
"For classic Reese Basses, the JUNO does a great job of keeping the feel of the originals."
Step 3
It’s worth considering that the Saunderson and drum and bass Reese Basses were heavily filtered and played low on the keyboard. For this patch, we’ll lower the VCF Frequency to around 130 and leave all the other filter parameters untouched.
Step 4
Since the classic ’90s Reeses were played as drones, Env-2 (the amplifier envelope default) should have zero Attack and Decay, with Sustain set to 100%. Adding a touch of Release time will prevent clicking on MIDI note-offs. While the sound works dry, the JUNO chorus adds more motion and depth to the sound.
Reese Bass Sound Sample
Tech House
House, tech house, and melodic techno use a massive range of bass sounds. Still, many classic and modern tracks use an analog bass that’s a variation on the above synthwave bass but with a slightly different configuration that yields a hollow, percussive sound.
Step 1
For this patch, the DCO is configured as a single square wave at maximum volume, with the octave Range set to 16. Adding a touch of sub-oscillator (value 54) can also be effective for adding lows, so experiment with that when designing your own version.
Step 2
Dialing in the VCF parameters can be pretty specific. If the sound is too open or bright, it has more of a pluck/arp vibe. Here, set the Freq to around 80 and Env-1 to 45. These two parameters interact heavily, so if you experiment with one, you’ll want to adjust the other. Also, note that a touch of filter velocity control can enhance the dynamics of the sound.
"Many classic and modern tracks use an analog bass that’s a variation on synthwave bass, but with a configuration that yields a hollow,
percussive sound."
Step 3
Since Env-1 modulates the VCF, set this to a tight pluck with an Attack and Sustain of 0 and the Decay/Release set identically around 60. For Env-2, set the Attack and Decay to 0, with the Sustain at 100% and no velocity. This setting keeps the volume consistent and reduces the need for heavy compression. A touch of Release (48) will eliminate any clicks.
Step 4
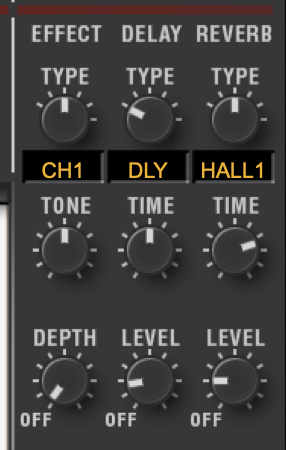
Quite a few tech house tracks include a slight touch of delay and reverb on this type of bass. To get this effect, select delay and set the Level to around 6. To keep things rhythmically tight, turn on tempo sync and set the time to 1/8D.
Tech Bass Sound Sample
Making Them Your Own
Once you’ve spent time developing the above patches on your rig, you’ll find new parameter tweaks to make these sounds yours. The above patches in this tutorial are also available as part of a downloadable bank for the Roland Cloud JUNO-106. In addition, these techniques apply to the JU-06 and JU-06A in the Roland Boutique series. Use them as the starting point for your production journey.
Download
JUNO Bass Patches
Try out the patches from this article with the Roland Cloud JUNO-106. They will also work in the SYSTEM-8 when the JUNO-106 PLUG-OUT is loaded.


