
The RE-201 Space Echo tape delay is a towering presence in the history of music production. Beloved for its durability, sound quality, and ability to quickly take things into the deepest reaches of the sonic galaxy, it’s just as home in a modern studio setting as it is on stage. Learn how to get the most out of the Roland Cloud version, which expands on the original’s already versatile feature set with a clutch of advanced parameters.
Space is the Place
Roland released a number of Space Echo tape delay units throughout the 1970s. The most popular—and still best known—is the RE-201. Remaining in production until 1990, it became the trademark sound for various artists, from reggae producer Lee “Scratch” Perry, who pushed it to the limits in his dub explorations, to Radiohead and Portishead.
The Space Echo sounds great on anything you throw at it, from guitar to drums. And thanks to its gorgeous preamps, it’s even a secret sauce for engineers looking to liven up vocal recordings. Curious about how to get the most out of the RE-201? That’s what we’re here to find out.
Roland Cloud RE-201 Space Echo Overview
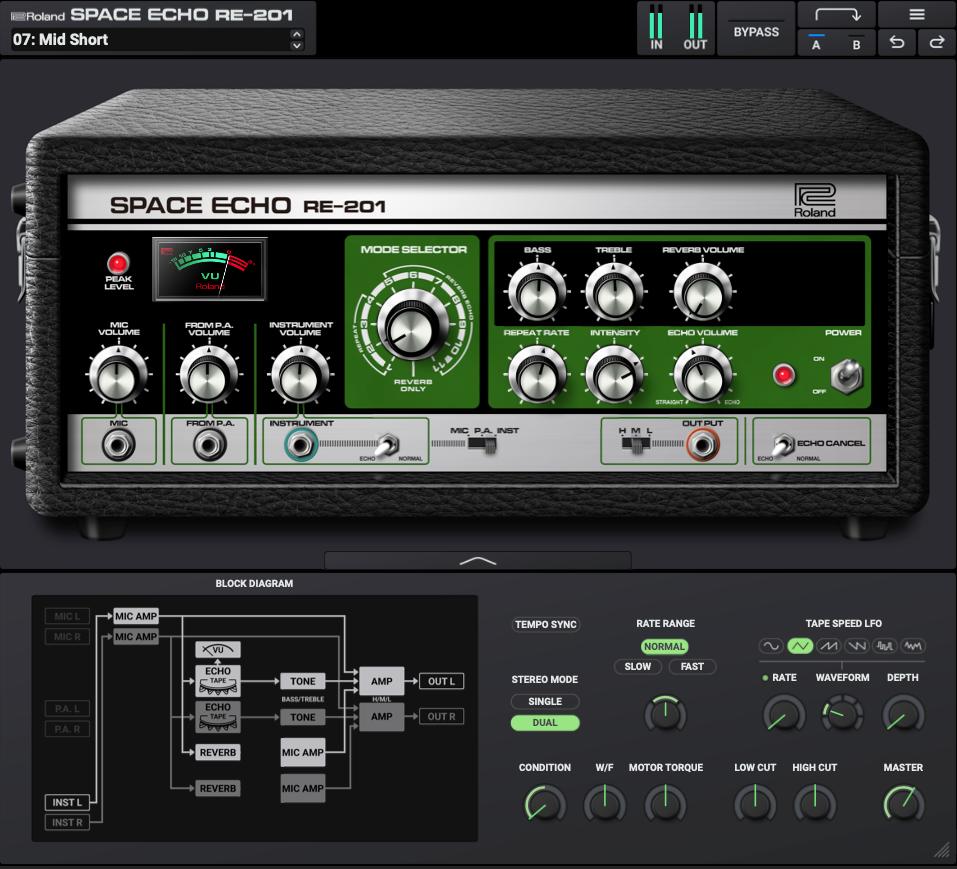
It will be helpful to understand the layout of the Roland Cloud RE-201 before proceeding, as the purpose of some parameters might not be immediately apparent.
The basic panel, as the traditional front of the unit is called, features a number of dials. Use the Instrument channel for general-purpose sounds, Mic when you want to boost a signal (careful, it’s hot), and From P.A. when you want to cut the dry signal altogether as on the send channel.
The knob that may be most confusing, however, is the large, central Mode Selector. The RE-201 has three playback heads plus a spring reverb; you can engage them individually or in various combinations by choosing the appropriate number on the dial. The selected playback head’s distance from the record head will play a factor in the speed of the delay, as will the Repeat Rate knob.
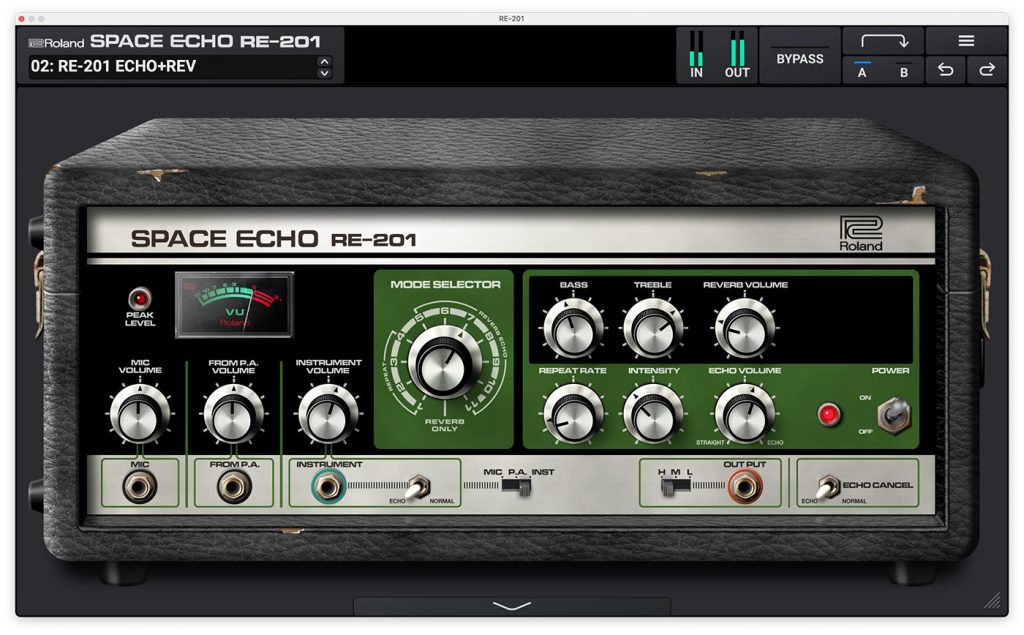
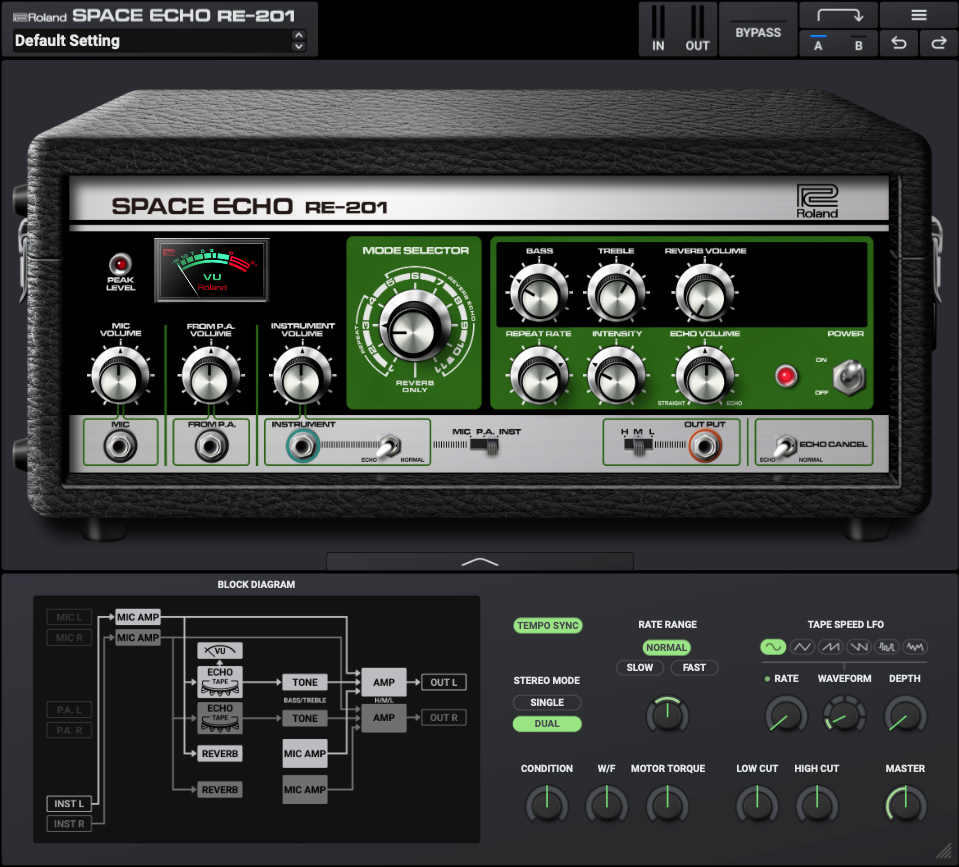
The Roland Cloud plug-in adds an expanded panel, which you access by clicking the downward-facing triangle at the bottom center of the basic panel. This reveals several parameters exclusive to the software, including tempo sync, a stereo mode, tape speed LFO and overall condition, and additional functionality. We’ll address these as needed throughout.
NOTE: Unless otherwise indicated, all these tips have the plug-in as an insert effect on the track itself.
Syncopated Repeats
One trick dub producers like Lee “Scratch” Perry liked to use was running the drums through an RE-201 and creating syncopated repeats. This approach works especially well on hi-hats, but you can use it across the entire drum bus. A side benefit to this is the saturation that the preamps impart.
Start by opening the Advanced panel and selecting Tempo Sync to ensure the repeats stay in time with the DAW’s tempo. Next, choose Repeat Mode 3 and dial an appropriate Repeat Rate, like 1/8. Next, fine-tune the Intensity until you get a good balance of echoes without overwhelming the original track. Adjust the Echo Volume to taste. Choose the Dual mode from the Advanced panel to push the echoes out into the stereo spectrum for a full and rich stereo effect. Finally, tweak the Bass and Treble knobs to reduce the amount of kick in the affected signal and boost the hi-hats and snare tops.
Here’s what that sounds like, first dry and then with the RE-201 adding its magic:
Syncopated Repeats Sound Example
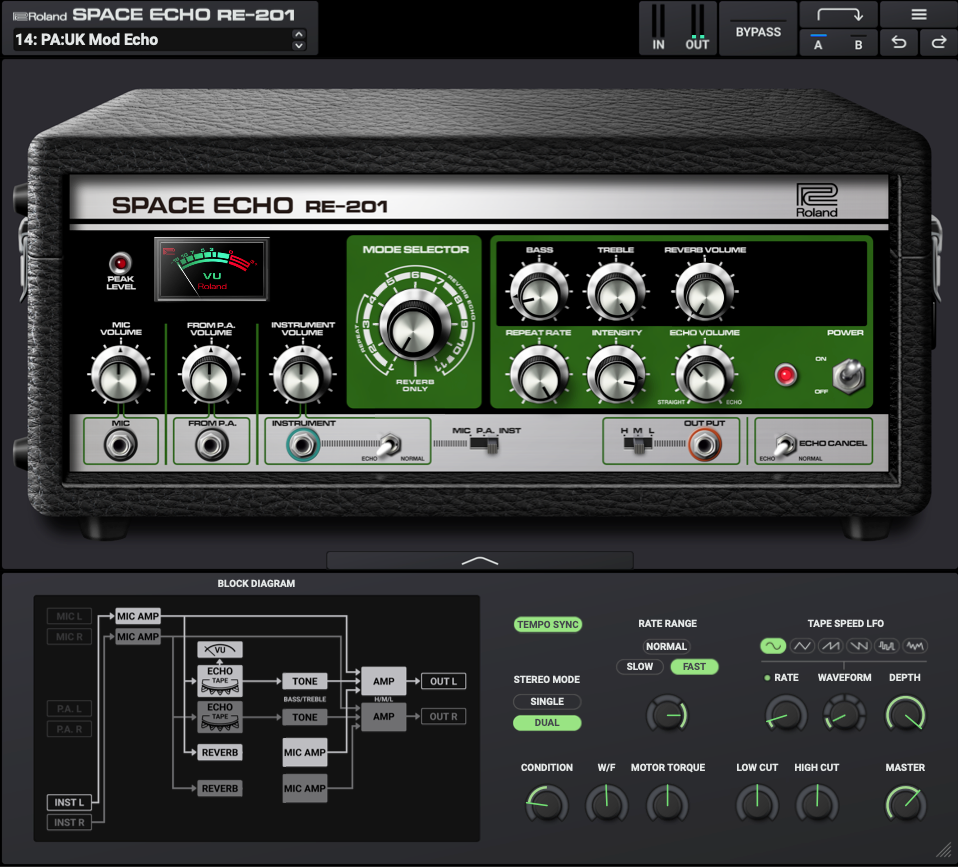
Dub Echoes
Next, let’s recreate a classic dub snare effect. Again, open the Advanced panel and select tempo Sync, then a Repeat Rate of 1/16D, or dotted sixteenth notes, a standard dub echo note time. Go with Mode 6 (playhead 3 plus reverb), which will give us the exact note time plus the added benefit of spring reverb. Go ahead and increase the Reverb Volume to about 3 o’clock. Next, bring up the Intensity until you hear it start to self-oscillate. Don’t push it too hard, or you’ll fry your ears. (You may want to place a limiter on the channel after the RE-201 plug-in, just in case.)
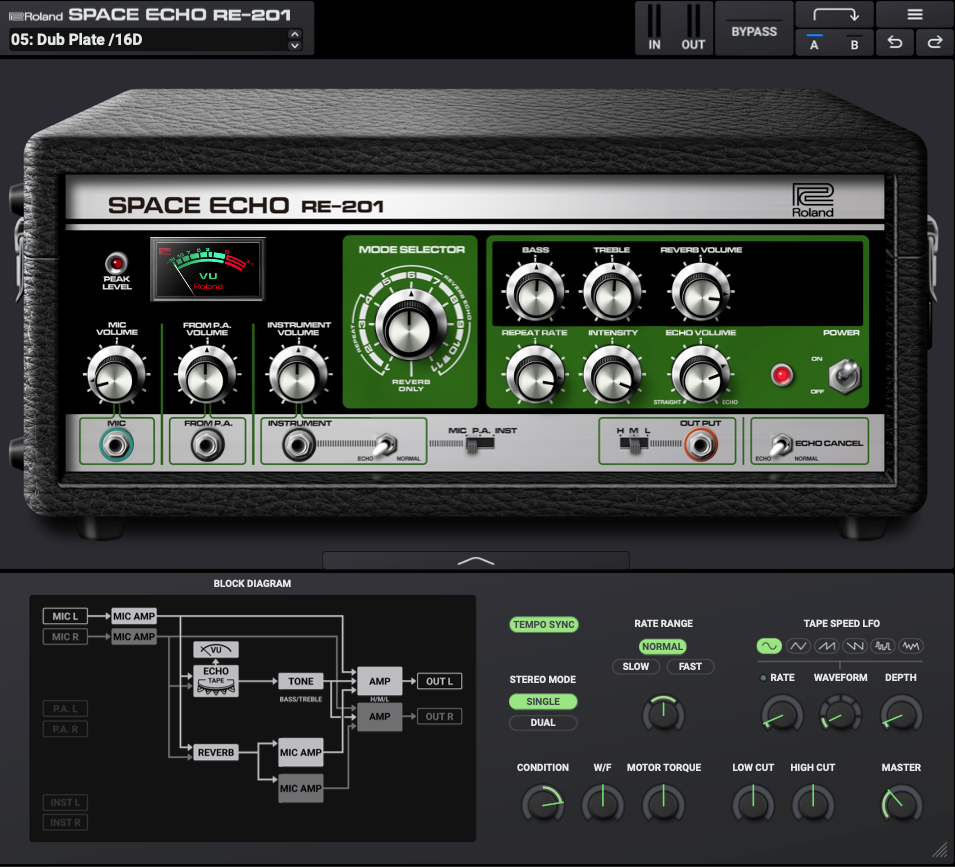
Next, let’s dial in some slow tape wobble in the Advanced panel. In the Tape Speed LFO section, choose a sine wave LFO for smooth changes, a slow Rate, and a reasonably low depth. Now the pitch of the delay tails will slowly rise and fall. Lastly, turn the Condition knob to the right to give the whole effect a grungy sound. If you find the tails are continuing too long, use automation to reduce intensity over time. For a dirtier sound, use the Mic input and drive the signal going in.
Dub Echoes Sound Example
Analog or Digital Delay
As technology progressed, tape echoes were largely supplanted first by analog delays and then digital ones. Roland Cloud RE-201 can do a pretty mean approximation of either. The trick is to set up a clean delay and then play with the Condition knob, fully clockwise for a dark, analog-style delay and fully counterclockwise for a bright, digital one.
This Roland Cloud TB-303 acid line is being processed by the RE-201 as an analog delay first and then a digital one:
Analog or Digital Delay Sound Example
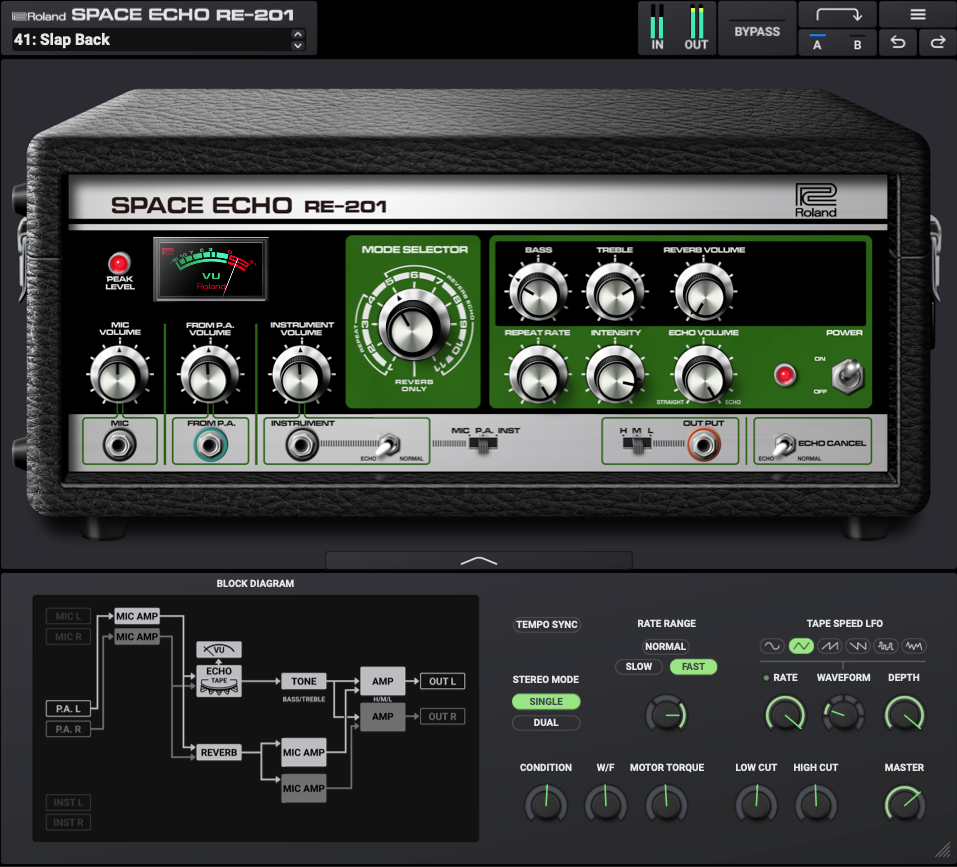
Tight Pitch Delays
You might not expect it, but Roland Cloud RE-201 can do some wild, tight pitch delays. We want to dial in fast repeats that follow the tempo, so engage Tempo Sync, then Repeat Mode 1 for the closest (fastest) tape head and a Repeat Rate of 1/32. Next, down below, change the Rate Range to Fast. Now we’re cooking. For wobbly pitch delays, choose a tape Speed LFO Rate of something like 2/1T (triplet) and crank up the Depth knob. Lastly, rotate the condition knob counter-clockwise for a bright, digital-style sheen. You should now hear tight delays with tails that rise and fall. Adjust Intensity as appropriate to your track.
This works well on short, percussive material like staccato chords and snares. For an even brighter and more modern vibe, lower the Bass and increase the Treble tone knobs. Here are bright pitch delays on piano chords:
Tight Pitch Delays Sound Example
Dalek Voice
The last tip is a unique vocal effect in the style of the Daleks from Doctor Who. The BBC Radiophonic Workshop used a sine wave and ring modulator to create the terrifying voice of the Doctor’s mutant enemies. Still, we can approximate it with a very fast delay and LFO modulation.
Start with the settings from Tight Pitch Delays tip above, but this time, set it to Single Stereo Mode and turn Tempo Sync off. Now, we can get even faster repeats. You should hear a metallic ringing from the fast delays. Now, the LFO. Set the LFO Waveform to triangle for a wavy feel. Next, crank both the Rate and Depth knobs right up to the max.
For a more intelligible result, put the RE-201 plug-in on a send channel, set it to From P.A. input mode, and turn the echo volume all the way up. Now dial in the send amount to balance the original voice and the effect. Try changing the Repeat Mode to one with more play heads, such as setting 4, for an even denser effect. Exterminate!
Here’s the Dalek voice in action, first just the original voice and then with Repeat Mode 4 selected: