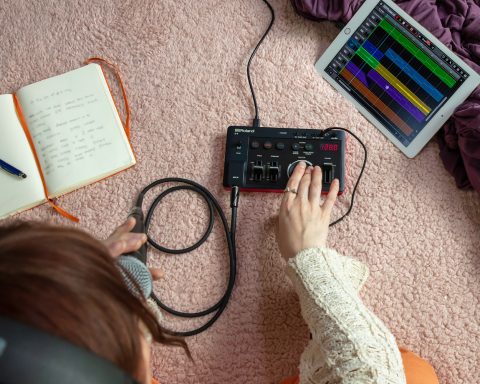
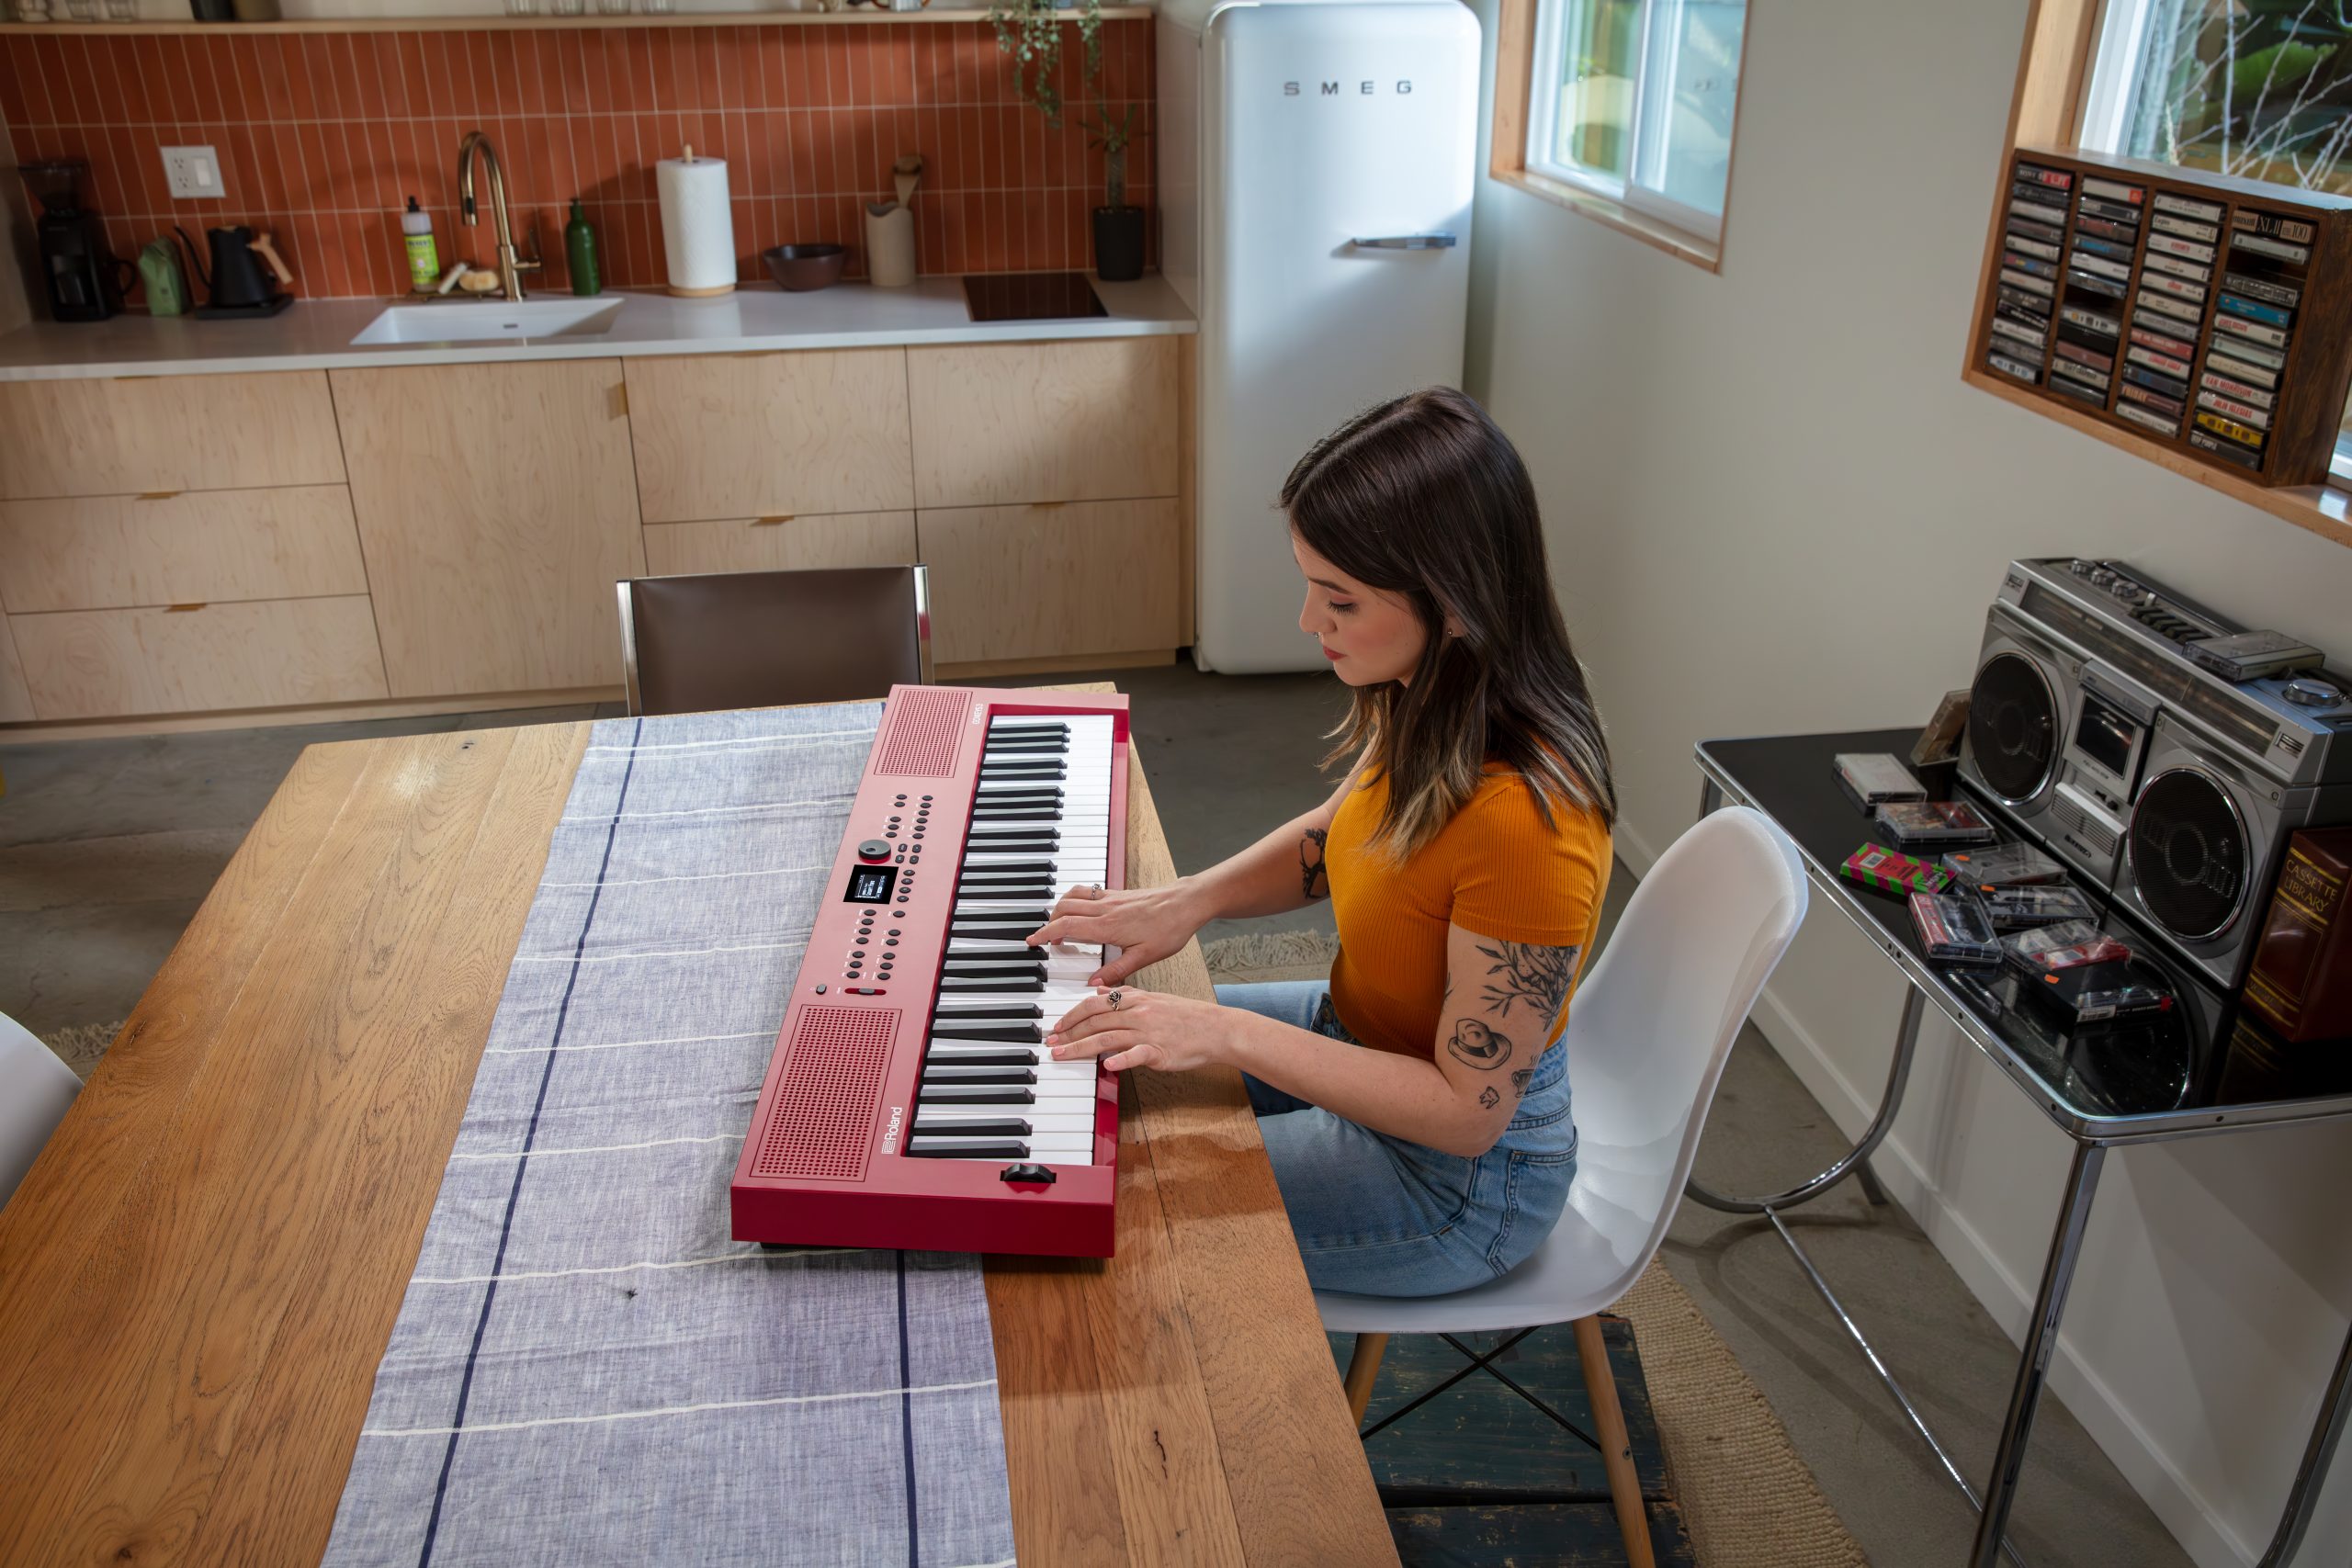
Making the jump from music lover to music creator is a bold endeavor. It’s a choice that can open up new worlds of creativity and enjoyment, but the first step can often be a bit daunting. A GO:KEYS keyboard makes the transition seamless, allowing you to explore your favorite genres using a single powerful, self-contained musical instrument. From pop to hip-hop and all points in between, unlock your inner musician with the GoGo series of step-by-step guides.
Creating an R&B Song
For many musicians, the greatest challenge is being brave enough to venture out of their comfort zone. Most songwriters begin by forming melodic and lyrical ideas over simple chord progressions. As they develop and gain experience, their compositions may grow more complex, adding harmony and other elements. In addition, experimenting with various genres, tempos, and textures can push creative boundaries.
One of the best ways to expand musical horizons is by adding a melodic topline to an inspiring beat. Luckily, GO:KEYS 5 is chock-full of these kinds of grooves. Explore how to create an R&B song using the powerful instrument.
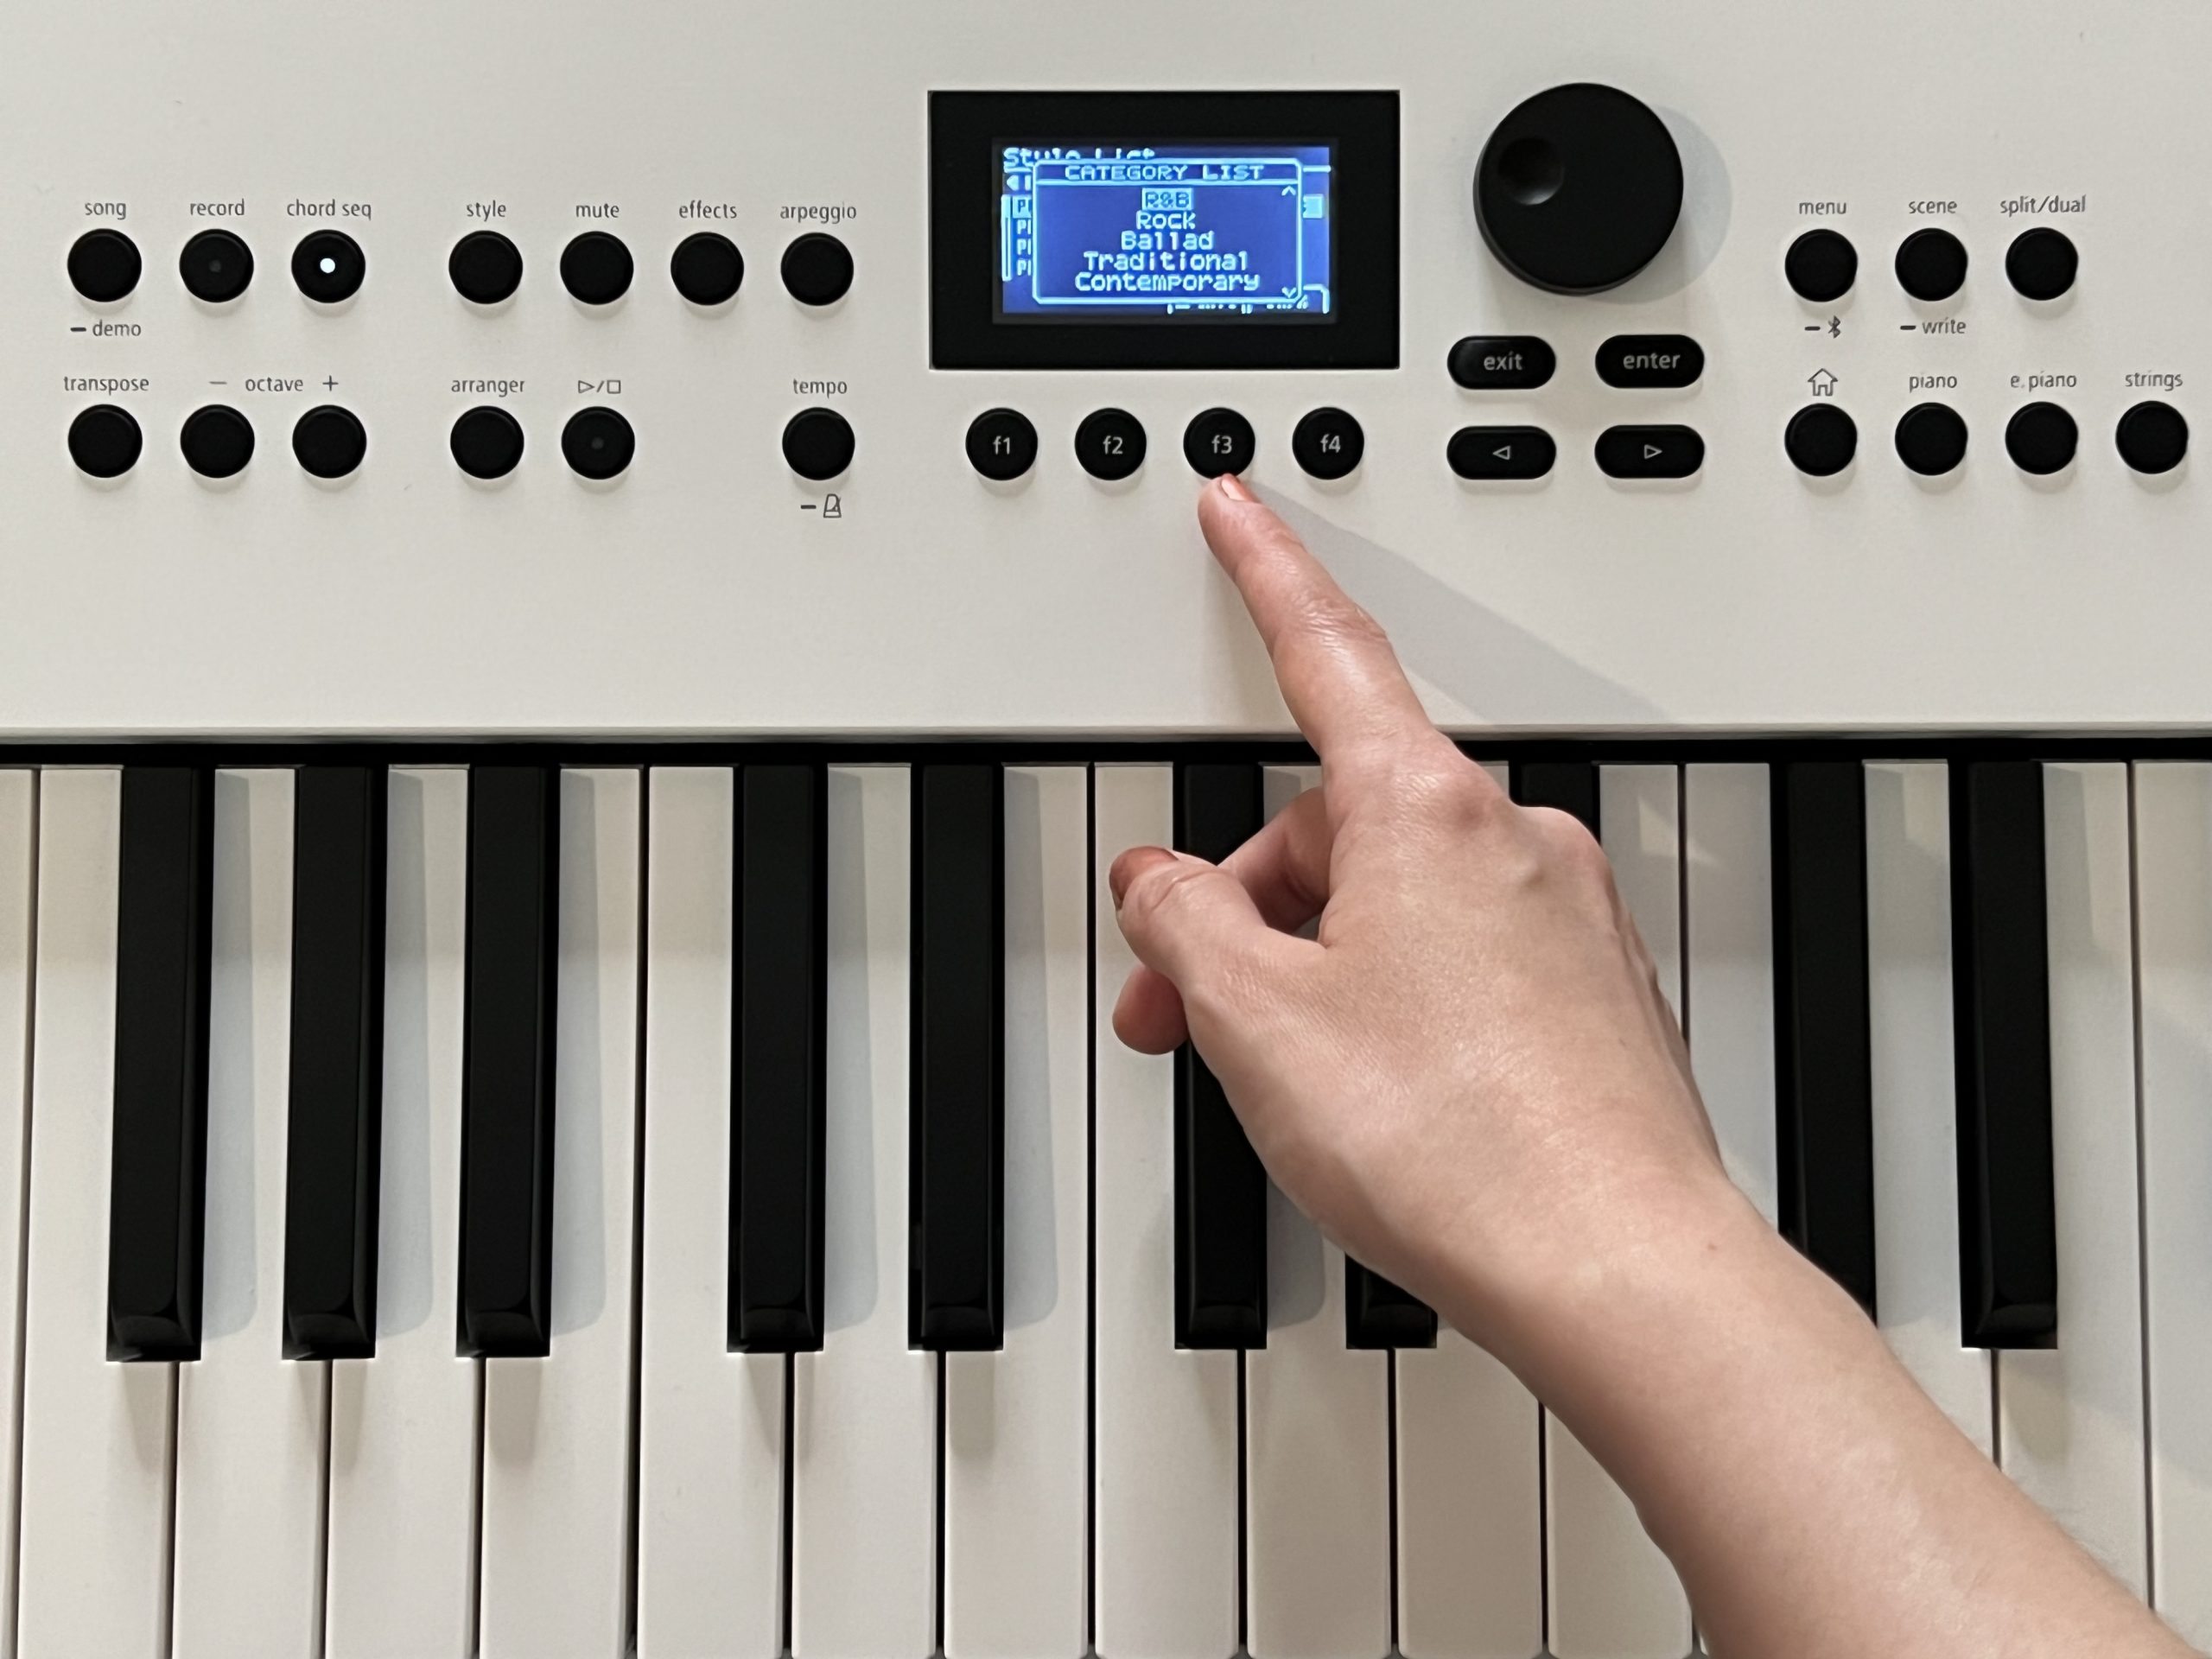
Step 1: Choose an Arranger Style
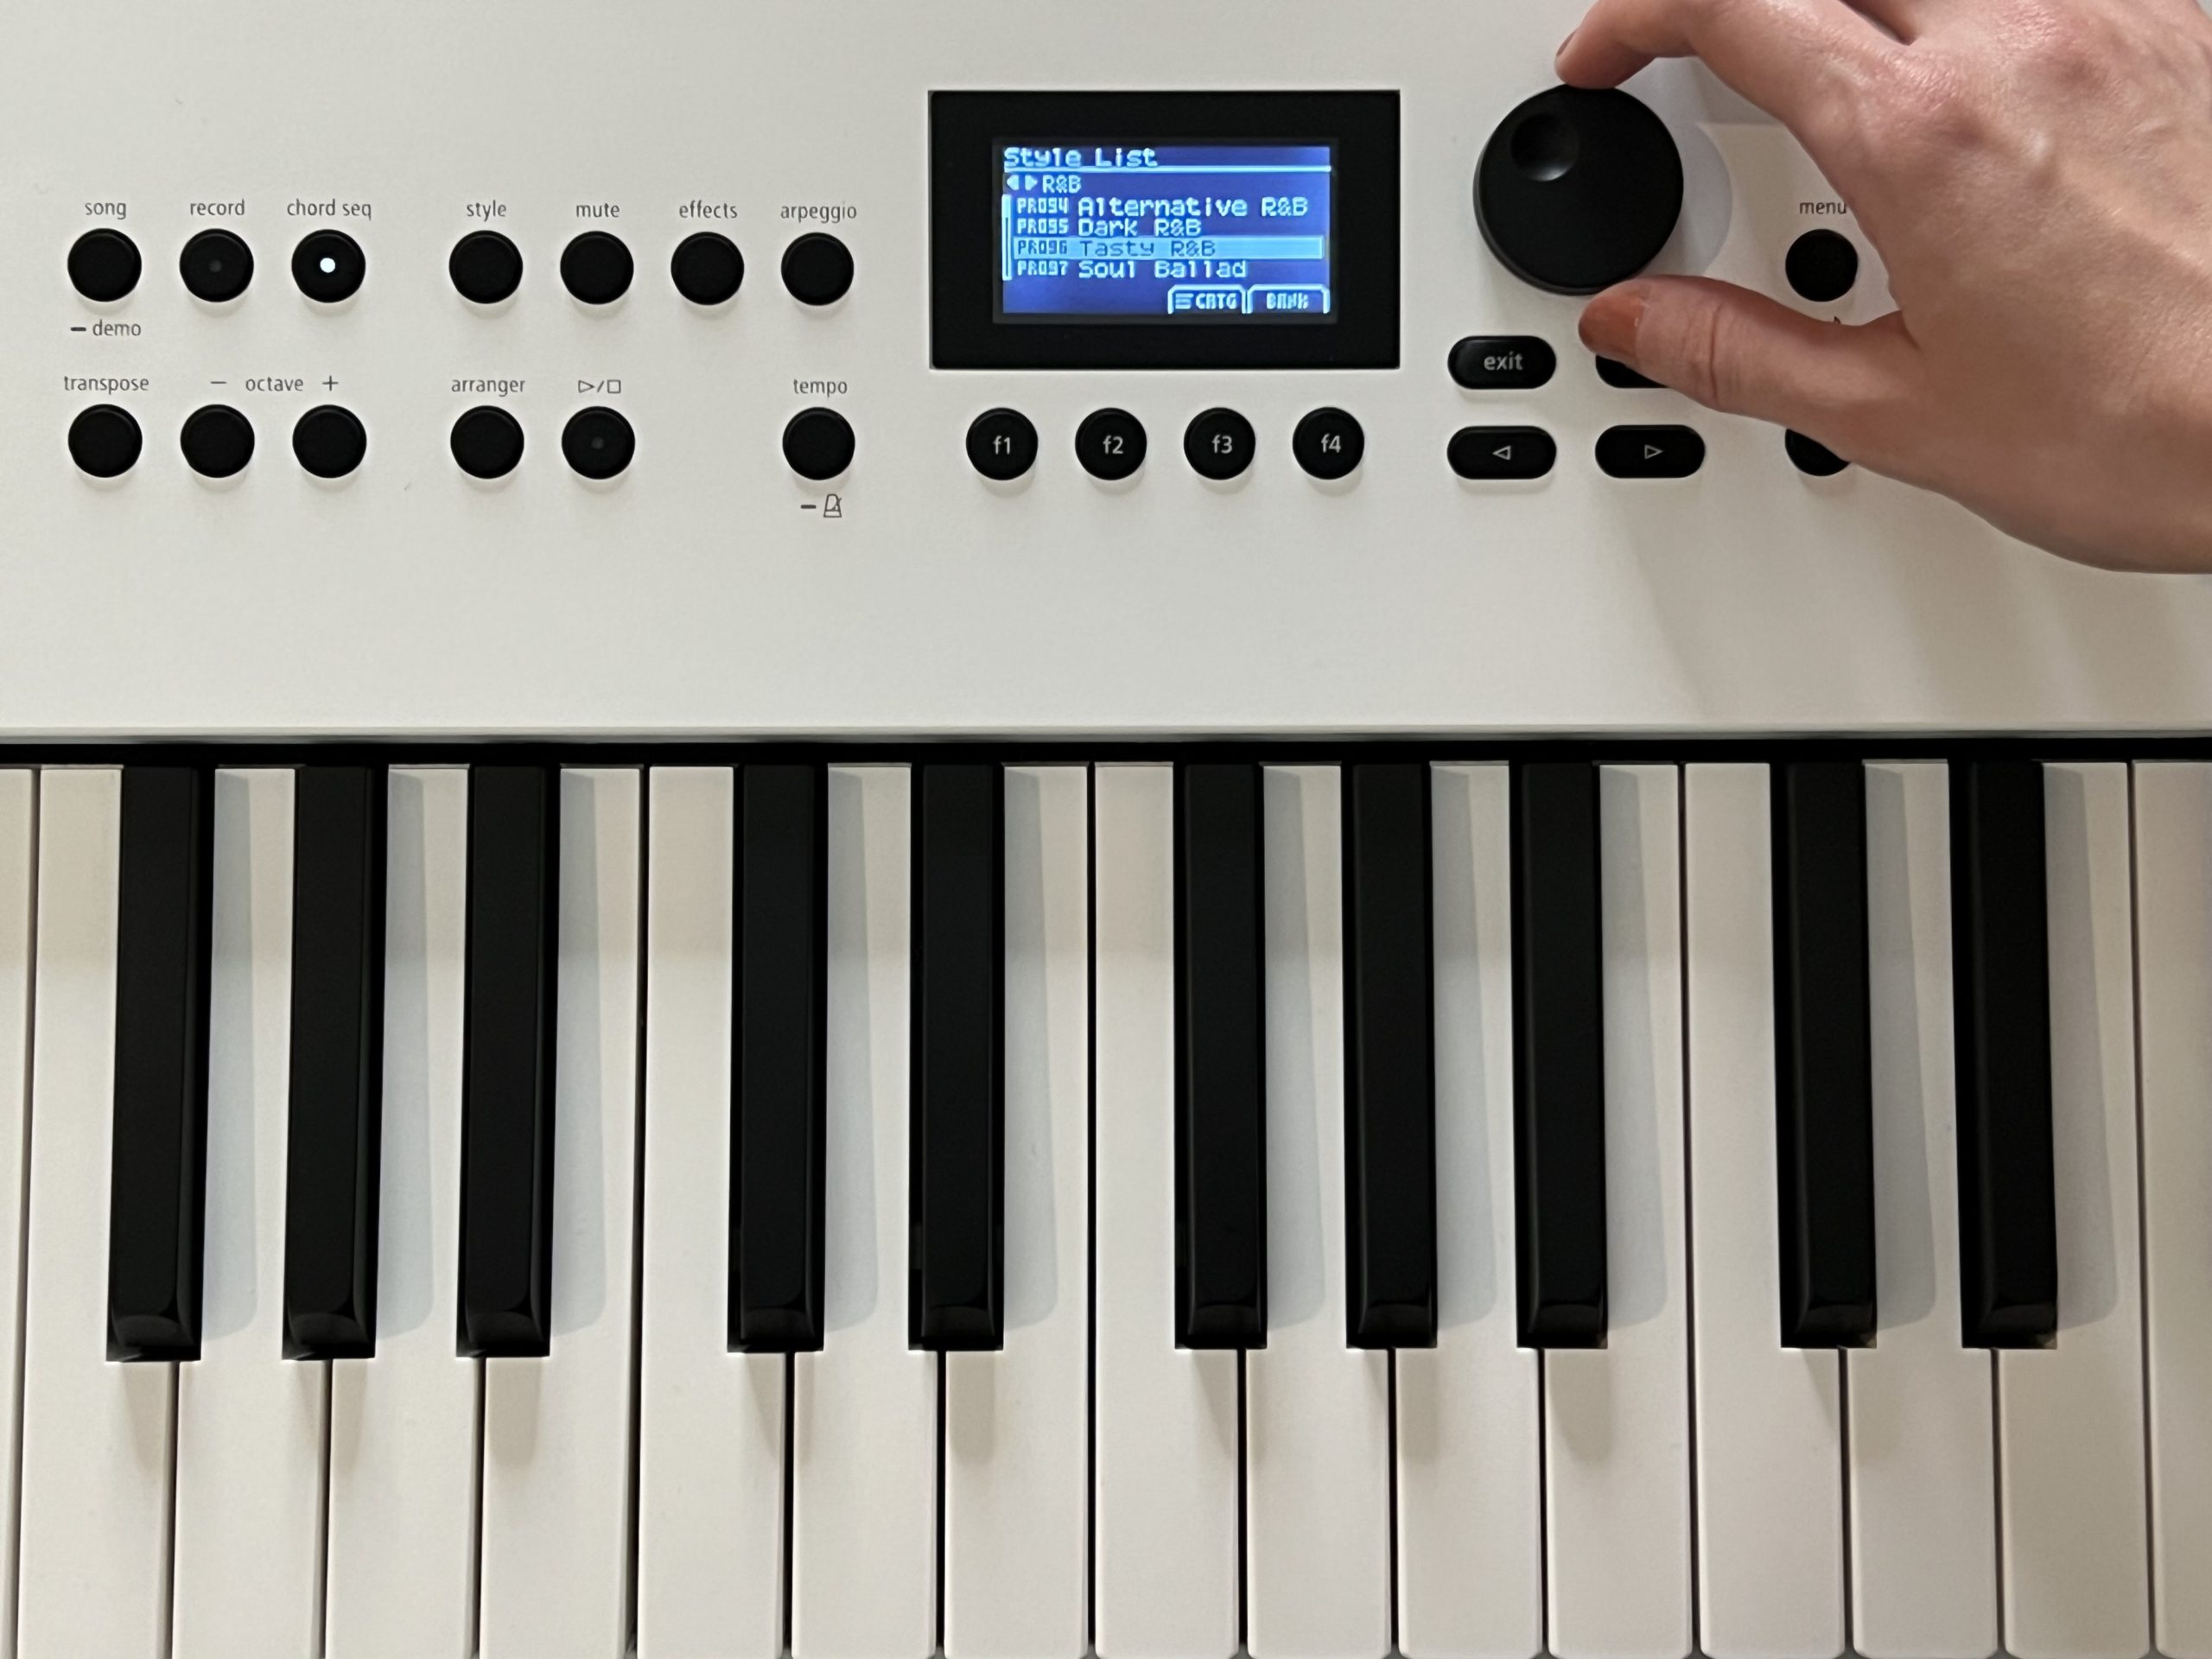
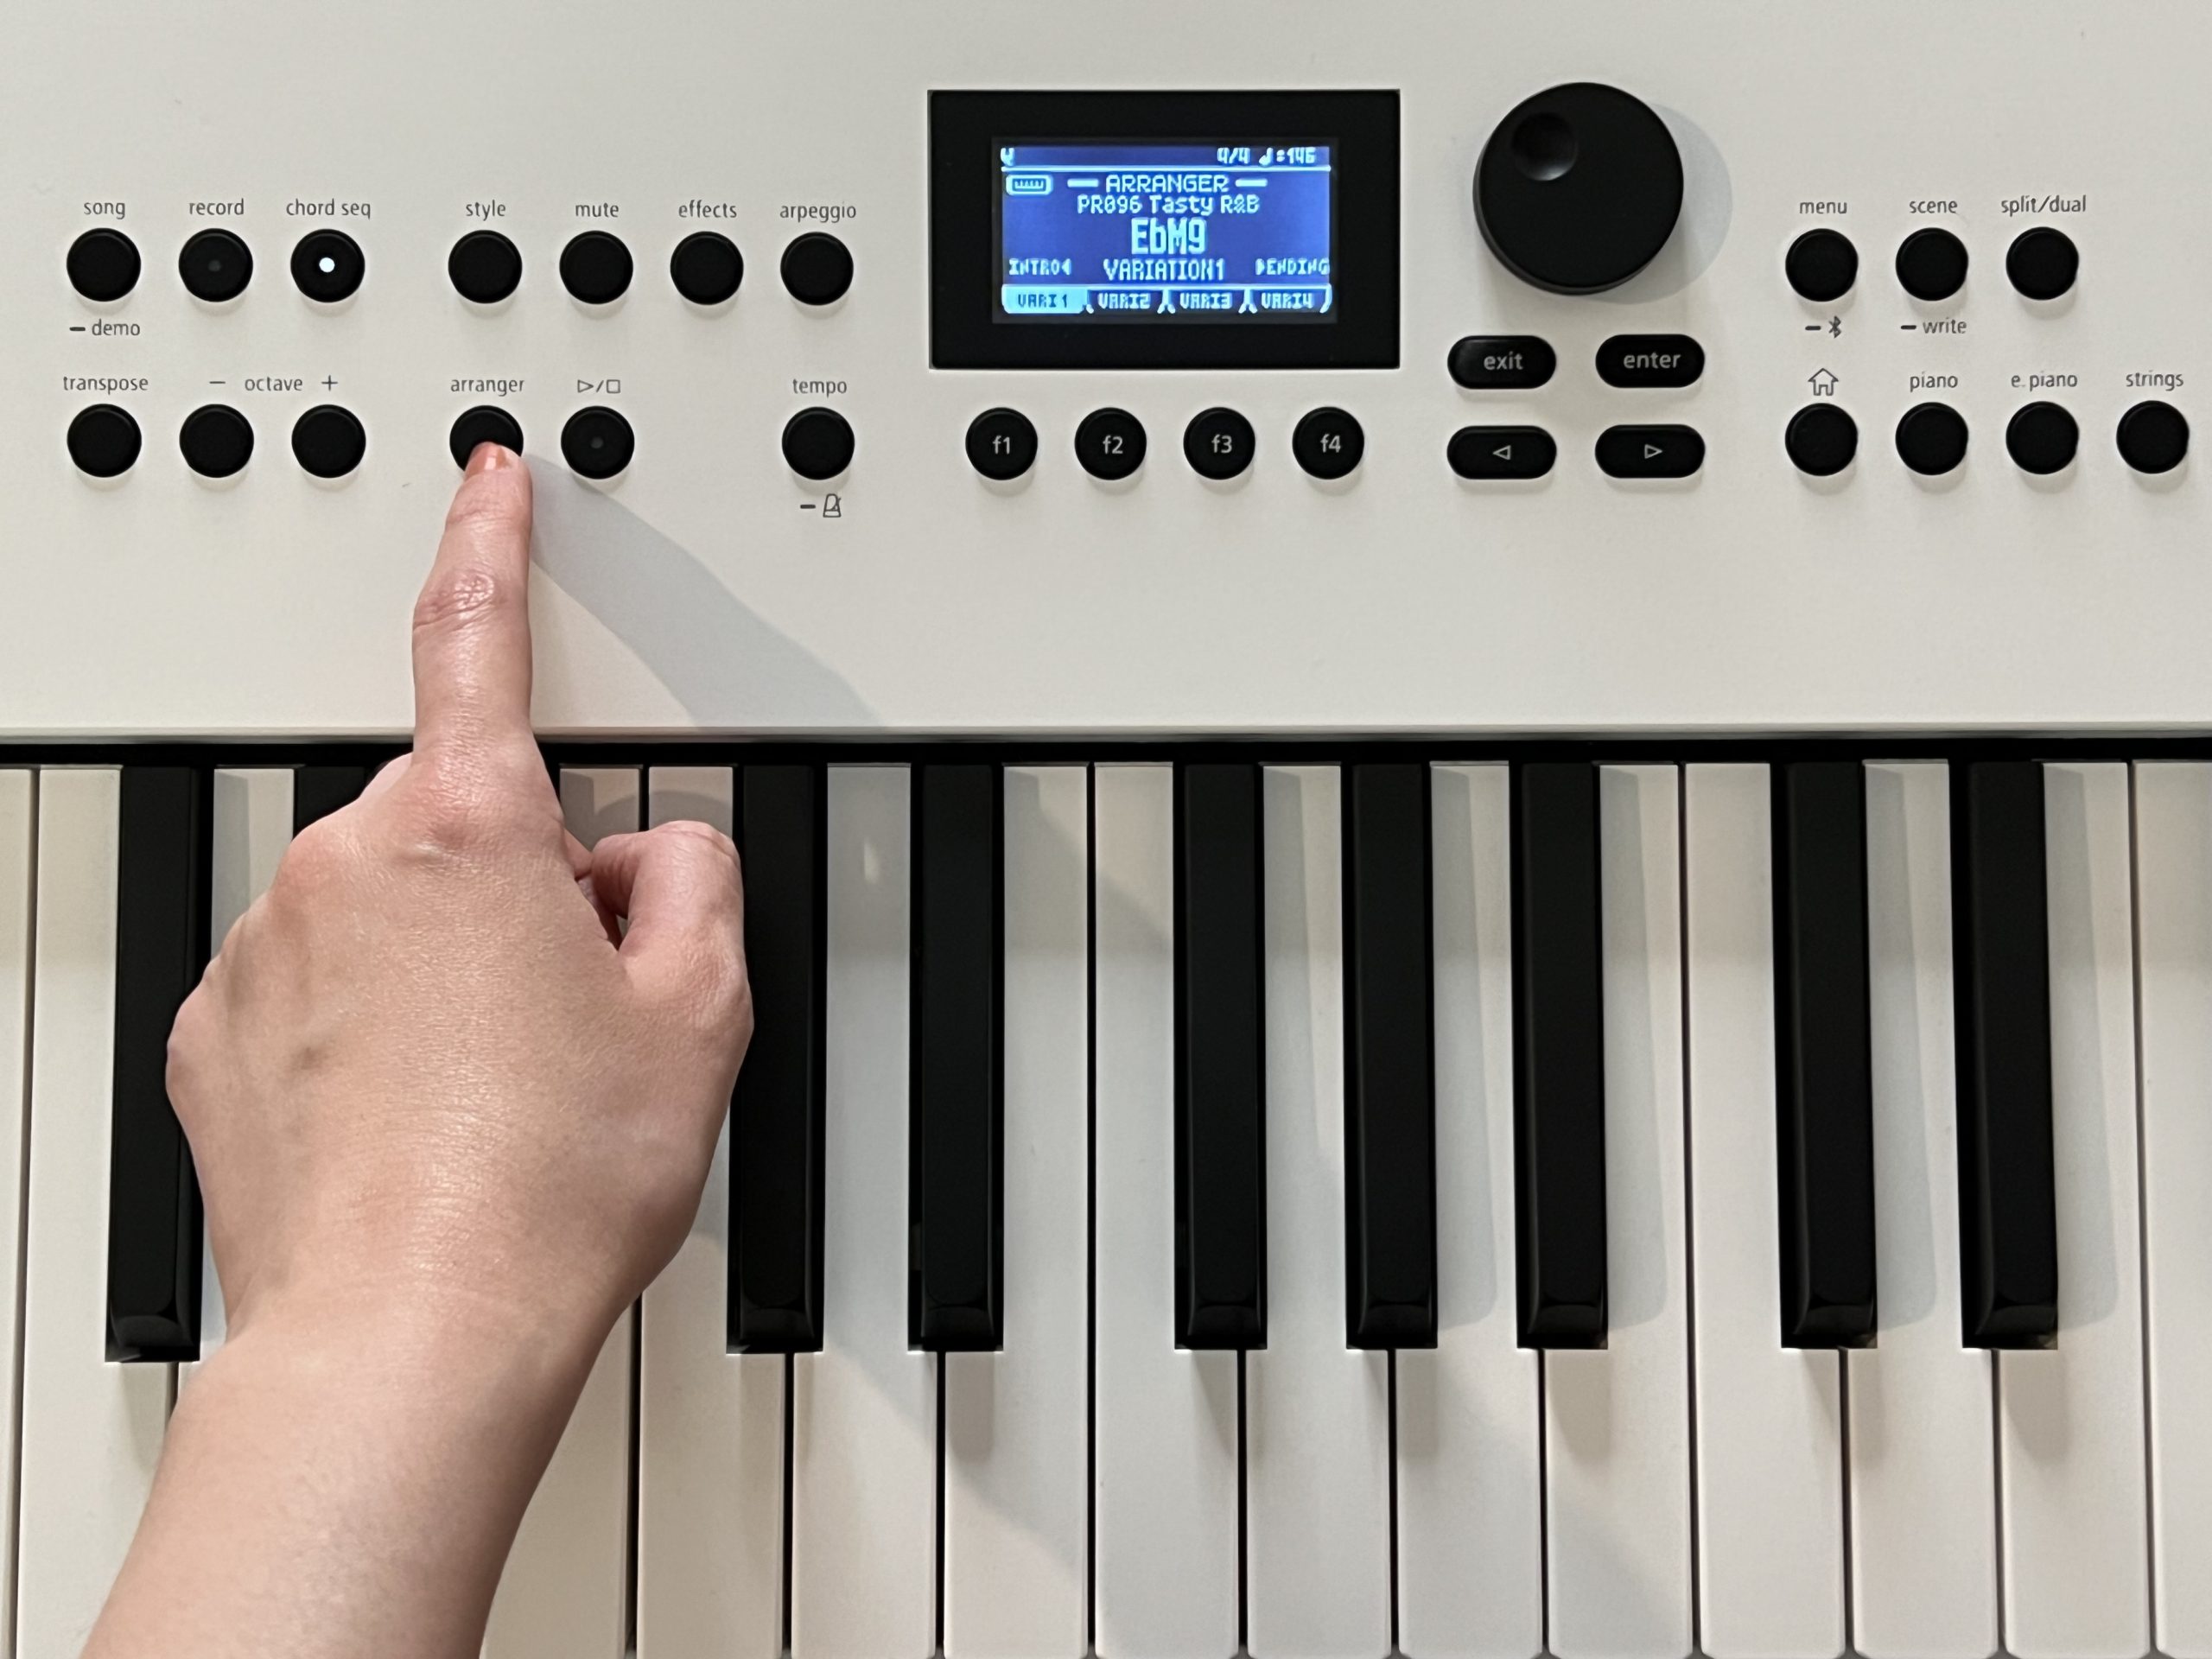
Under the Style tab, you’ll find an entire category dedicated to R&B. Push the F3 button to view the Style List and narrow down your options. For me, the PR096 Tasty R&B preset was the one. I pressed Enter to select it and hit the Arranger button to view its variations.
Step 2: Choose a Variation
Pushing the function buttons one by one and listening to the playback, I tested each of the four beat variations. In the end, I settled on Variation 1 as my starting point. The tempo and groove felt right, but I wanted to revise the harmony.
Step 3: Choose a Chord Pattern
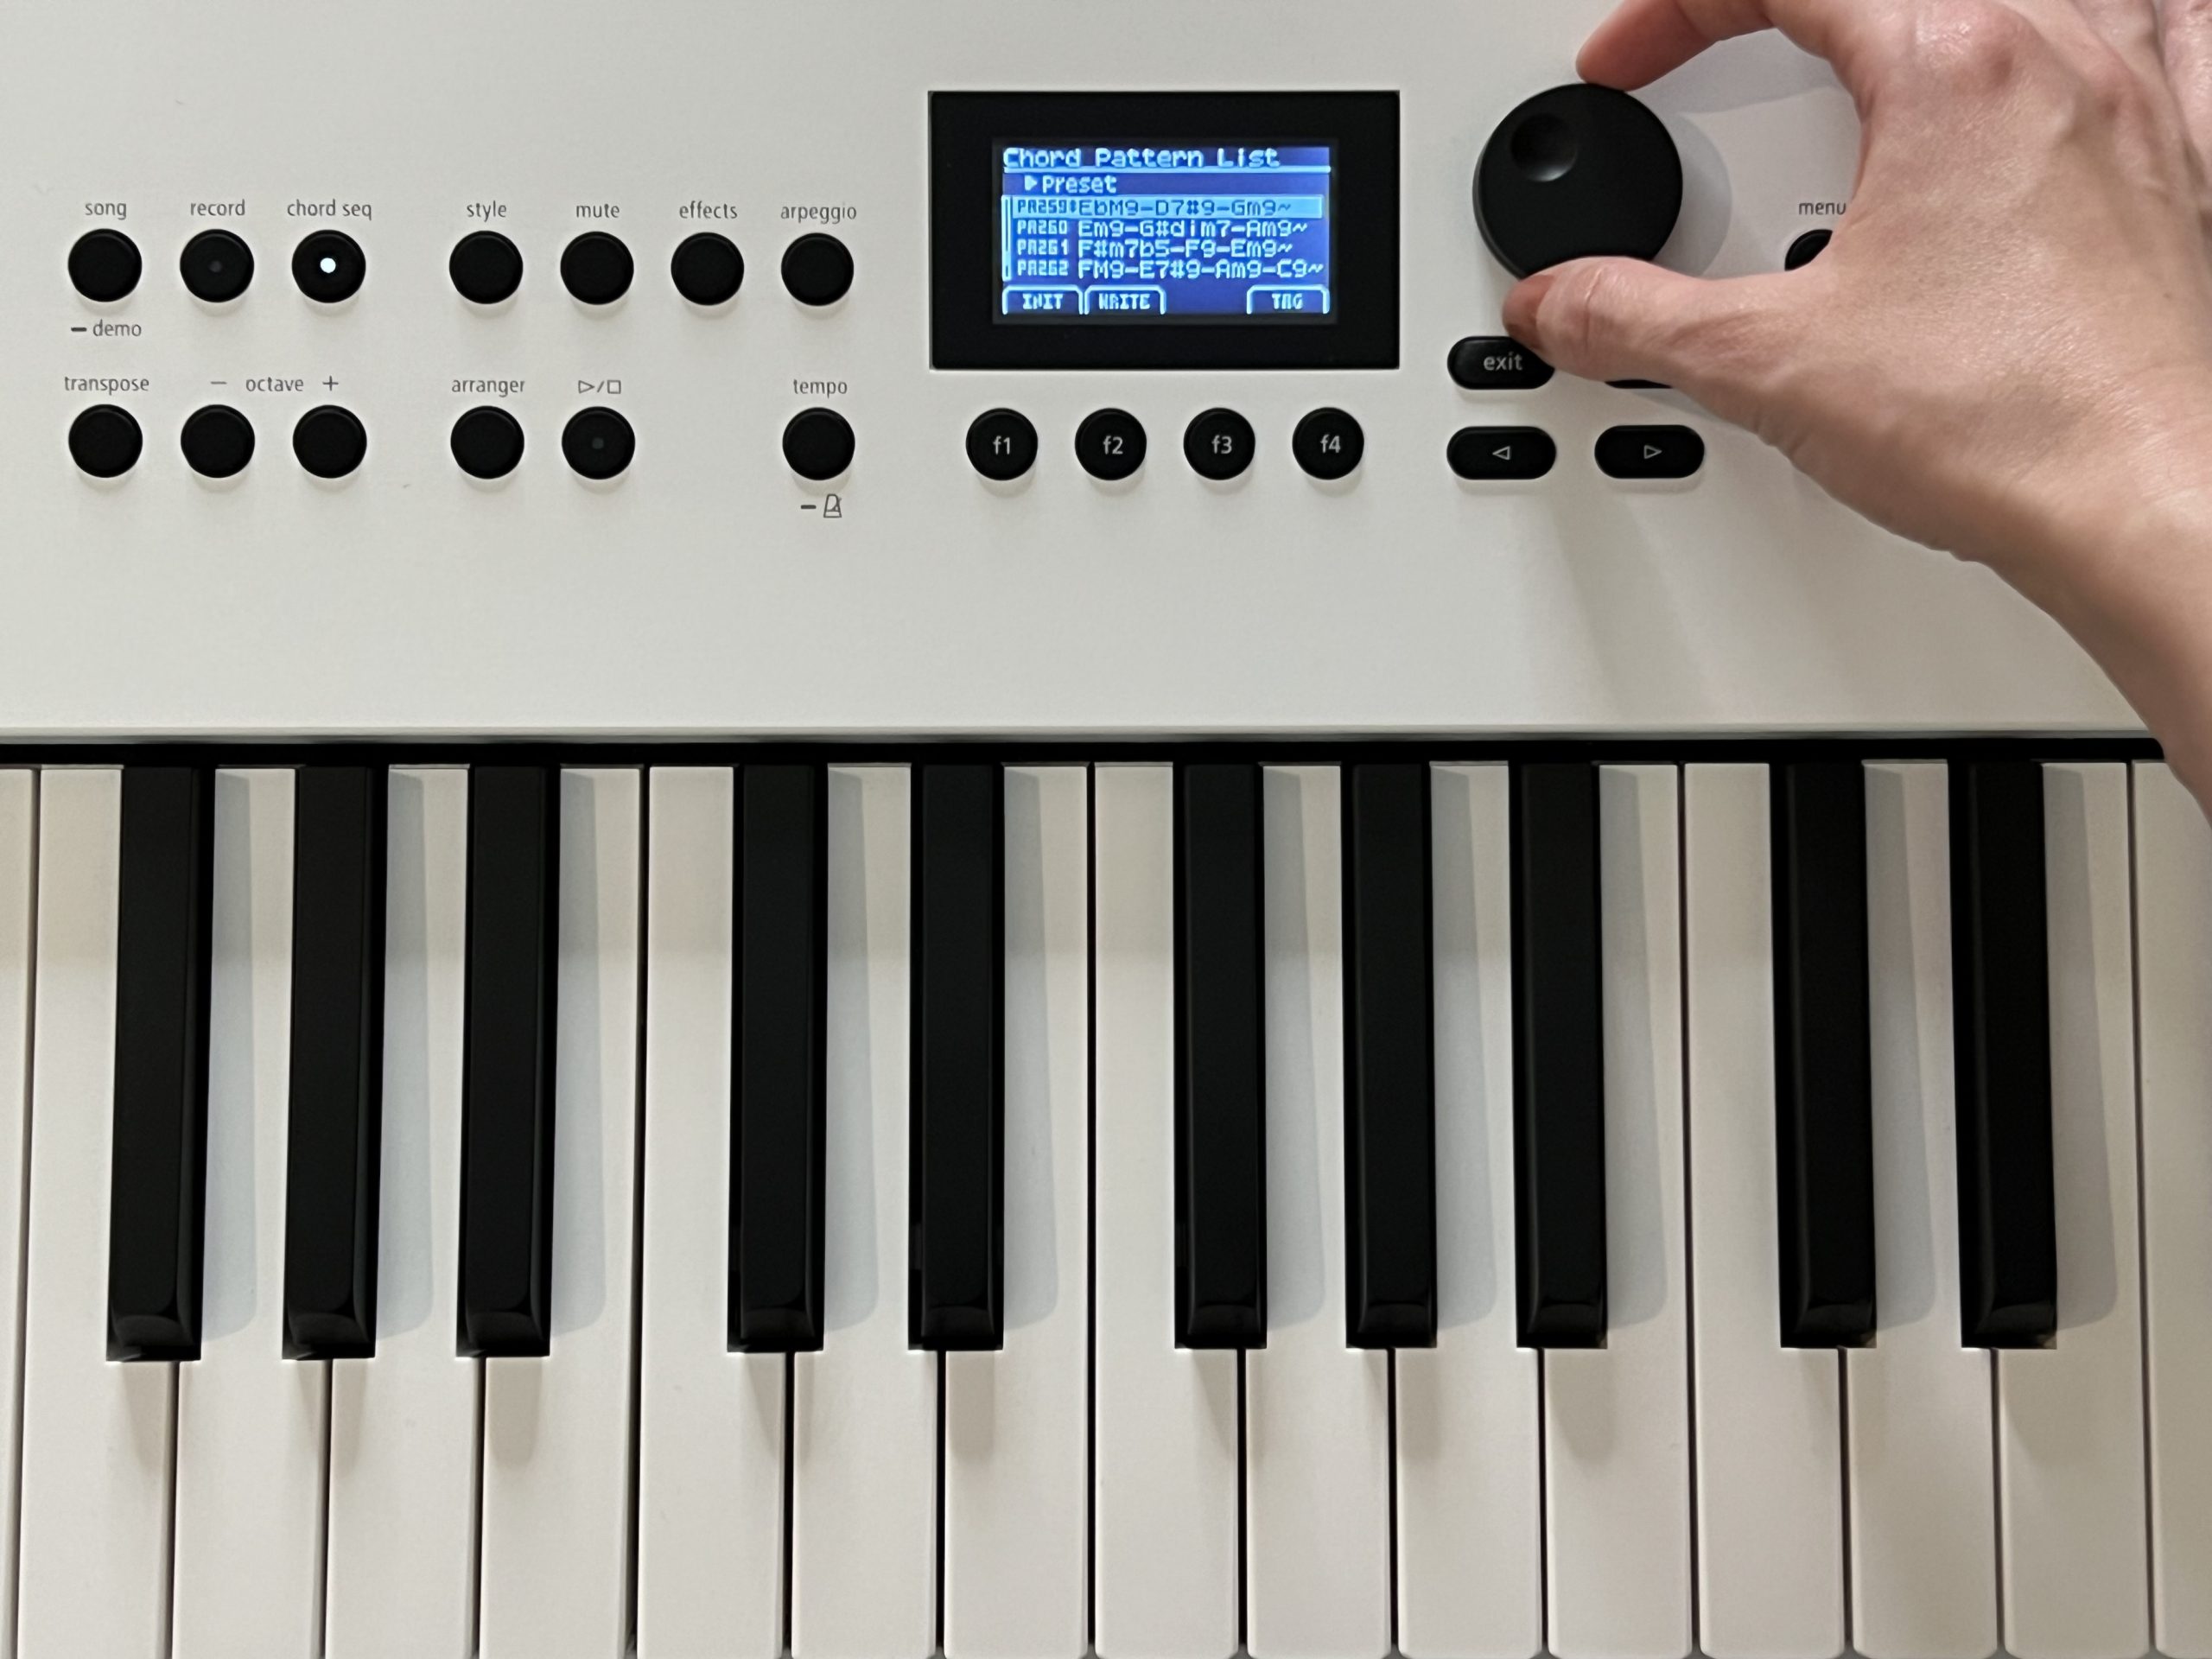
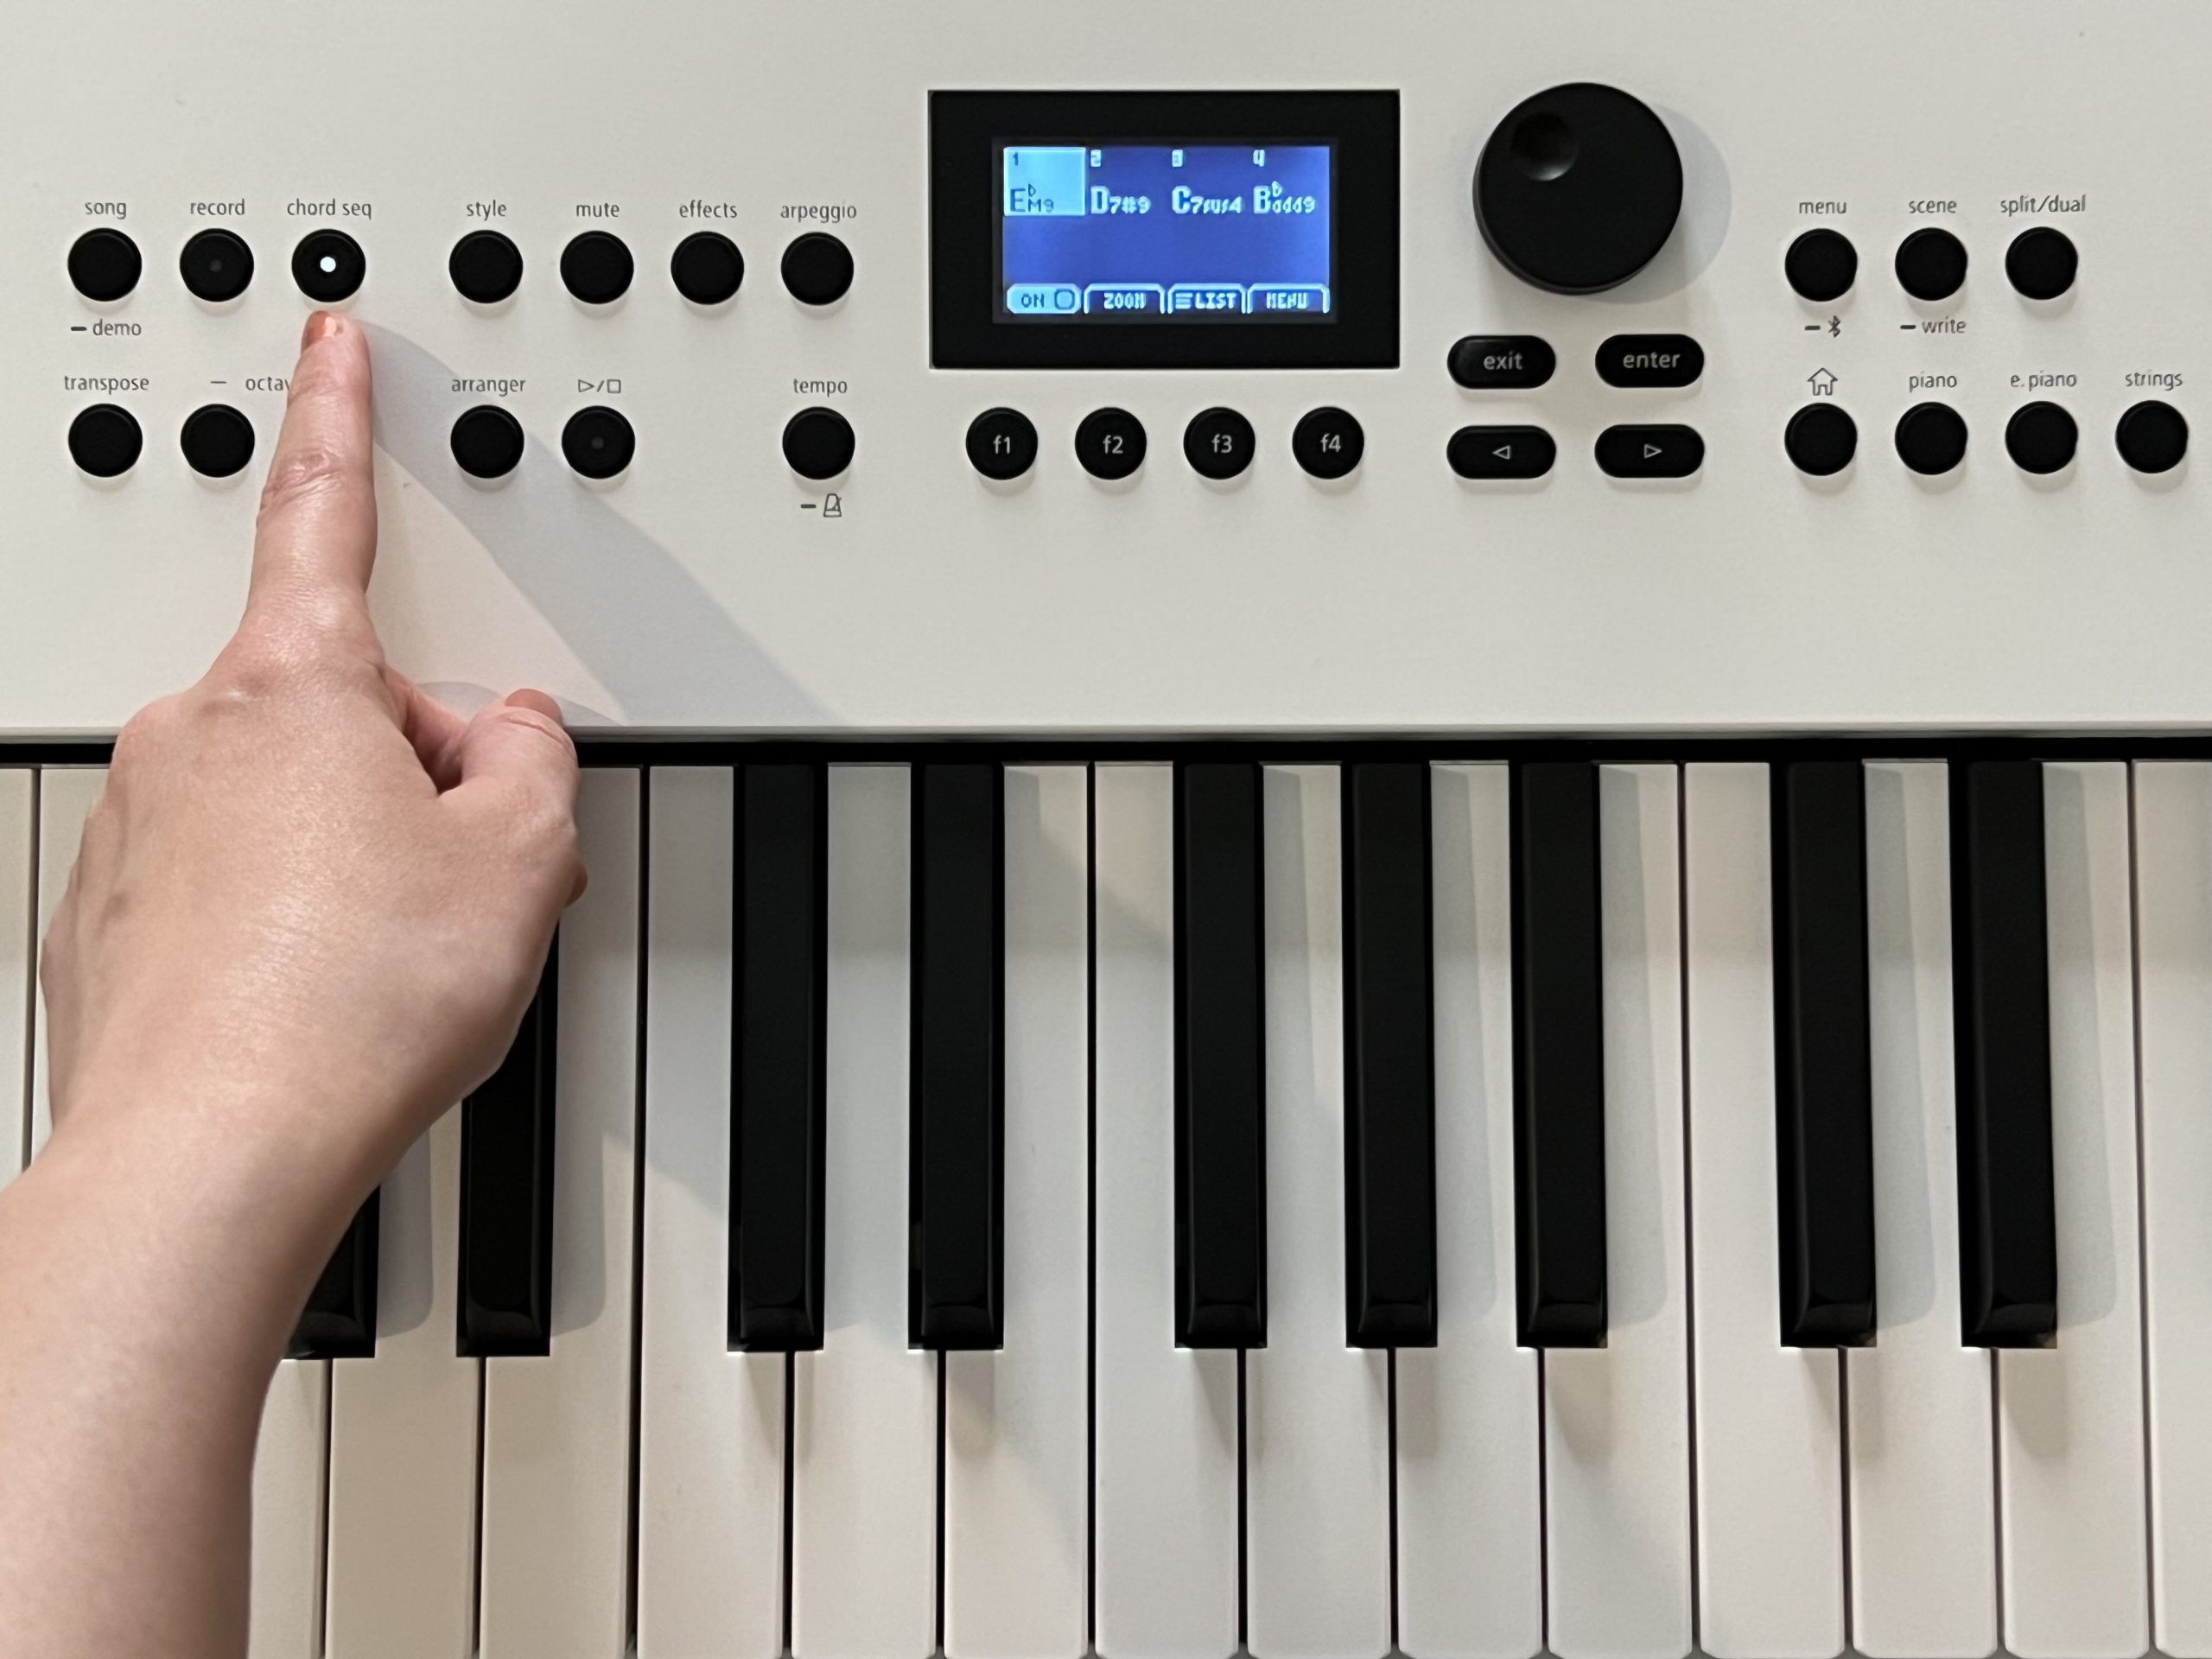
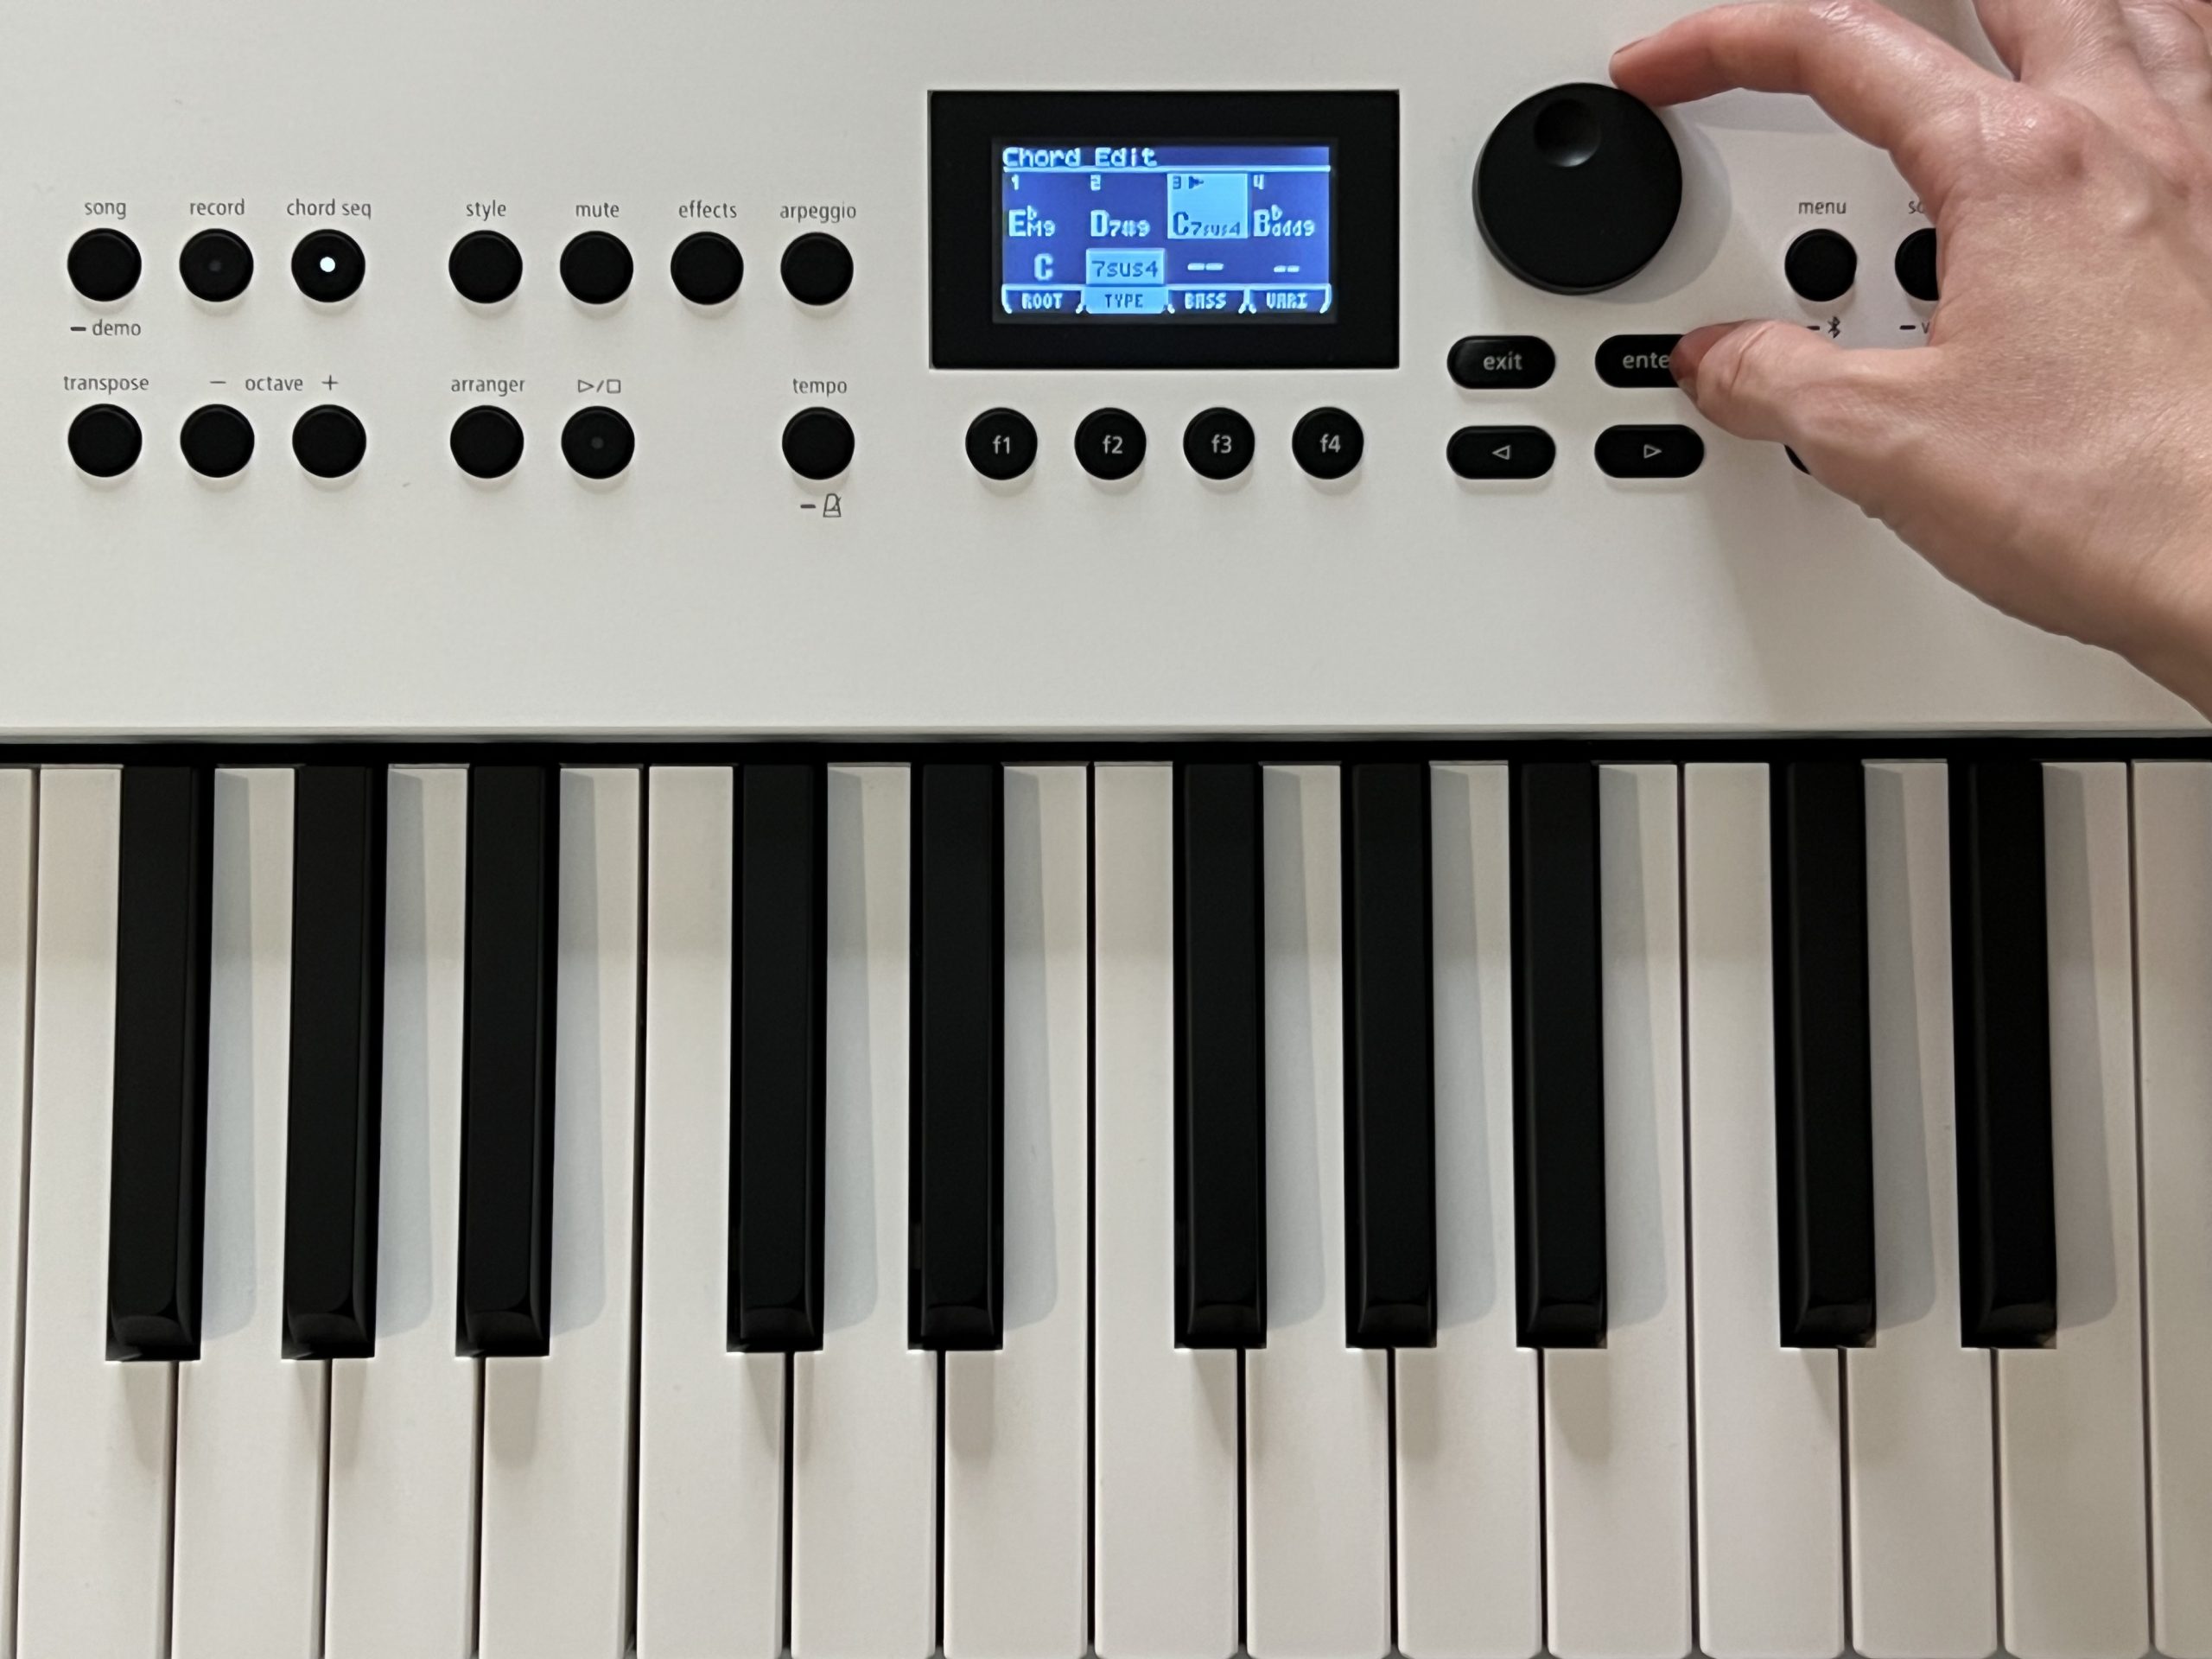
As the first variation of Tasty R&B continued playing in the background, I headed to the Chord Seq tab. Once there, I pushed the F3 button to view the list of Chord Patterns.
Turning the Dial knob to listen through the diverse strings of chords felt akin to playing harmony roulette. Instead of worrying about coming up with the chords from scratch, I got a preview of which ones worked best for R&B. When I heard the pattern PR259 over the beat, I knew I was in the right place. The original sequence shuffled between EbM9 and D7#9. But, I craved more complexity.
Upon selecting the pattern, I hovered over to the third chord with the Dial knob and pressed Enter to edit it. The Root became C, and the Type became 7sus4. I pressed Enter once more and followed the same steps to edit the fourth chord of the sequence. Eventually, my new pattern looked like this: EbM9 – D7#9 – C7sus4 – Bbadd9.
With the revised chords incorporated into the beat, I felt inspired to scribble down the first few lines of my song. Humming them along to the loop, I centered the theme around the hook: “Rush home to me.”
Step 4: Choose Tone
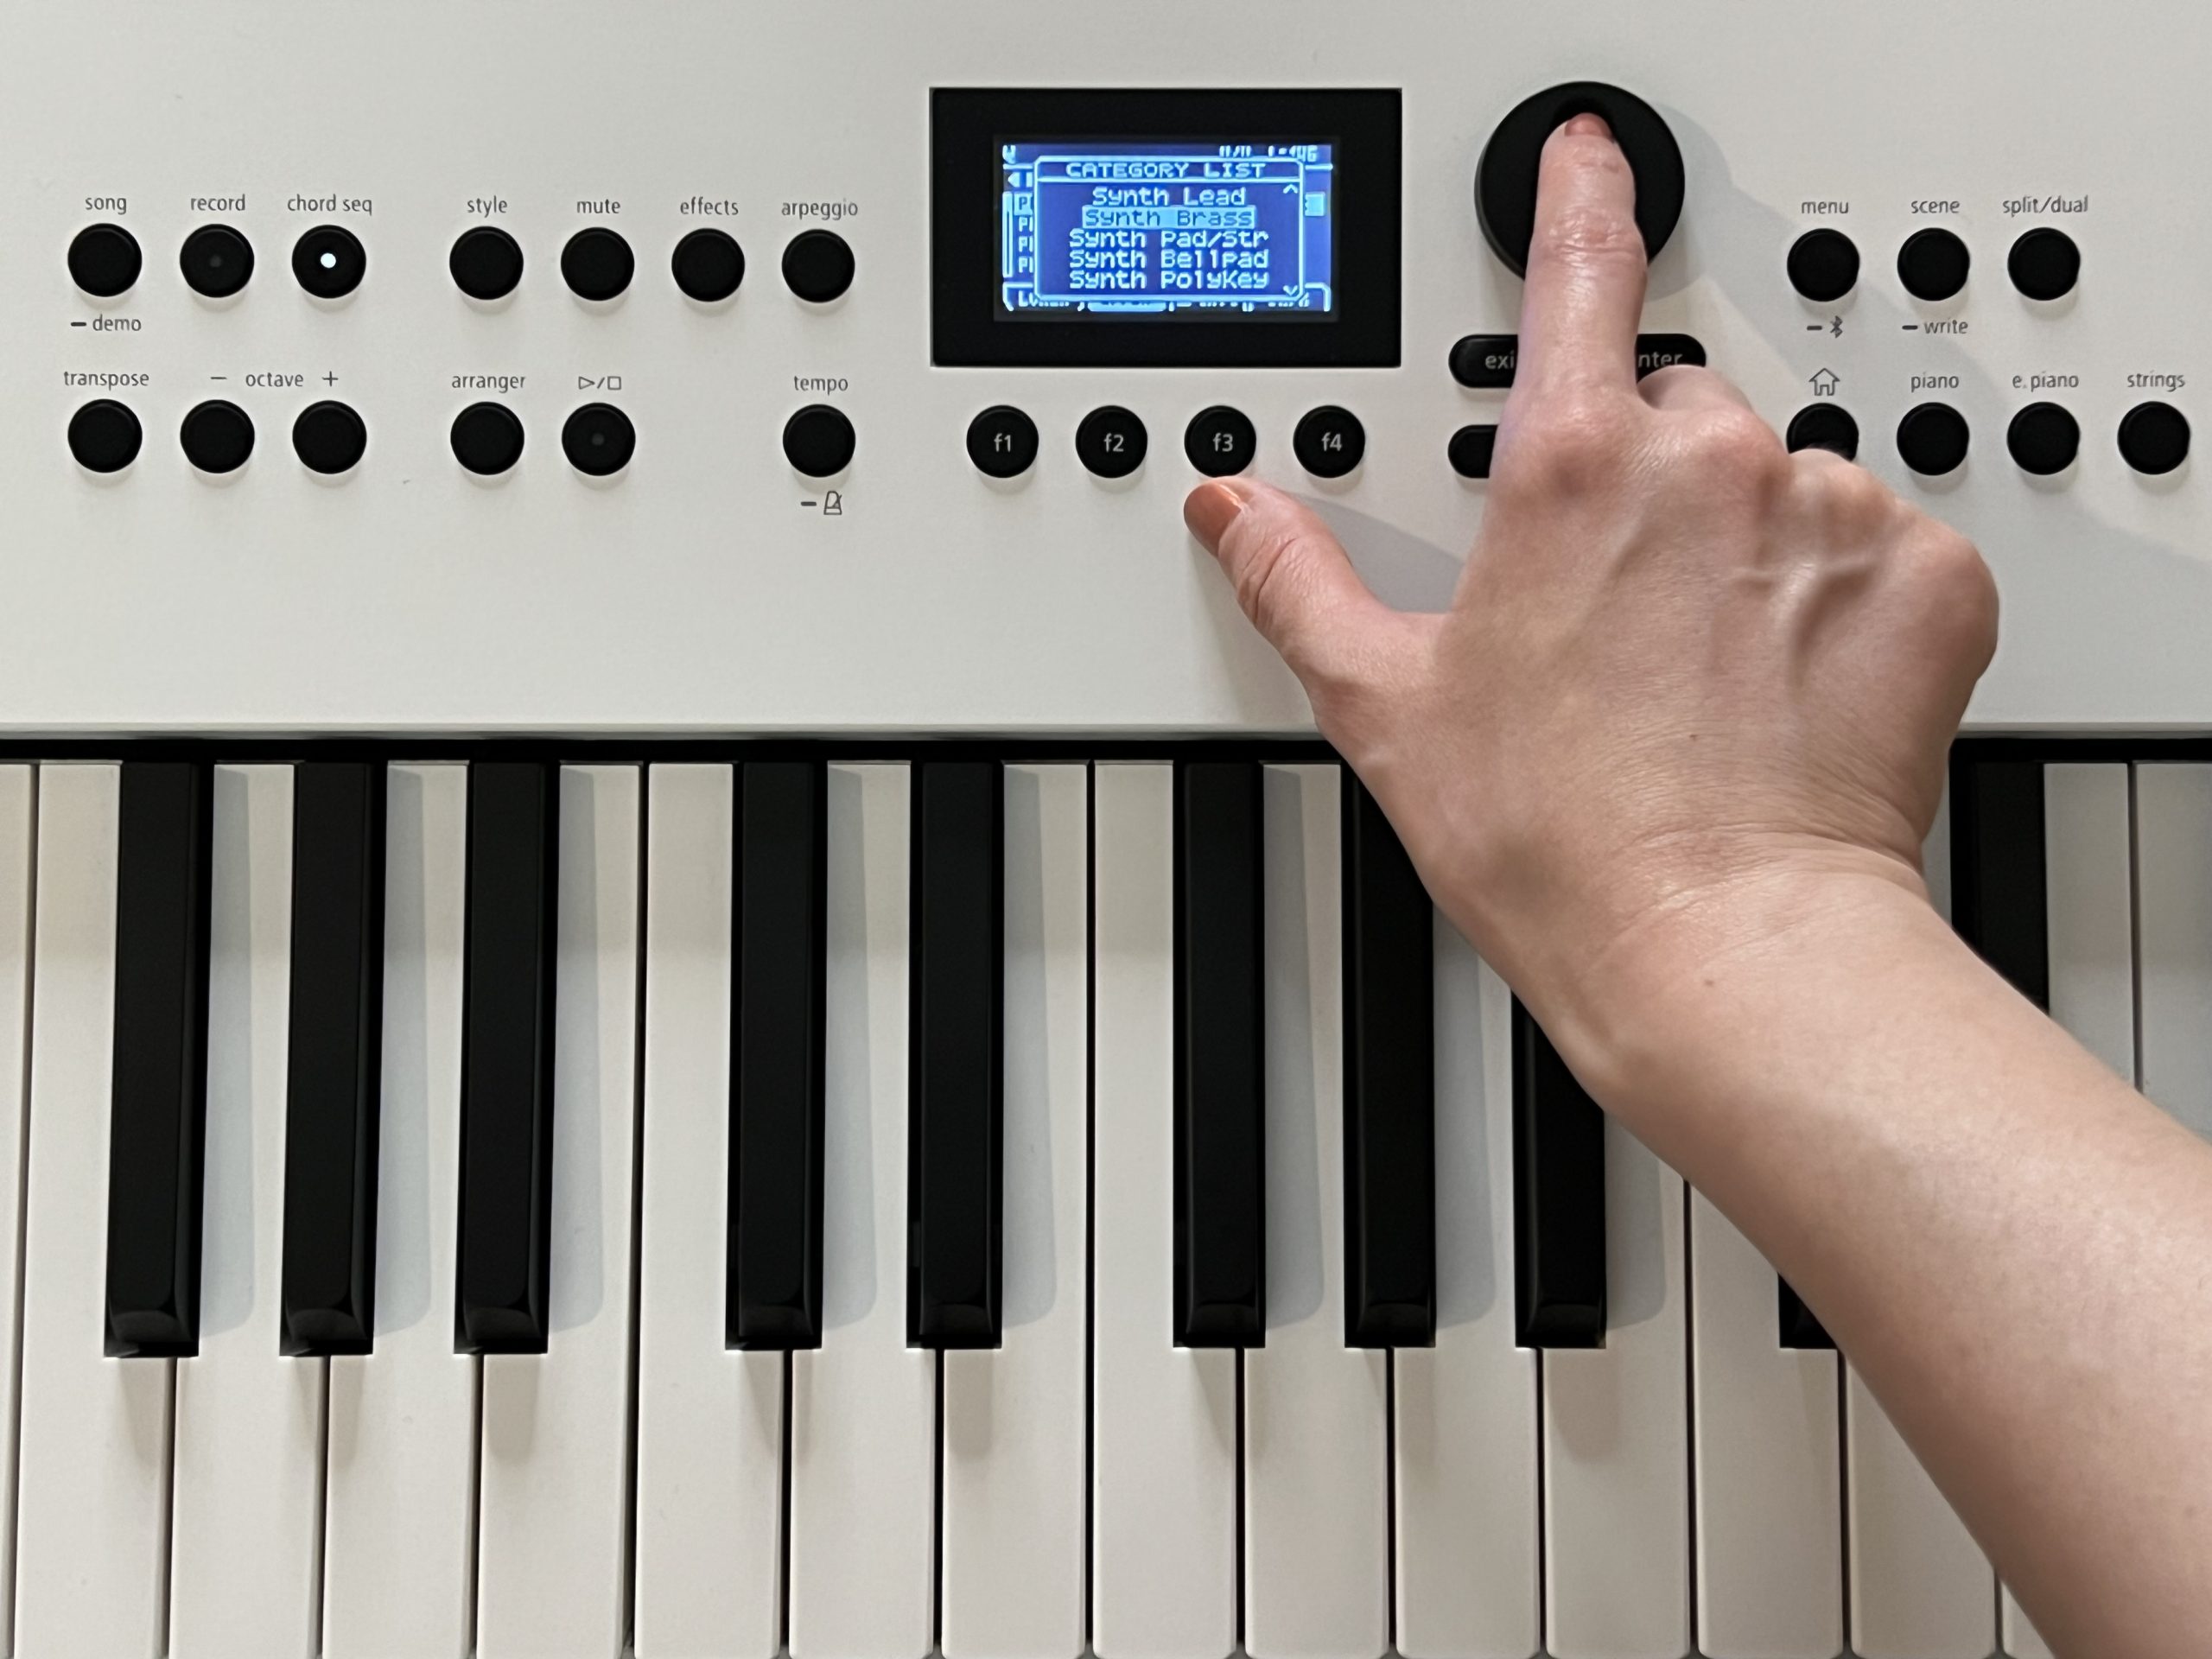
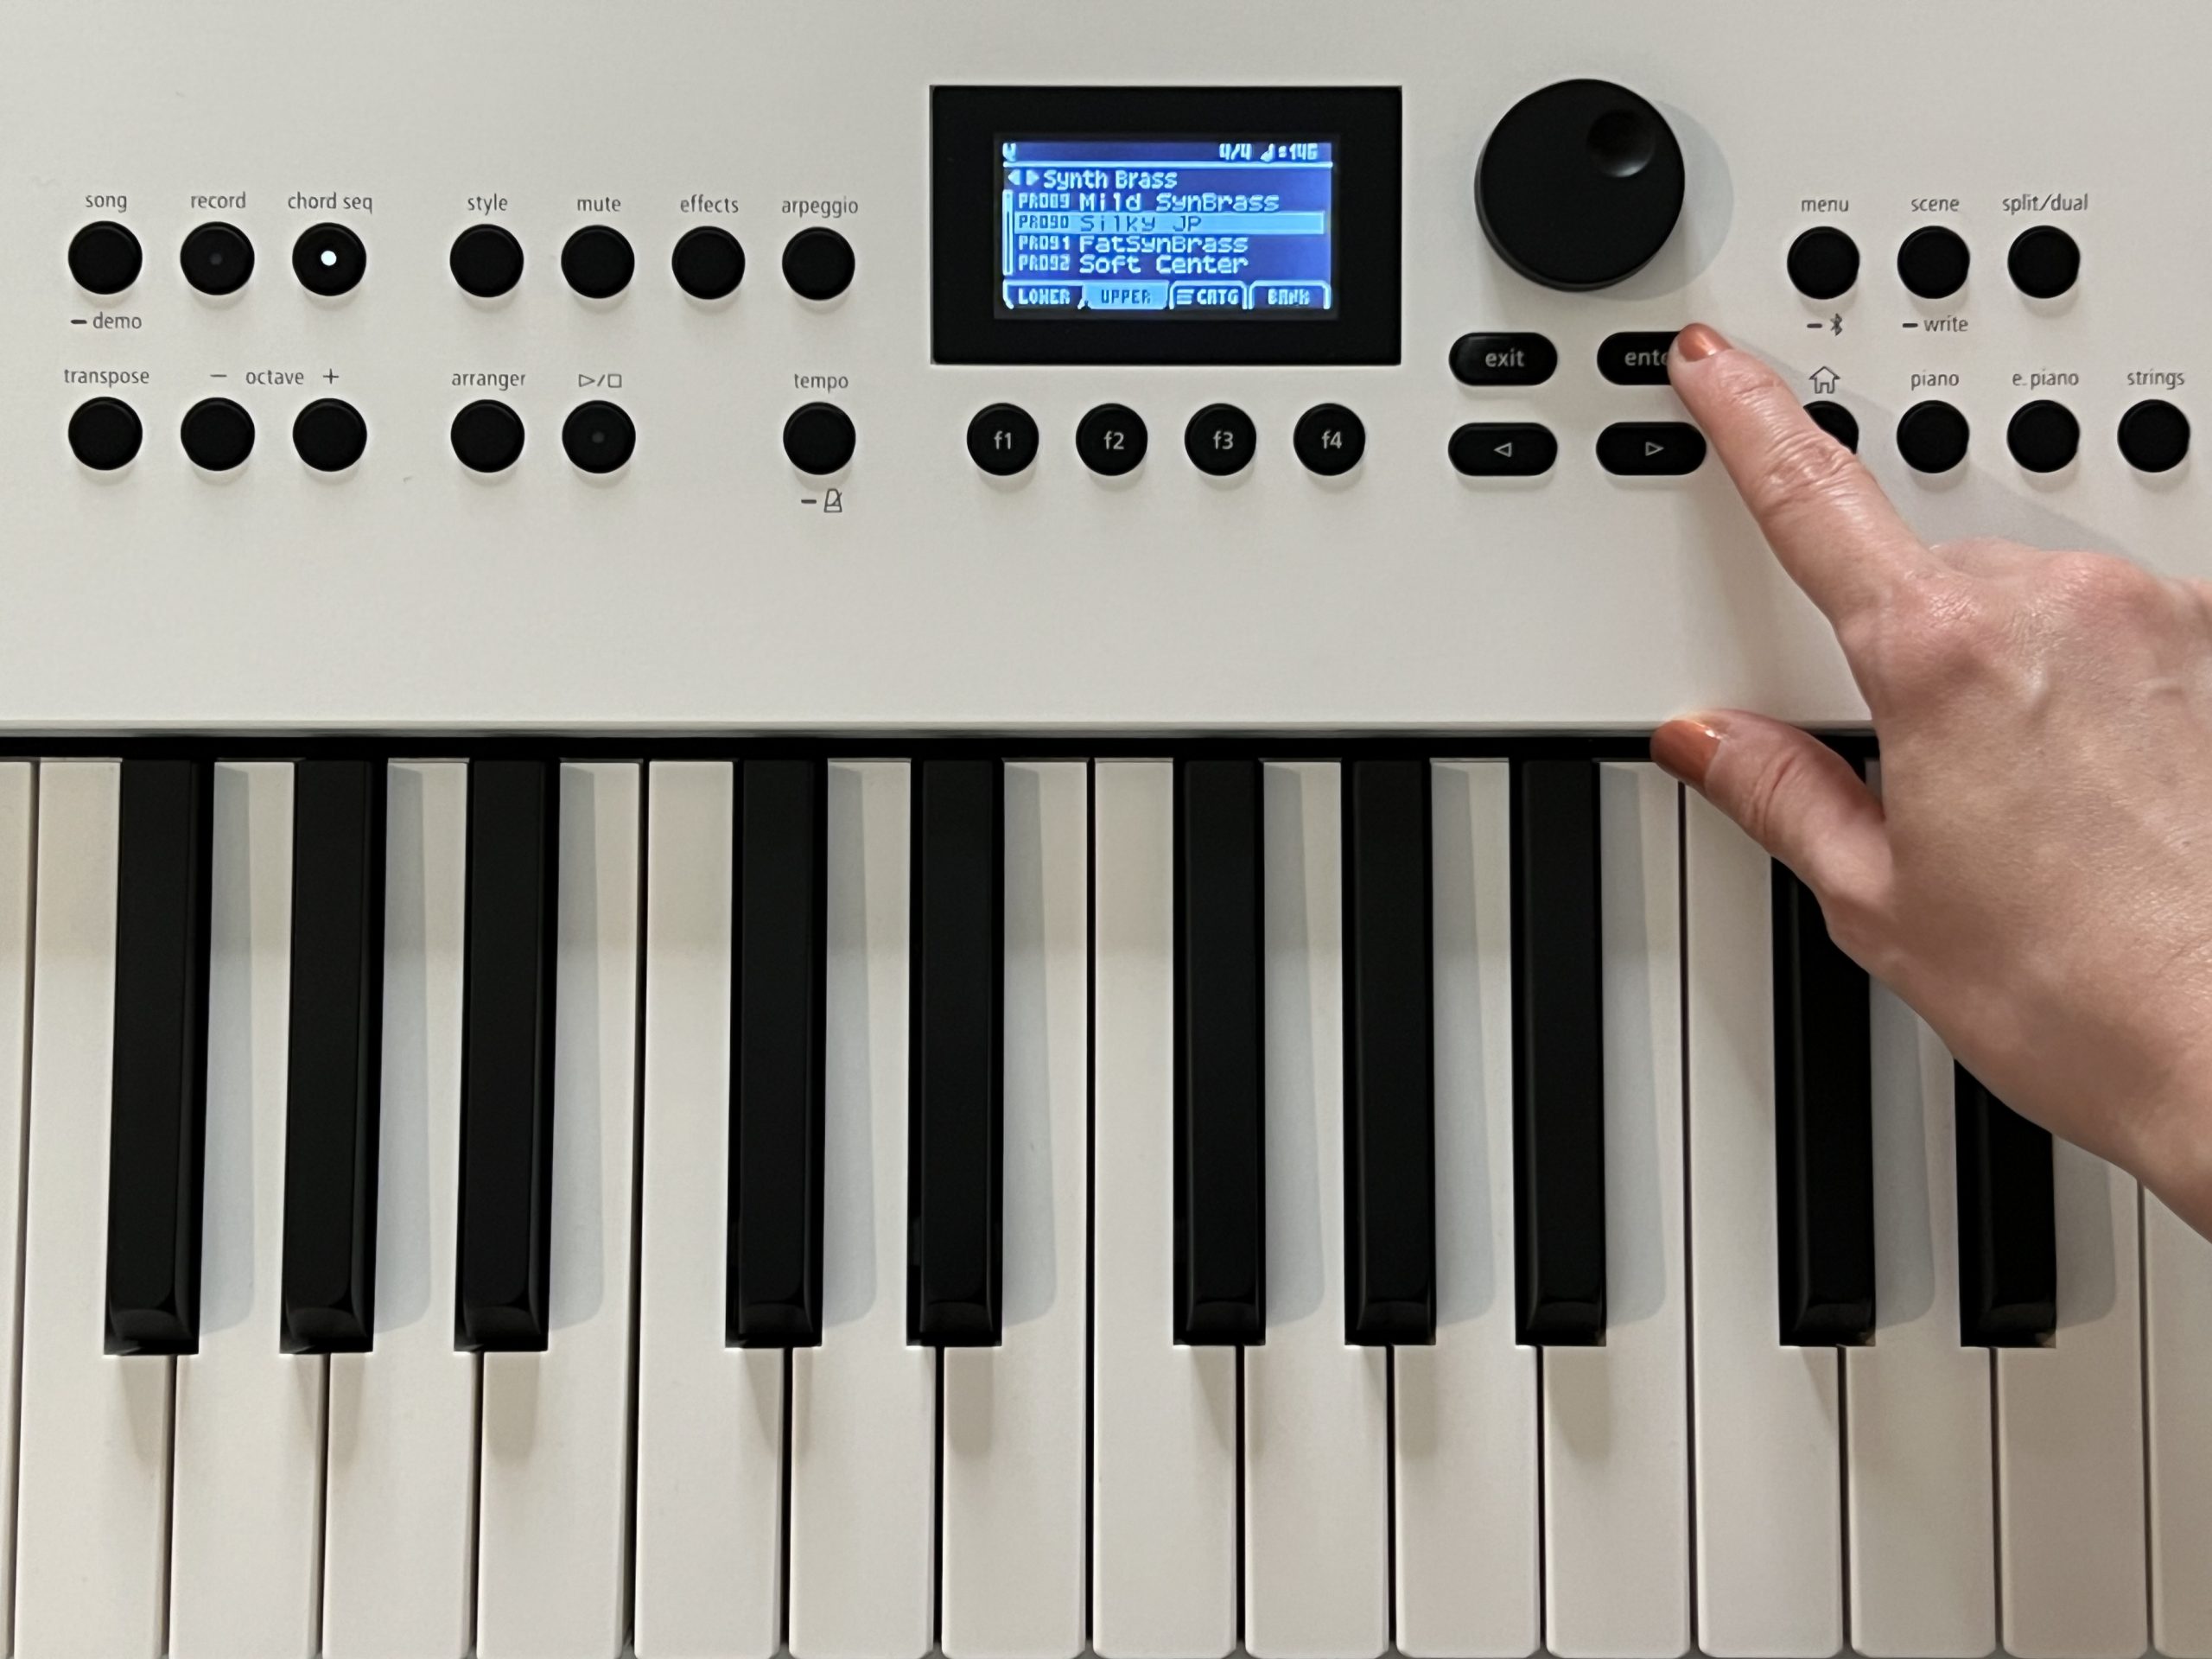
The lush combination of my voice with the beat made me wonder how a synth brass pad would sound underneath. I exited the Chord Seq window and pressed Synth to view the list of presets. Since I already knew what type of Tone I was looking for, I hit the F3 button to select the Synth Brass category. There, I found the PR090 Silky JP patch, which was close to what I had in mind. All it needed was a few tweaks.
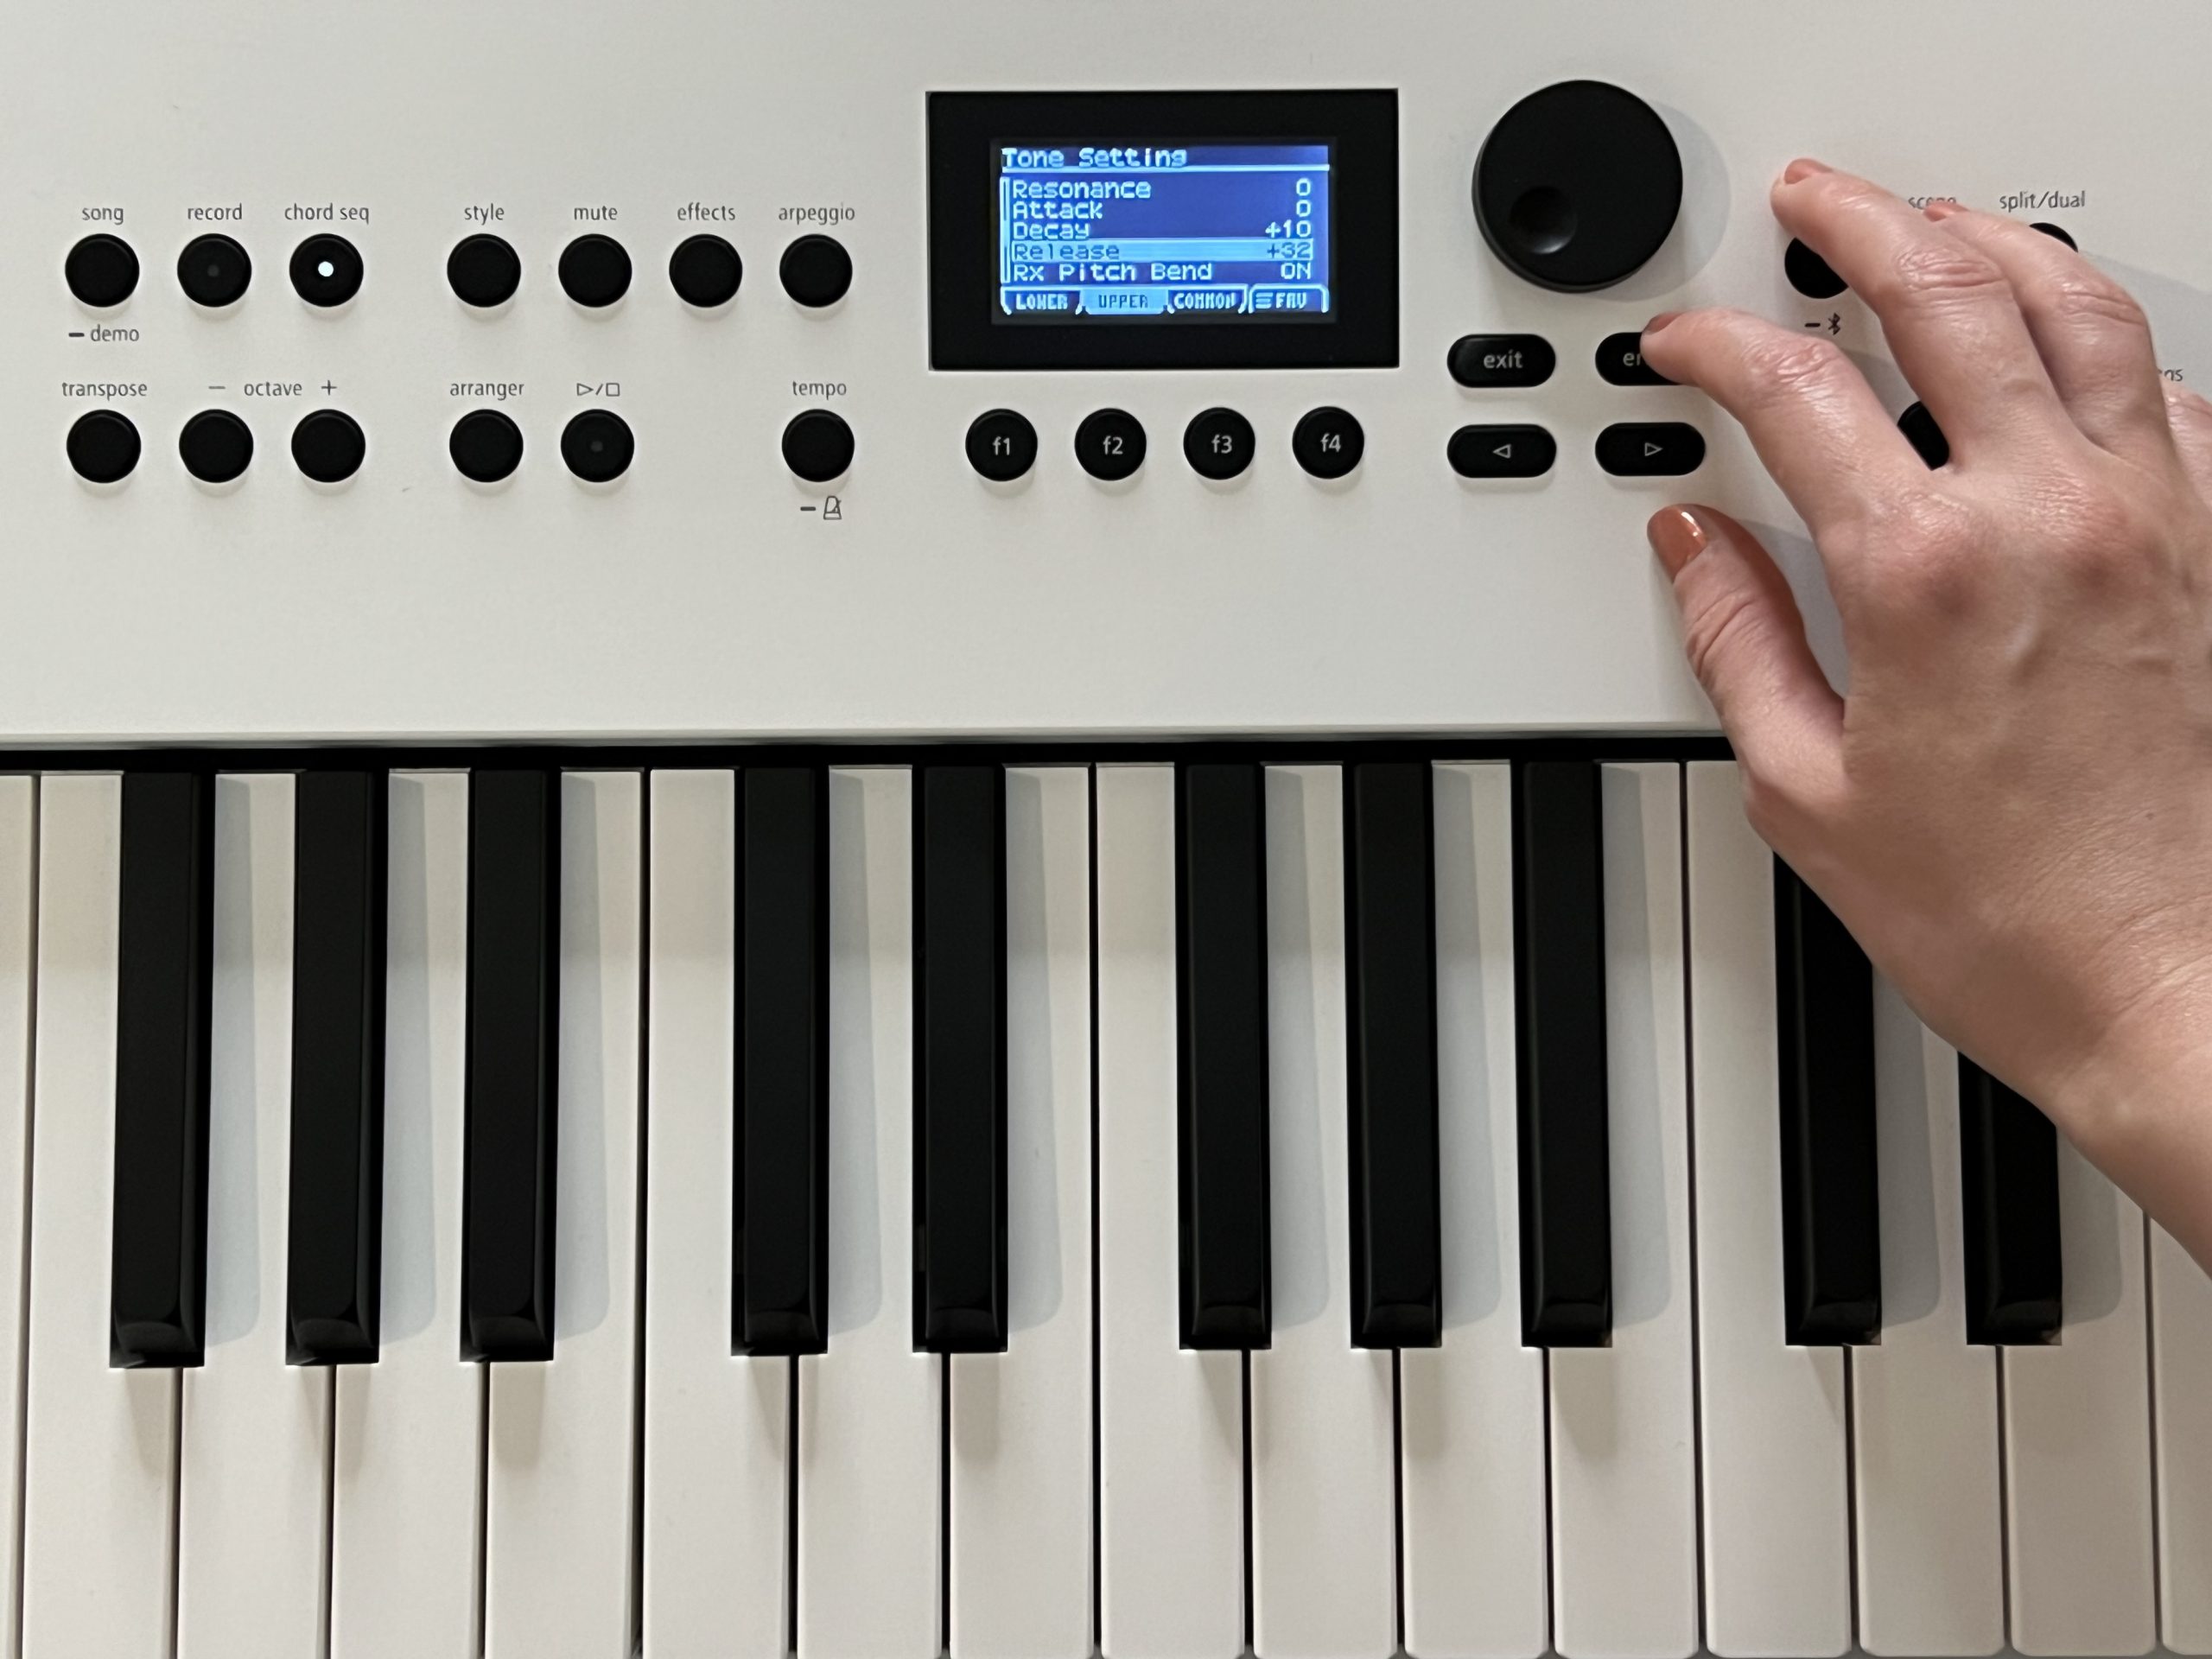
Step 5: Edit Tone
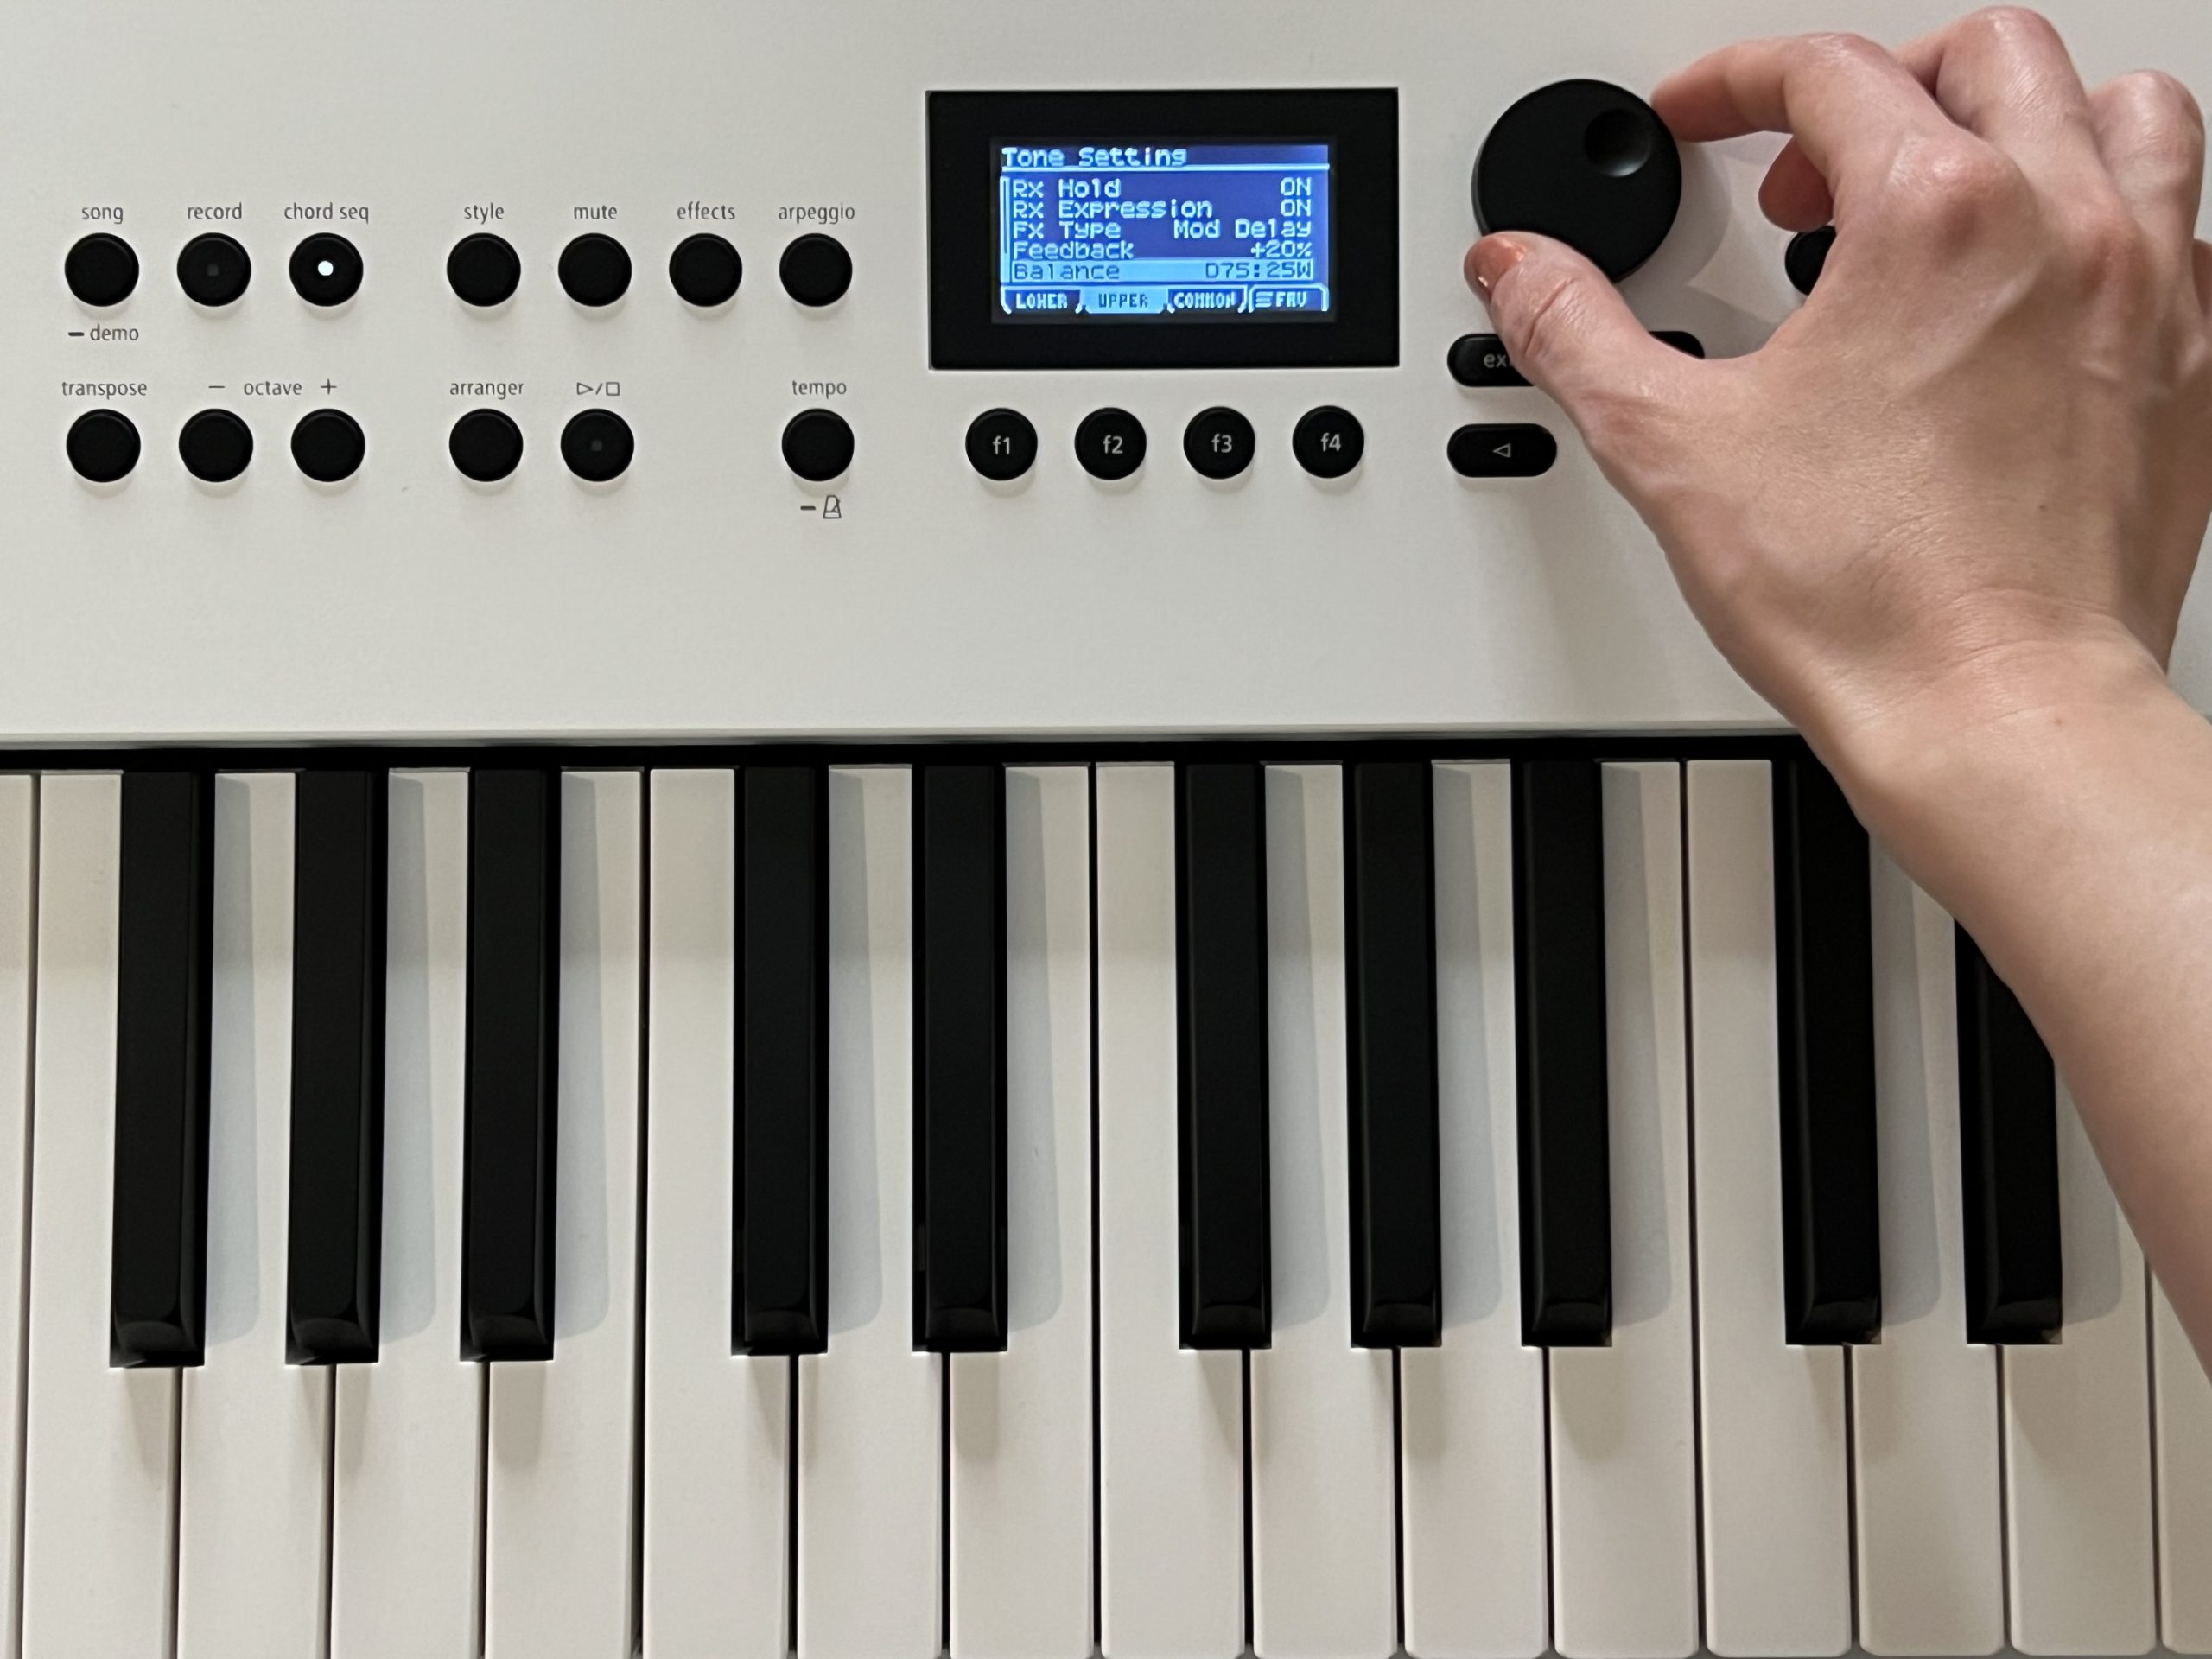
After selecting the Silky JP synth, I pushed the F4 button to view its settings. Next, I moved the Dial knob to select the FX Type line at the bottom. While playing the keys with one hand, I tested the various effects over the tone with the other. In GO:KEYS 5, you can throw an effect on the entire performance. Still, it’s also possible to process the tone of your chosen instrument exclusively.
In this case, Mod Delay added the magic I wanted to hear on the Silky JP synth. To hear more of the delay effect, I changed the dry (D) and wet (W) ratio from 90 to 10 and adjusted it to 75 to 25. While experimenting, I noticed that the synth tone’s tail didn’t behave how I wanted it to. I wanted to give it a bouncier feel and let it linger each time I lifted my fingers from the keyboard. To achieve this, I increased the decay time to +10 and took the release time as far as +32.
Step 6: Put the Arrangement Together
Although I was happy with Variation 1 of the Tasty R&B style, I didn’t want the arrangement to get stale. I pressed the Mute button to view the three groups of instruments that made up the beat. I began singing the song with the Accompaniment muted, which left me with only the drums and bass playing back. I knew that as soon as I hit the F3 button to unmute the accompaniment, it would feel like I’d arrived at the chorus section.
To prepare for this peak, I decided to play the chords with the Silky JP synth in the second half of the verse. I continued to play the same voicings in the chorus. But, with the accompaniment unmuted, the harmony sounded refreshed and complete. As I continued to play, sing, and hear the beat in full, I contemplated other ways to enhance the arrangement. Improvising on the keyboard’s higher octaves gave me the idea to finish the song with an arpeggiated pattern.

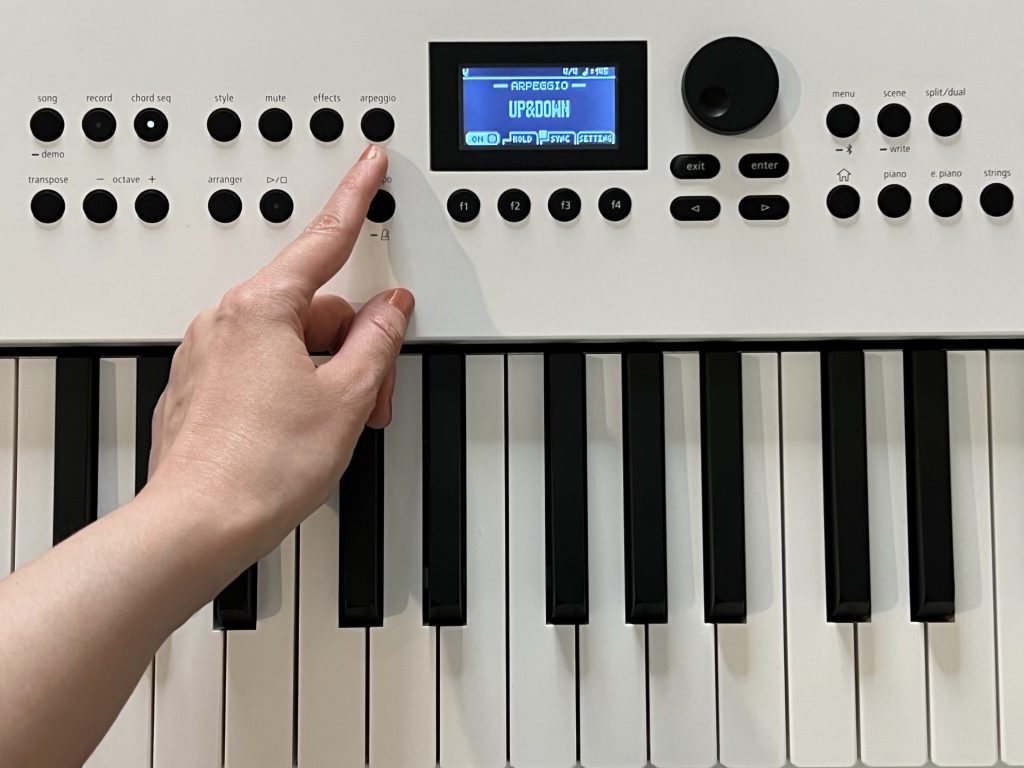
Step 7: Add Arpeggiation
I pressed the Arpeggio button and turned it on with F1. I shuffled between two triads over the accompaniment and let my GO:KEYS 5 do all the hard arpeggiation work. Out of the four motions built into the arpeggiator, I picked Up & Down.
I decided to introduce this element to the arrangement right after the chorus section. Halfway through the outro, I muted the accompaniment and continued to play the arpeggios over the Drums and Bass.
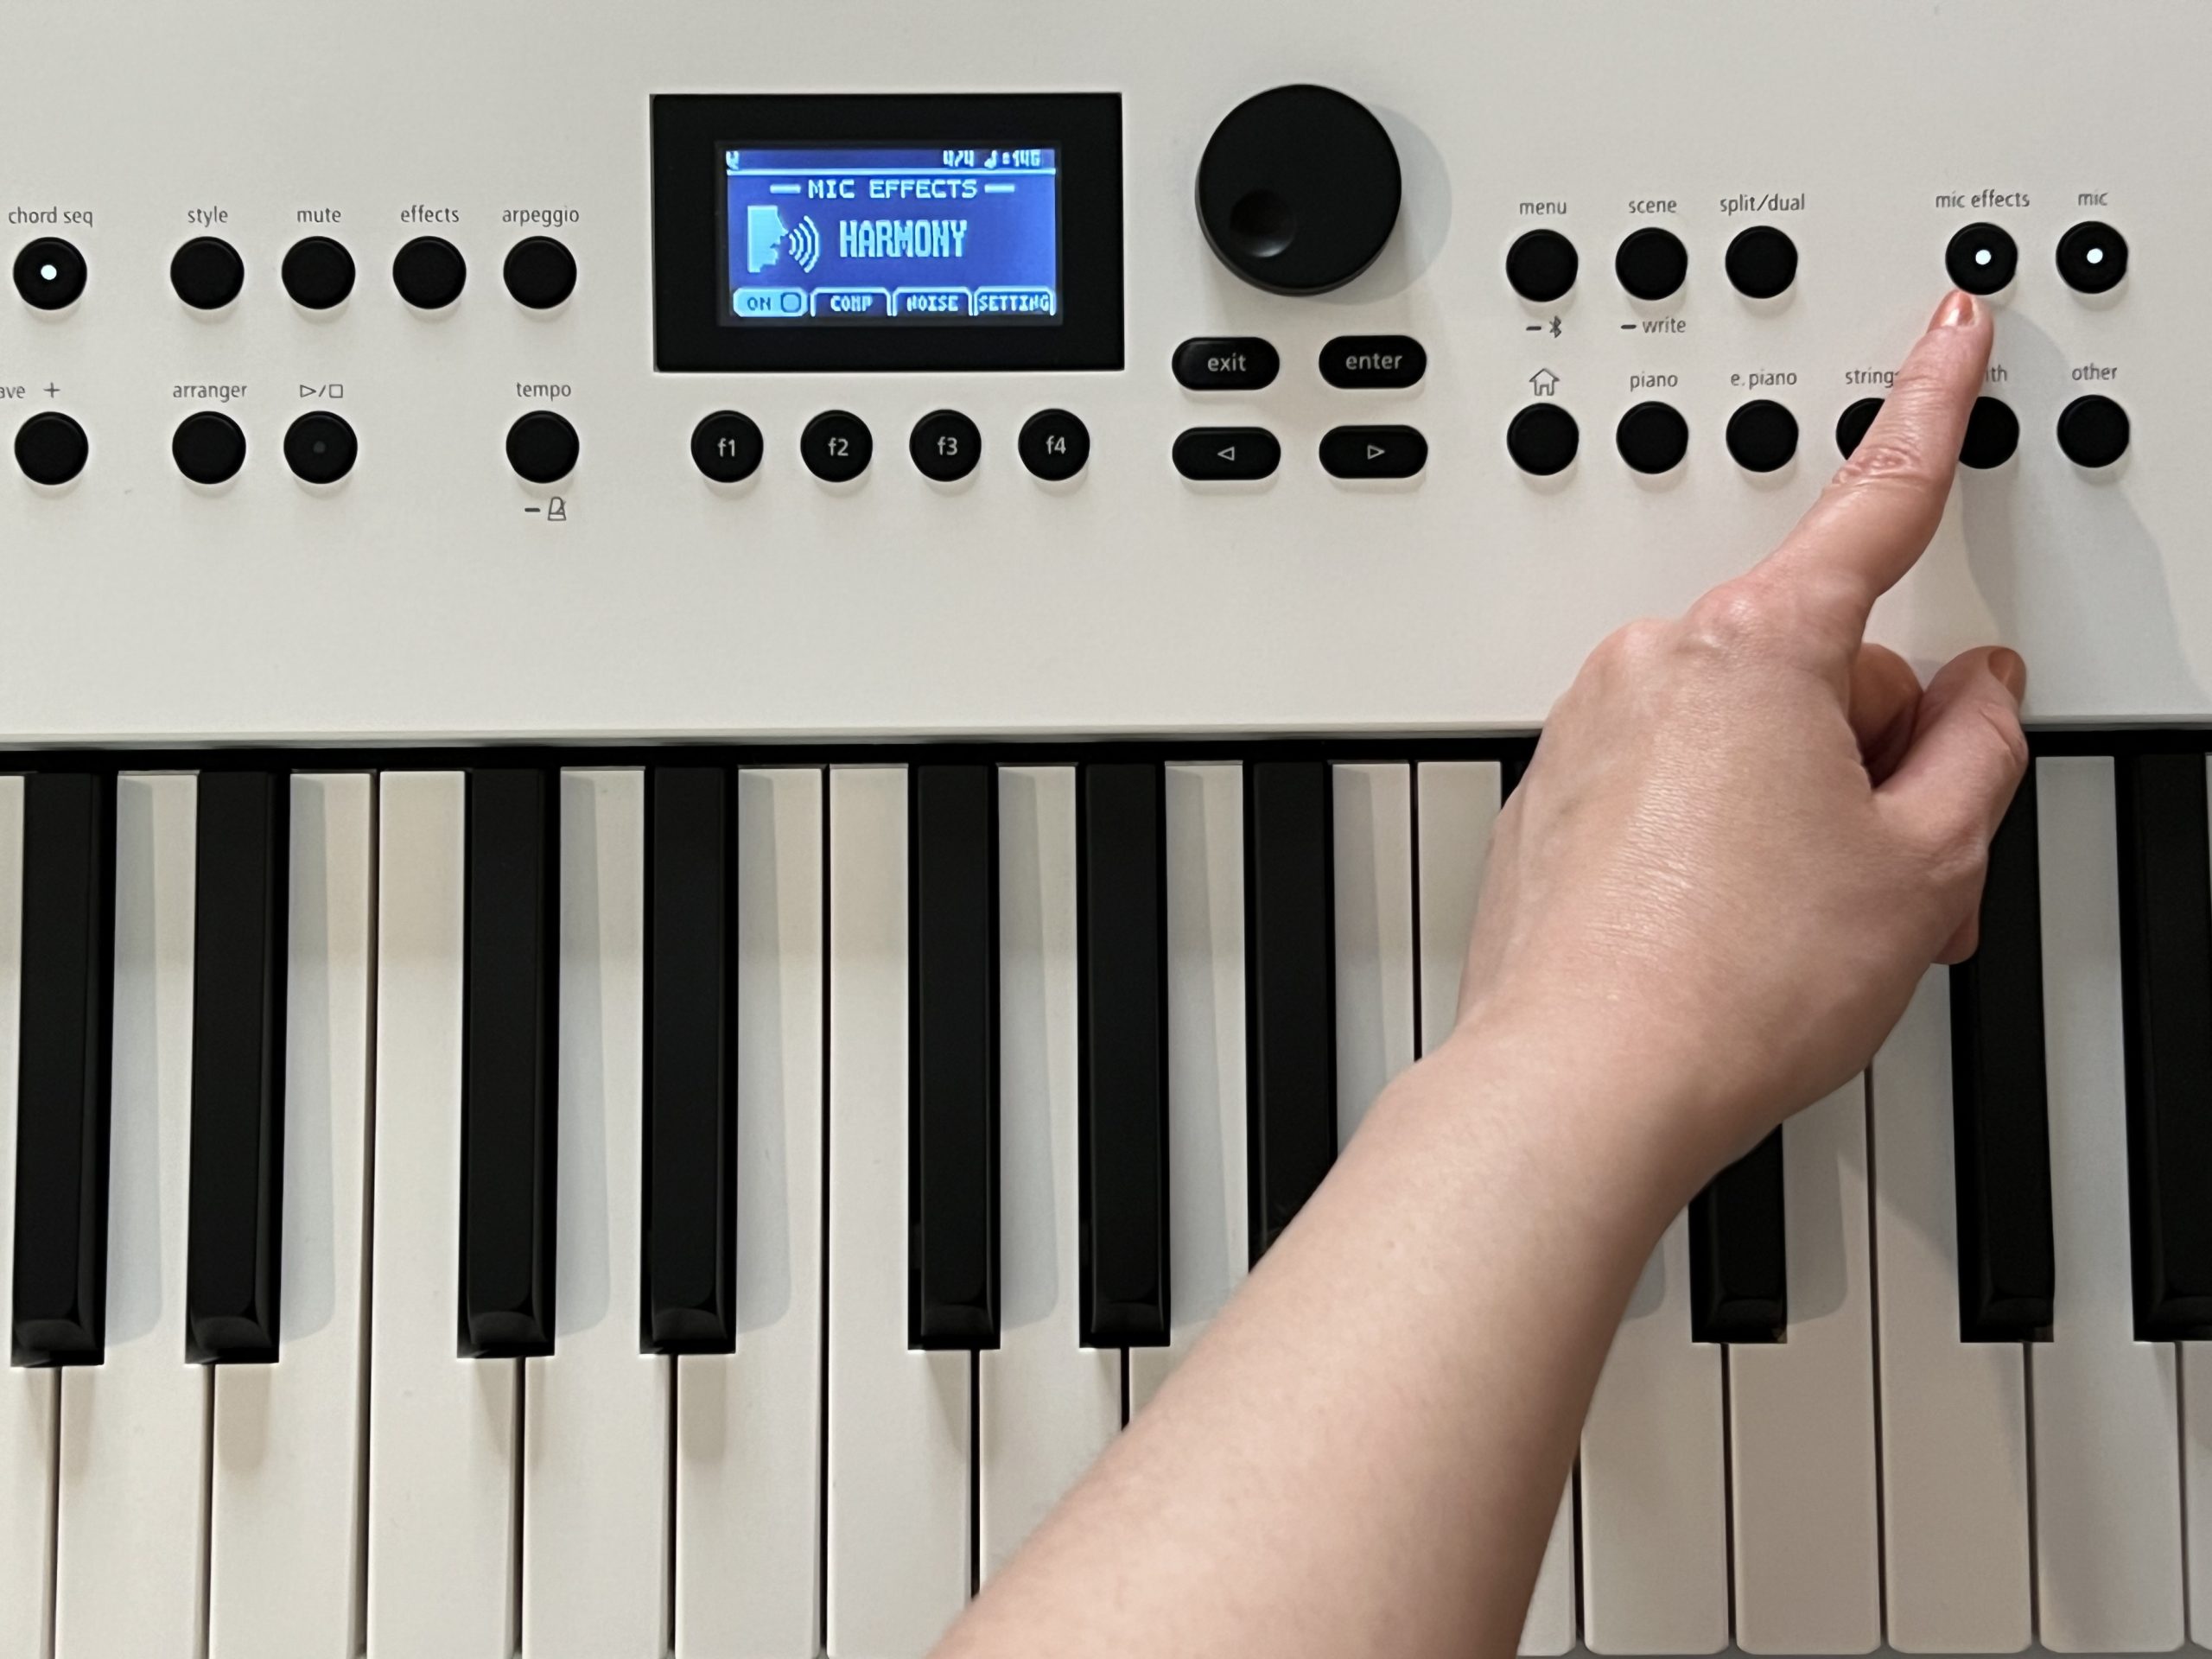
Step 8: Apply Mic Effects
As a singer, it’s rare for me to get through a song without adding some vocal harmonies to the arrangement. The Mic Effects is a great hub to test out different textures. Once there, I turned the Harmony effect on with the F1 button, and pressed F4 to view the settings. I hit Enter and turned the Dial while singing along to the accompaniment.
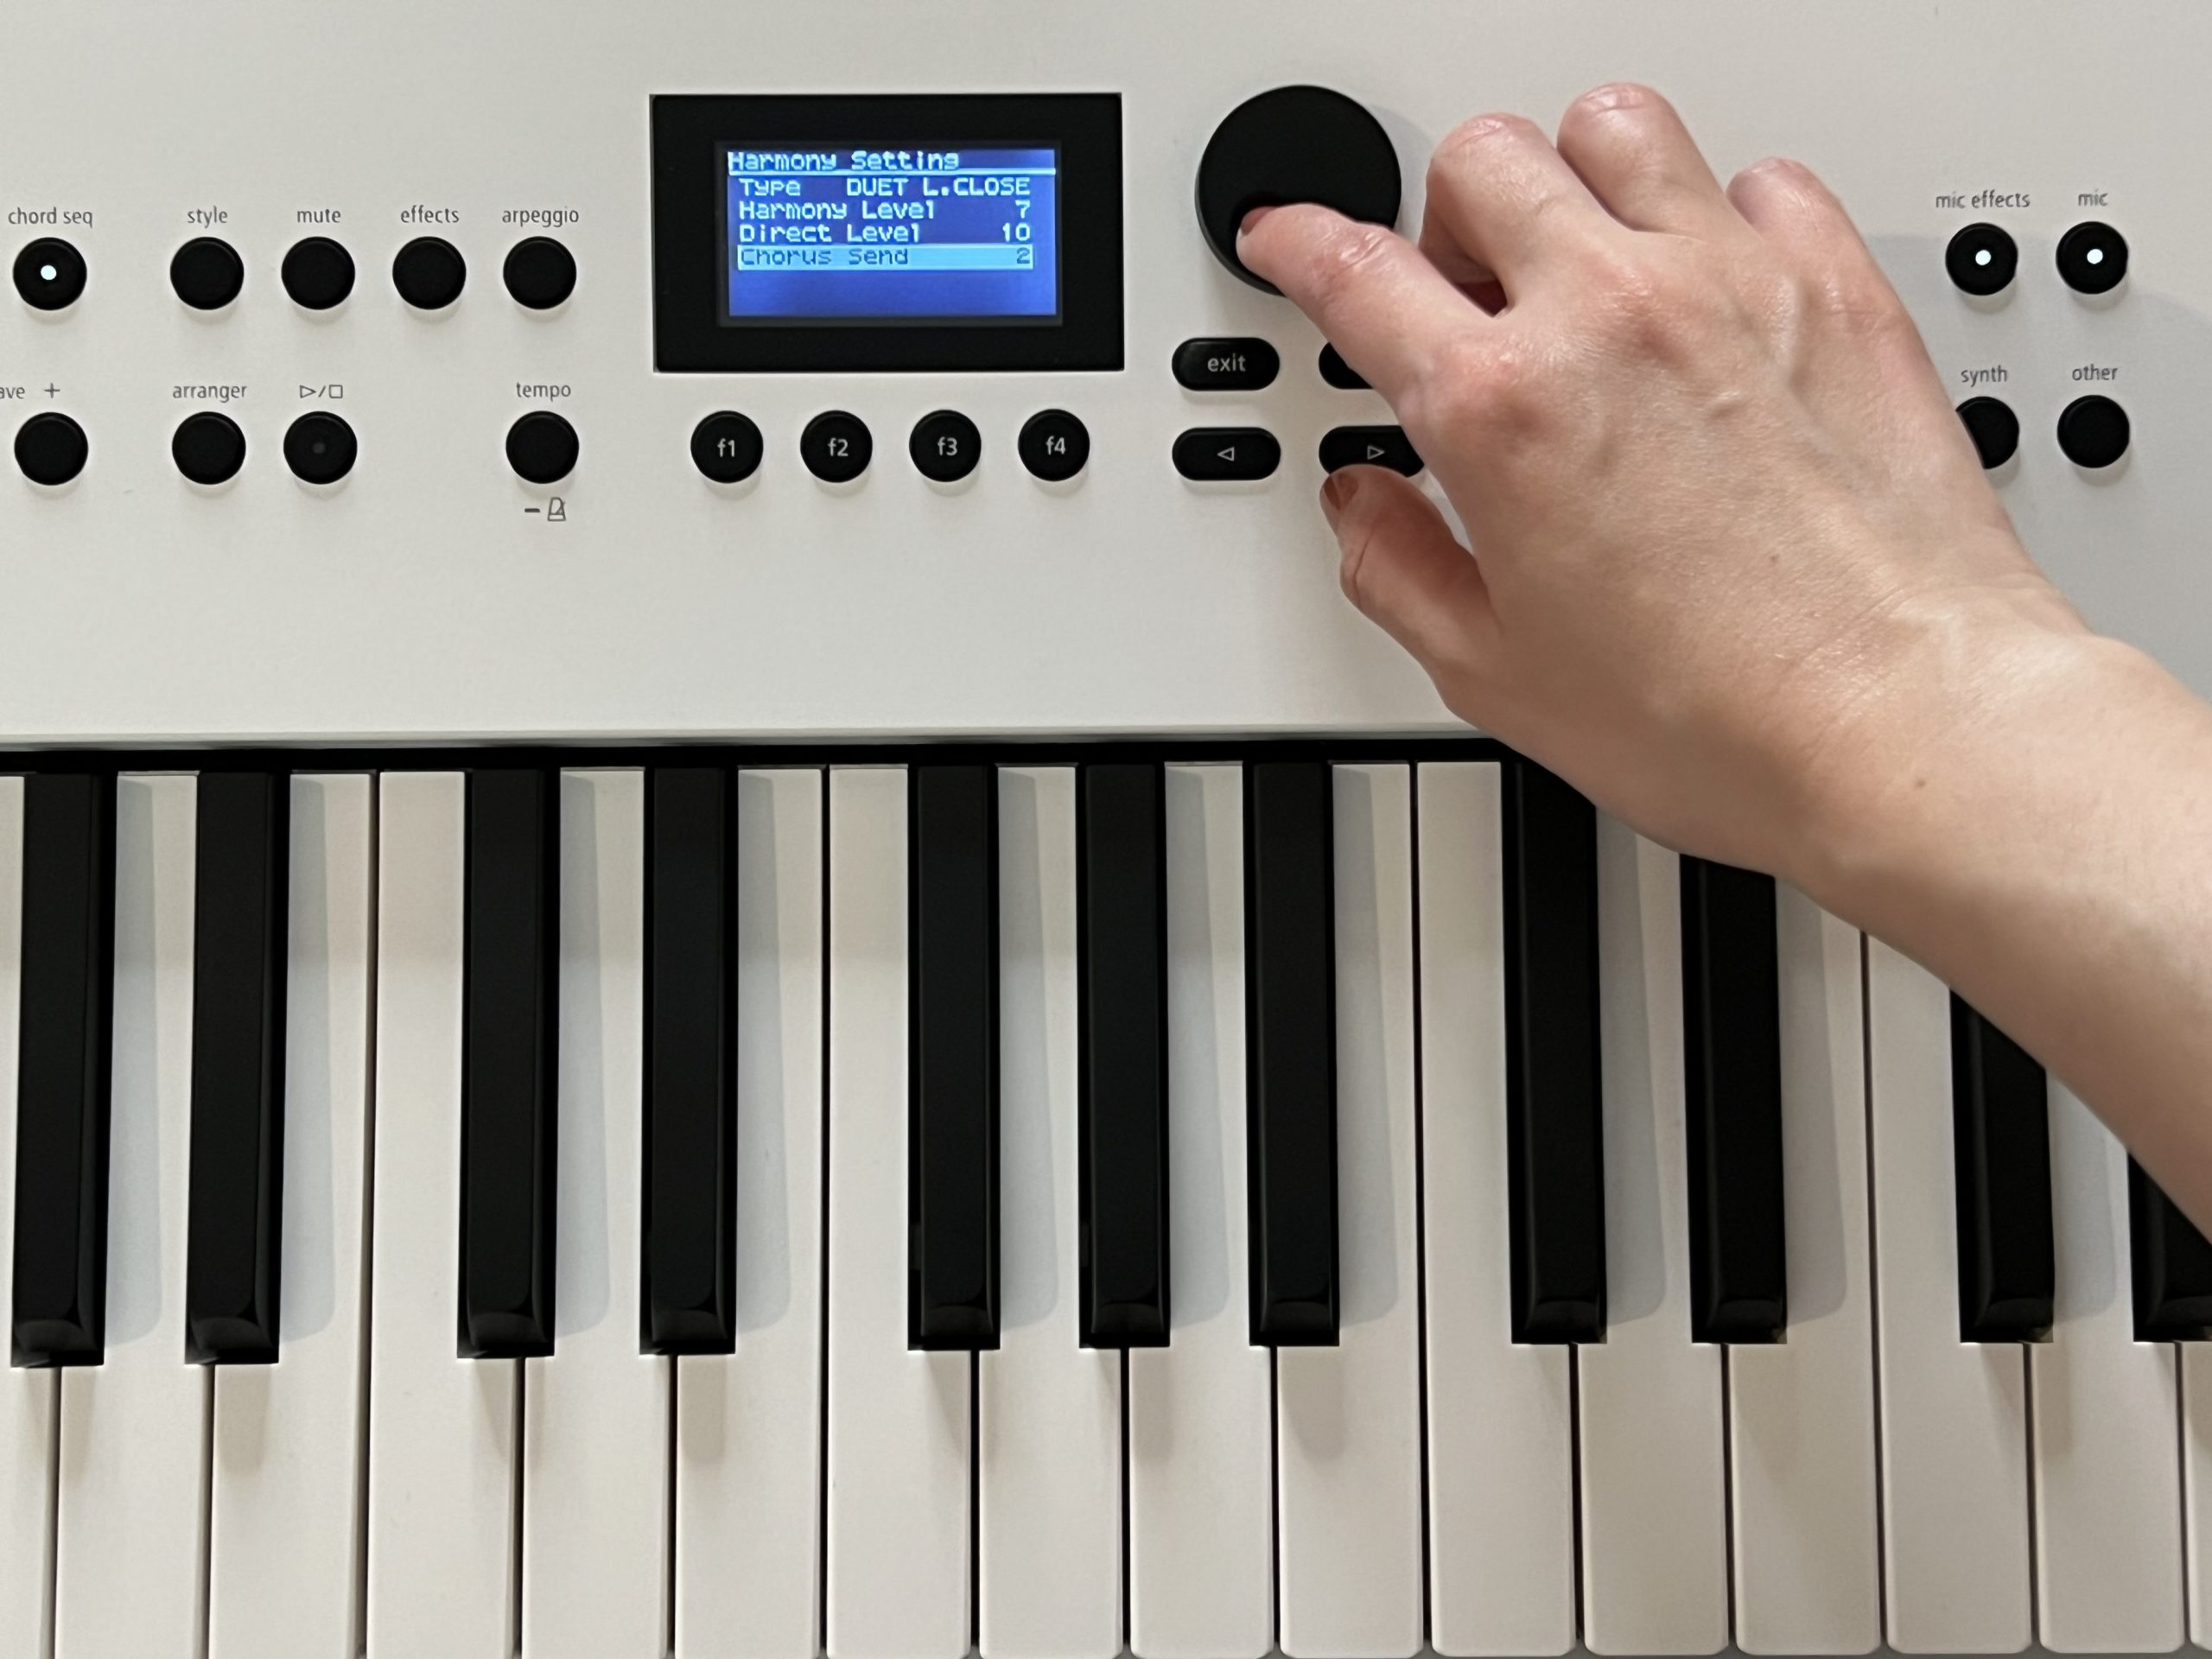
As long as I had the sequenced chords playing in the background, the Harmony effect adapted to the key automatically. I liked the subtle body the Duet L. Close harmony layer provided in the chorus section. I increased the harmony level to 7 and lowered the Chorus Send level to 2 to achieve a more natural vocal blend.
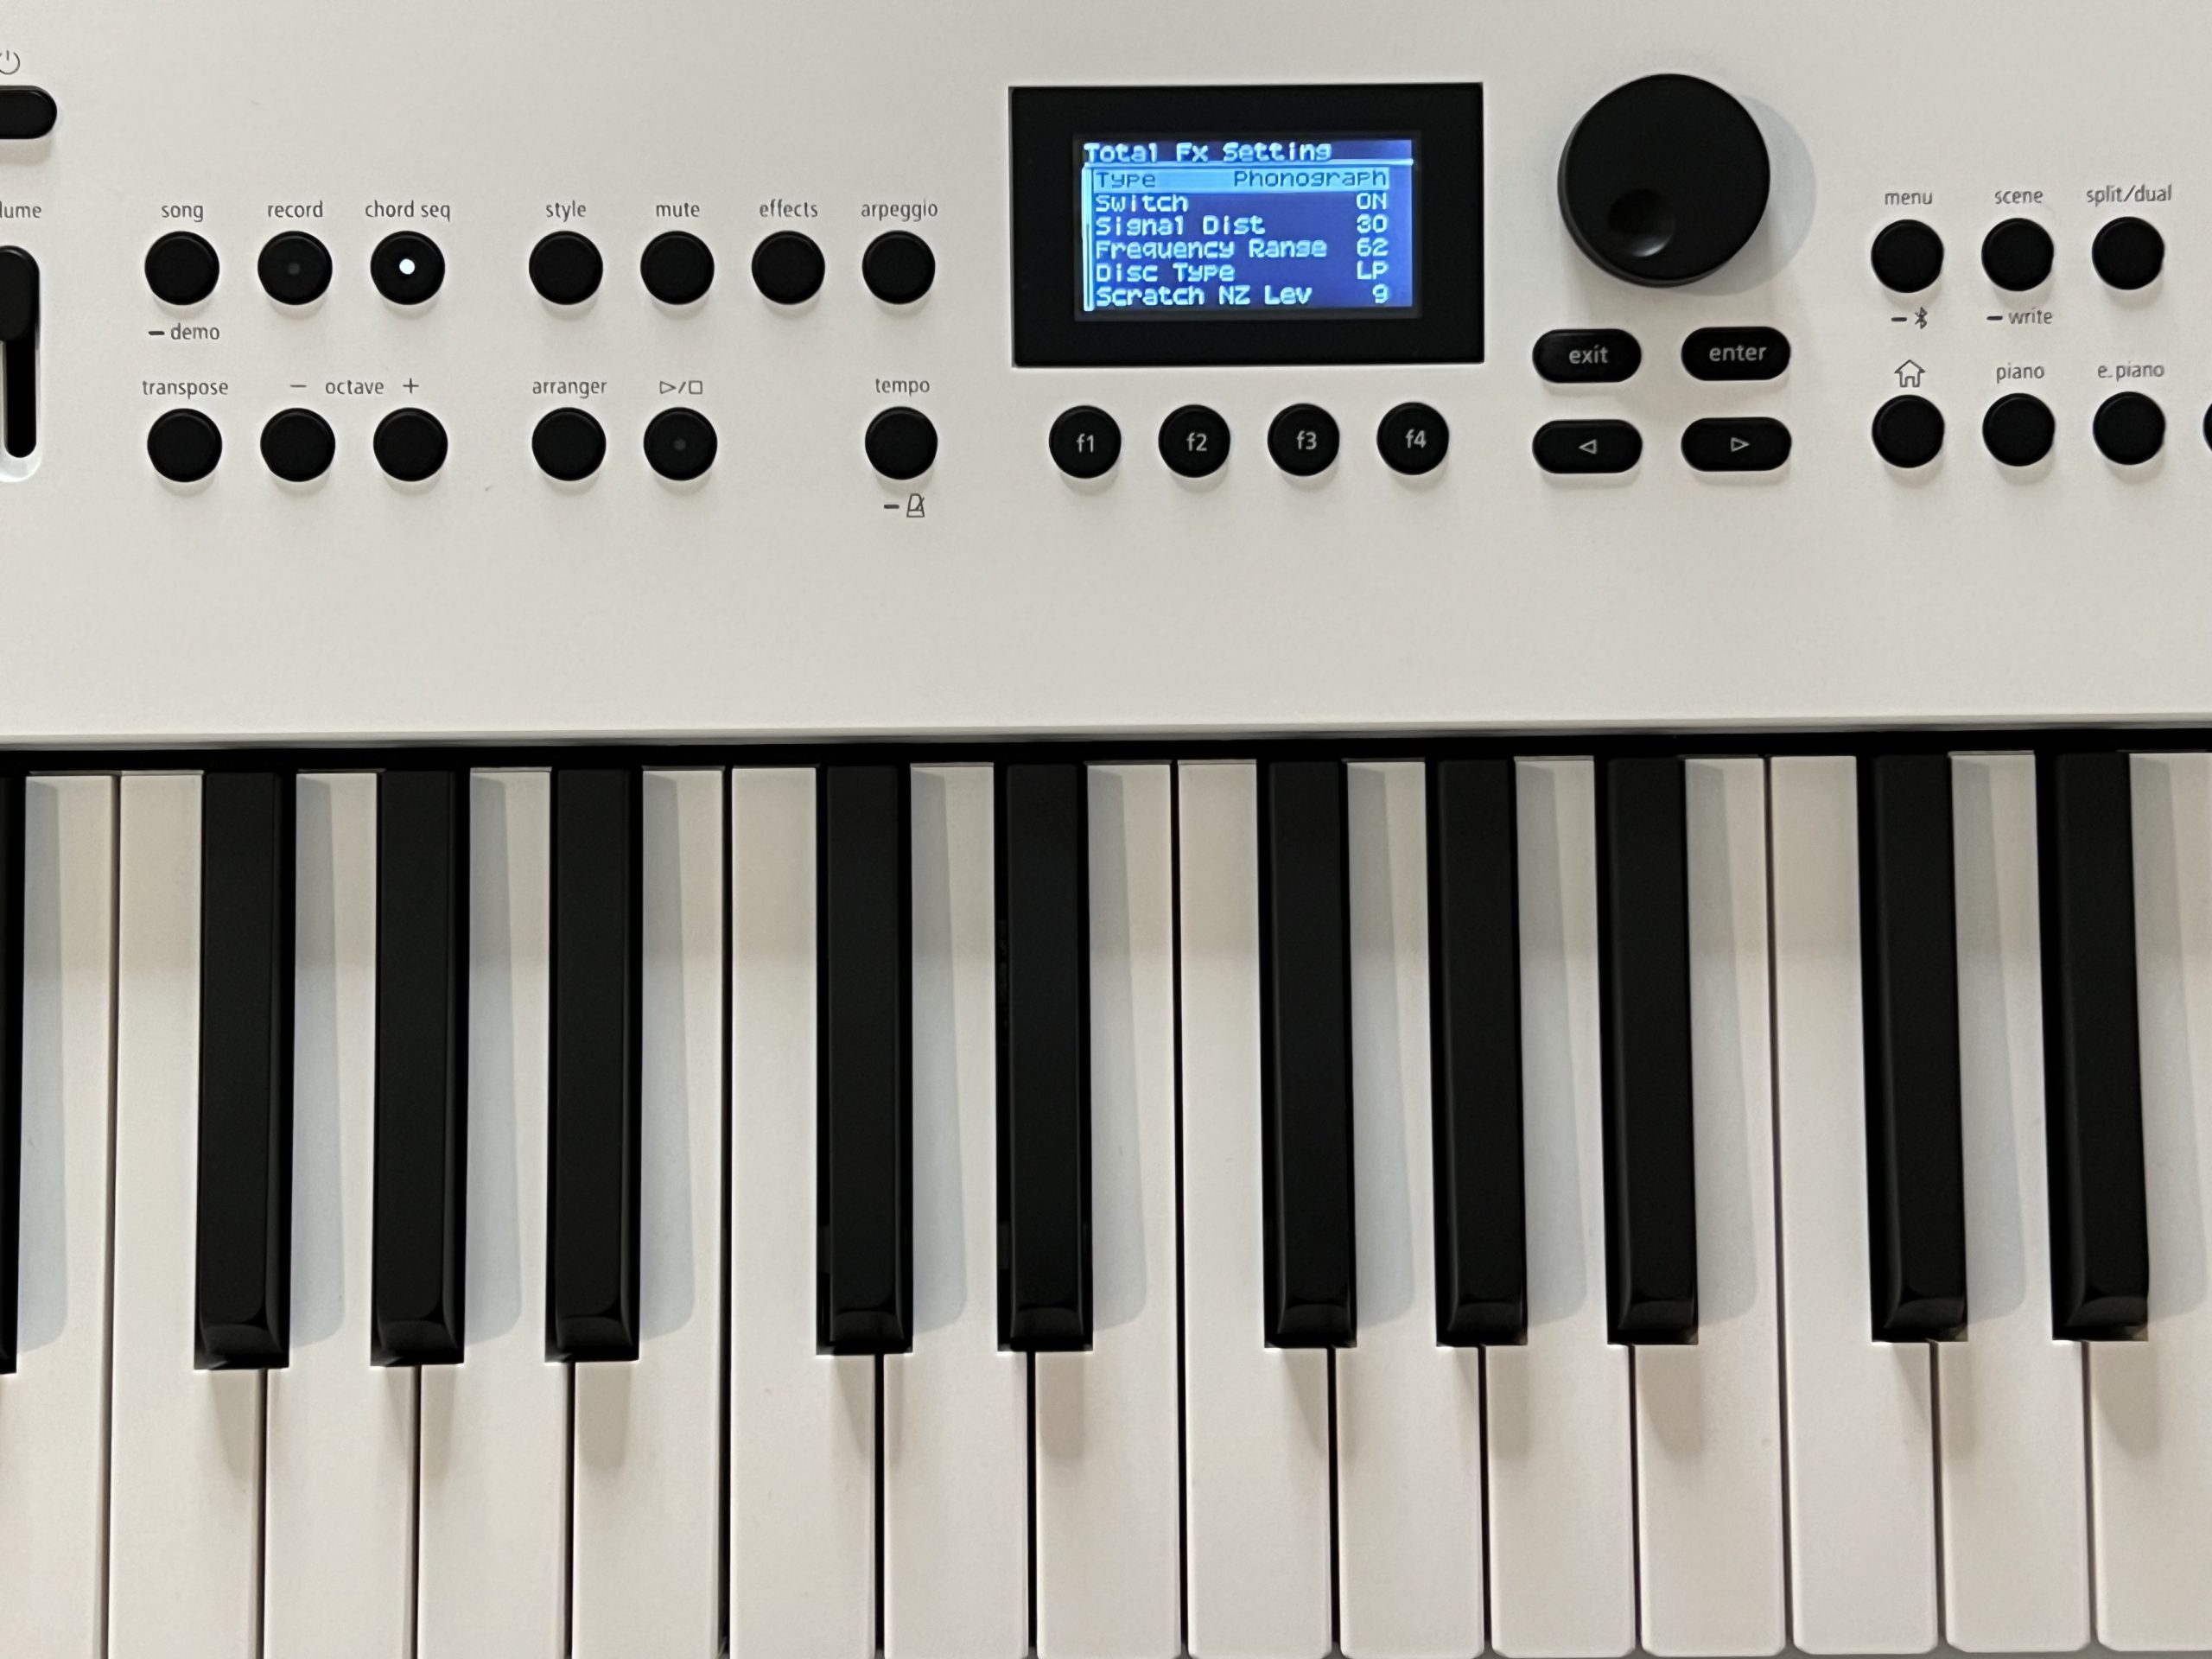
I had one last finishing touch in mind that would add a lo-fi flavor to the overall sound. I pushed the Effects button to hear the Tasty R&B beat play through various audio FX. The Phonograph effect was the right choice, but it sounded much noisier than I wanted it to.
I pressed the F4 button to reach the Effects settings. I reduced the Signal Distortion amount from 50 to 30, Scratch NZ and Dust NZ levels from 50 to 9, and Hiss NZ level from 50 to 6. Although the Wow and Flutter modulations sounded good on the instrumental, I found them slightly distracting when I sang the song. Bringing their levels down to 0 solved the issue. Finally, I adjusted the balance to have the Phonograph effect playing back at 40%.
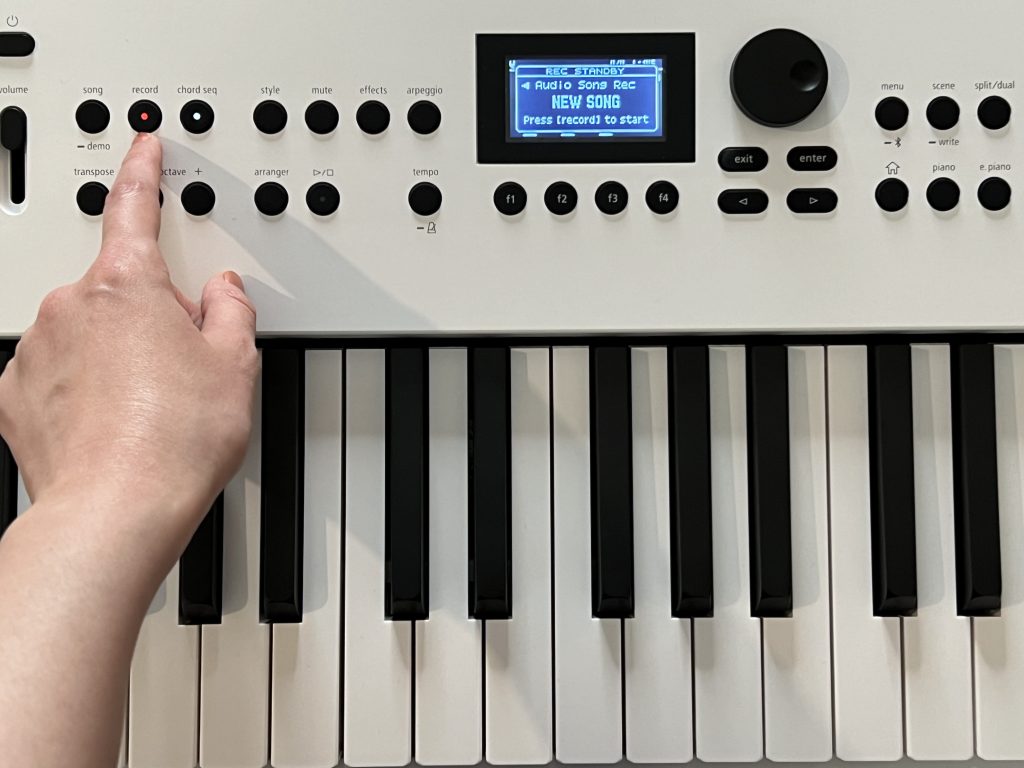
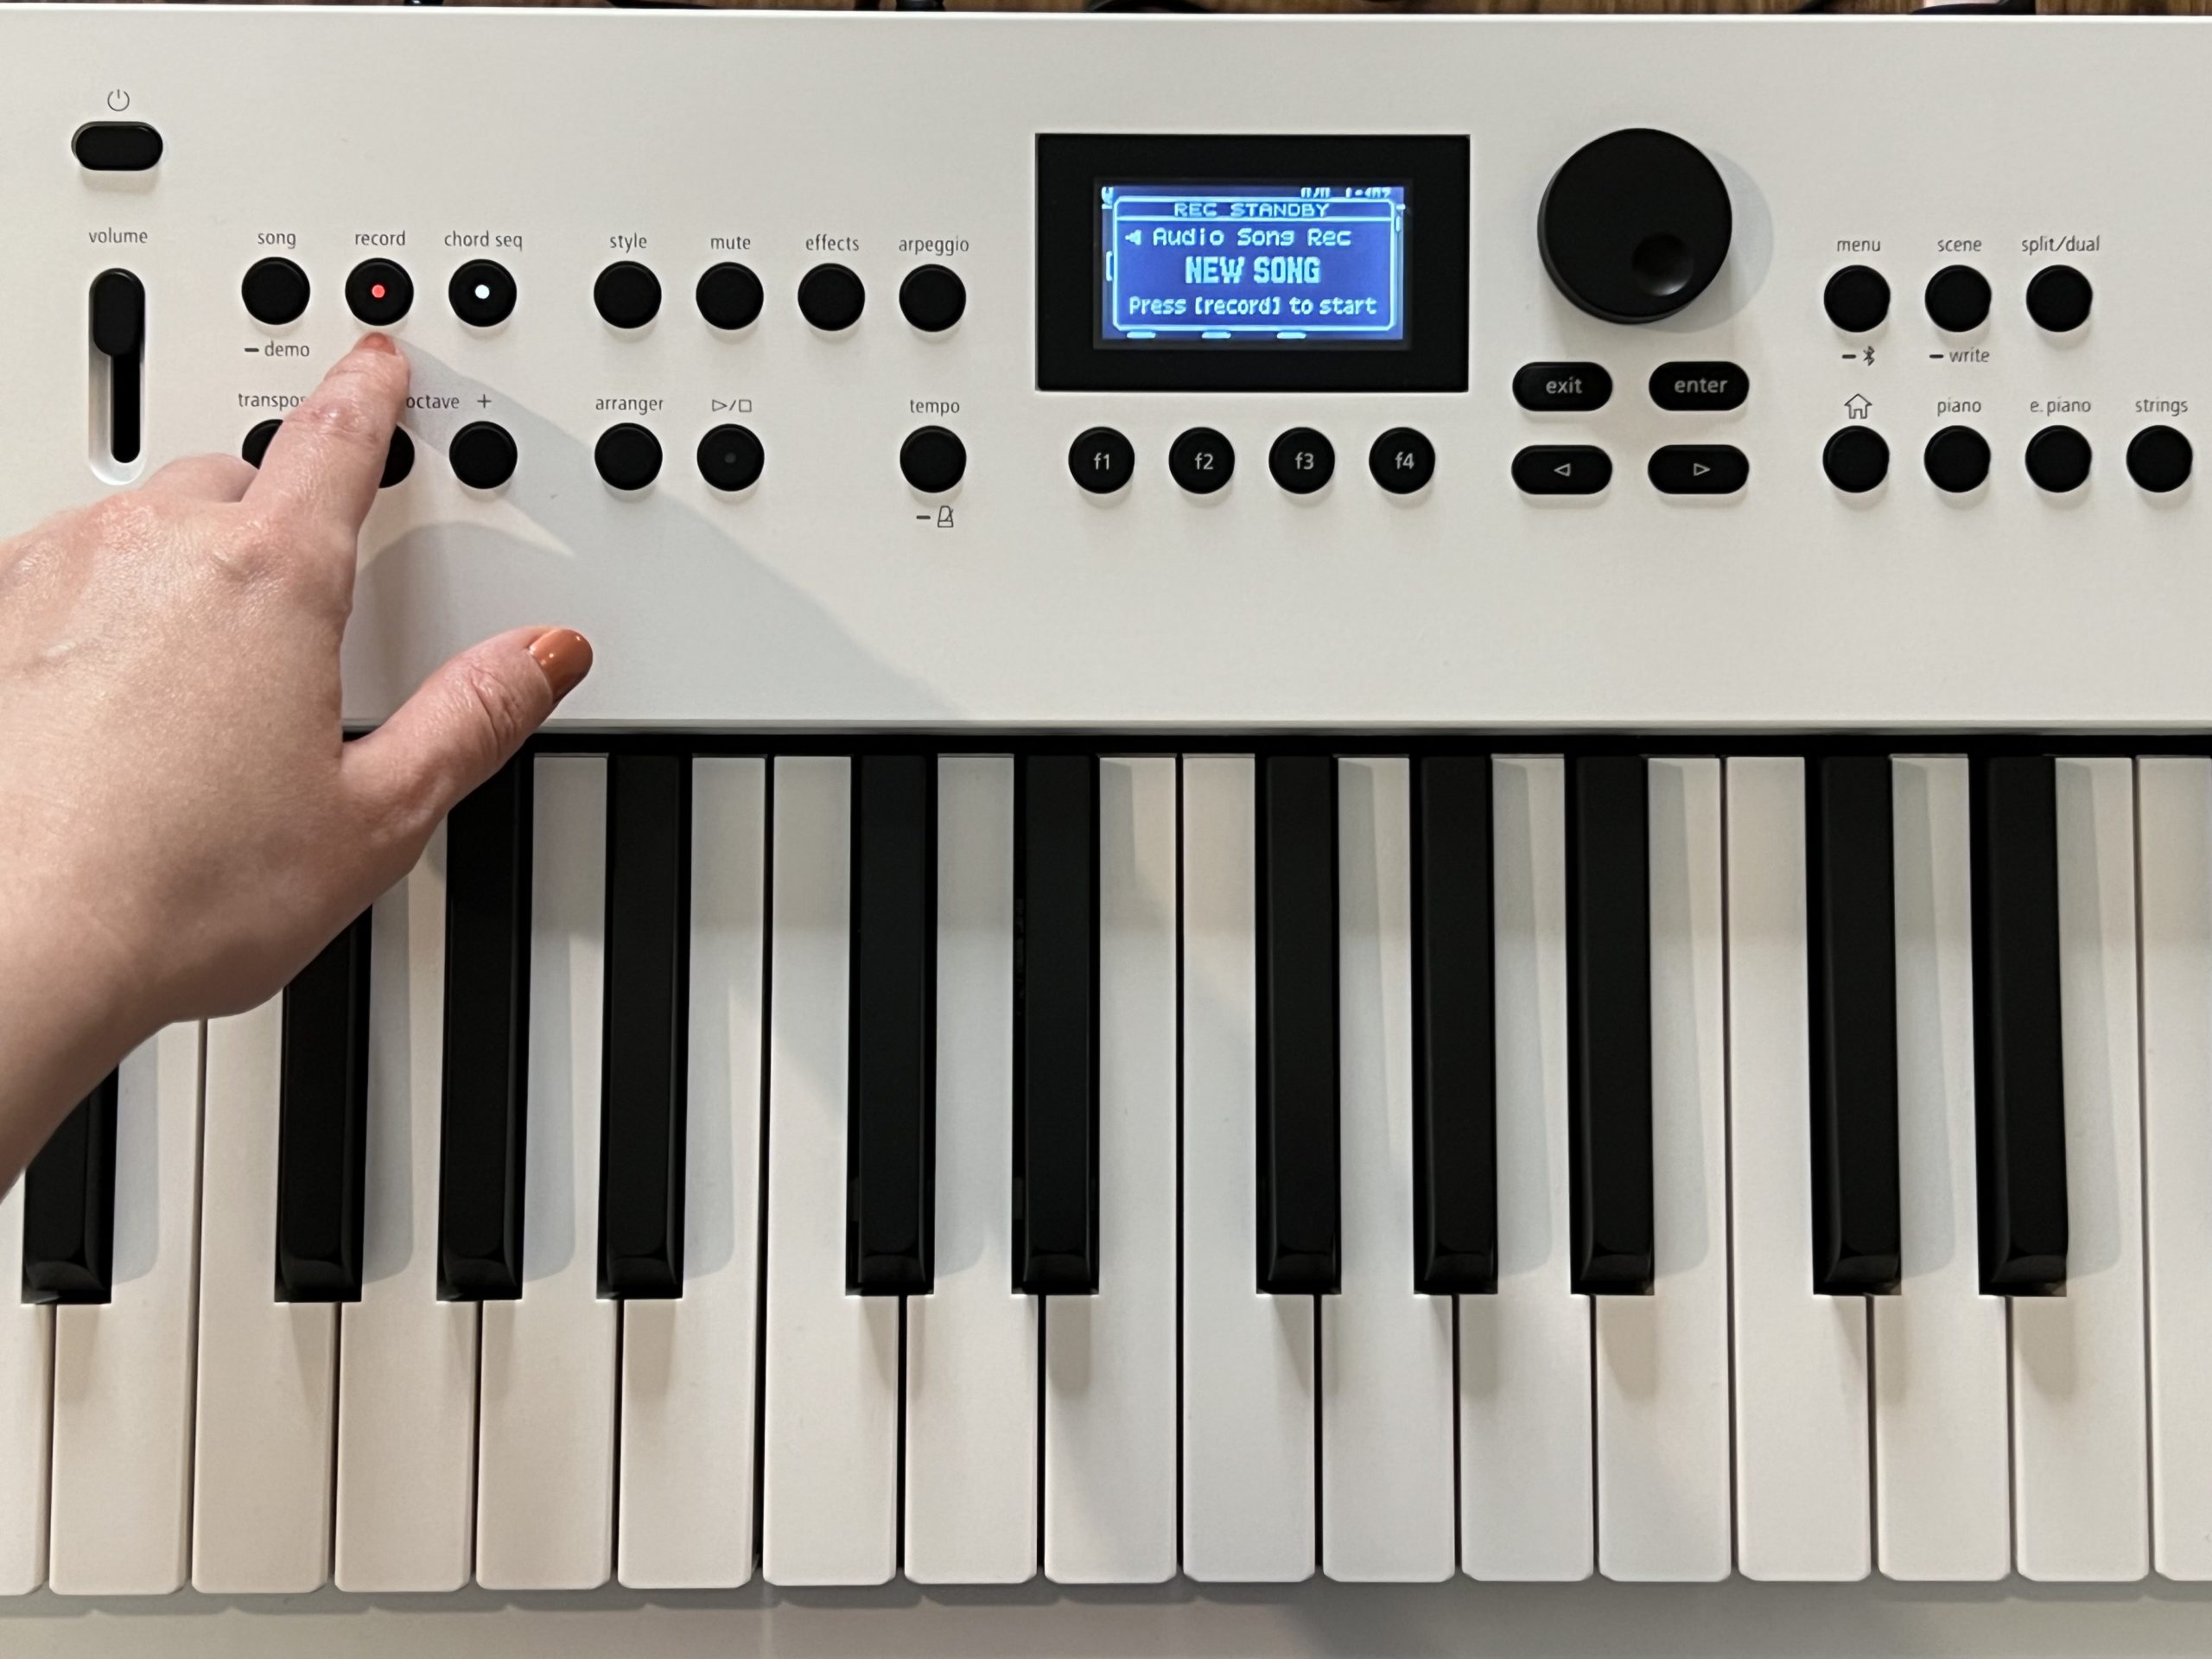
Step 9: Record
While practicing performing the entire arrangement, I adjusted the volume levels of each layer to taste. Finally, it was time to record the audio of the performance into my previously formatted USB flash drive. I plugged it in and hit Record twice to start the take, then hit it again when I was ready to end it. Each time I repeated this ritual, I got better acquainted with the song and the process that led me to it.


