
Making the jump from music lover to music creator is a bold endeavor. It’s a choice that can open up new worlds of creativity and enjoyment, but the first step can often be a bit daunting. A GO:KEYS keyboard makes the transition seamless, allowing you to explore your favorite genres using a single powerful, self-contained musical instrument. From pop to hip-hop and all points in between, unlock your inner musician with the GoGo series of step-by-step guides.
Creating a Pop Song
If you want to write pop songs, you can’t always rely on your piano or guitar. You’ll find your ideas drifting between various tempos without a proper groove for them to latch on to. Your ultimate goal may be collaborating with music producers to add melodies and lyrics to instrumentals. However, no songwriter should walk into the studio unprepared. With a GO:KEYS 5 keyboard, you can create catchy pop songs from the comfort of your home. Here’s how.
Step 1: Choose an Arranger Style
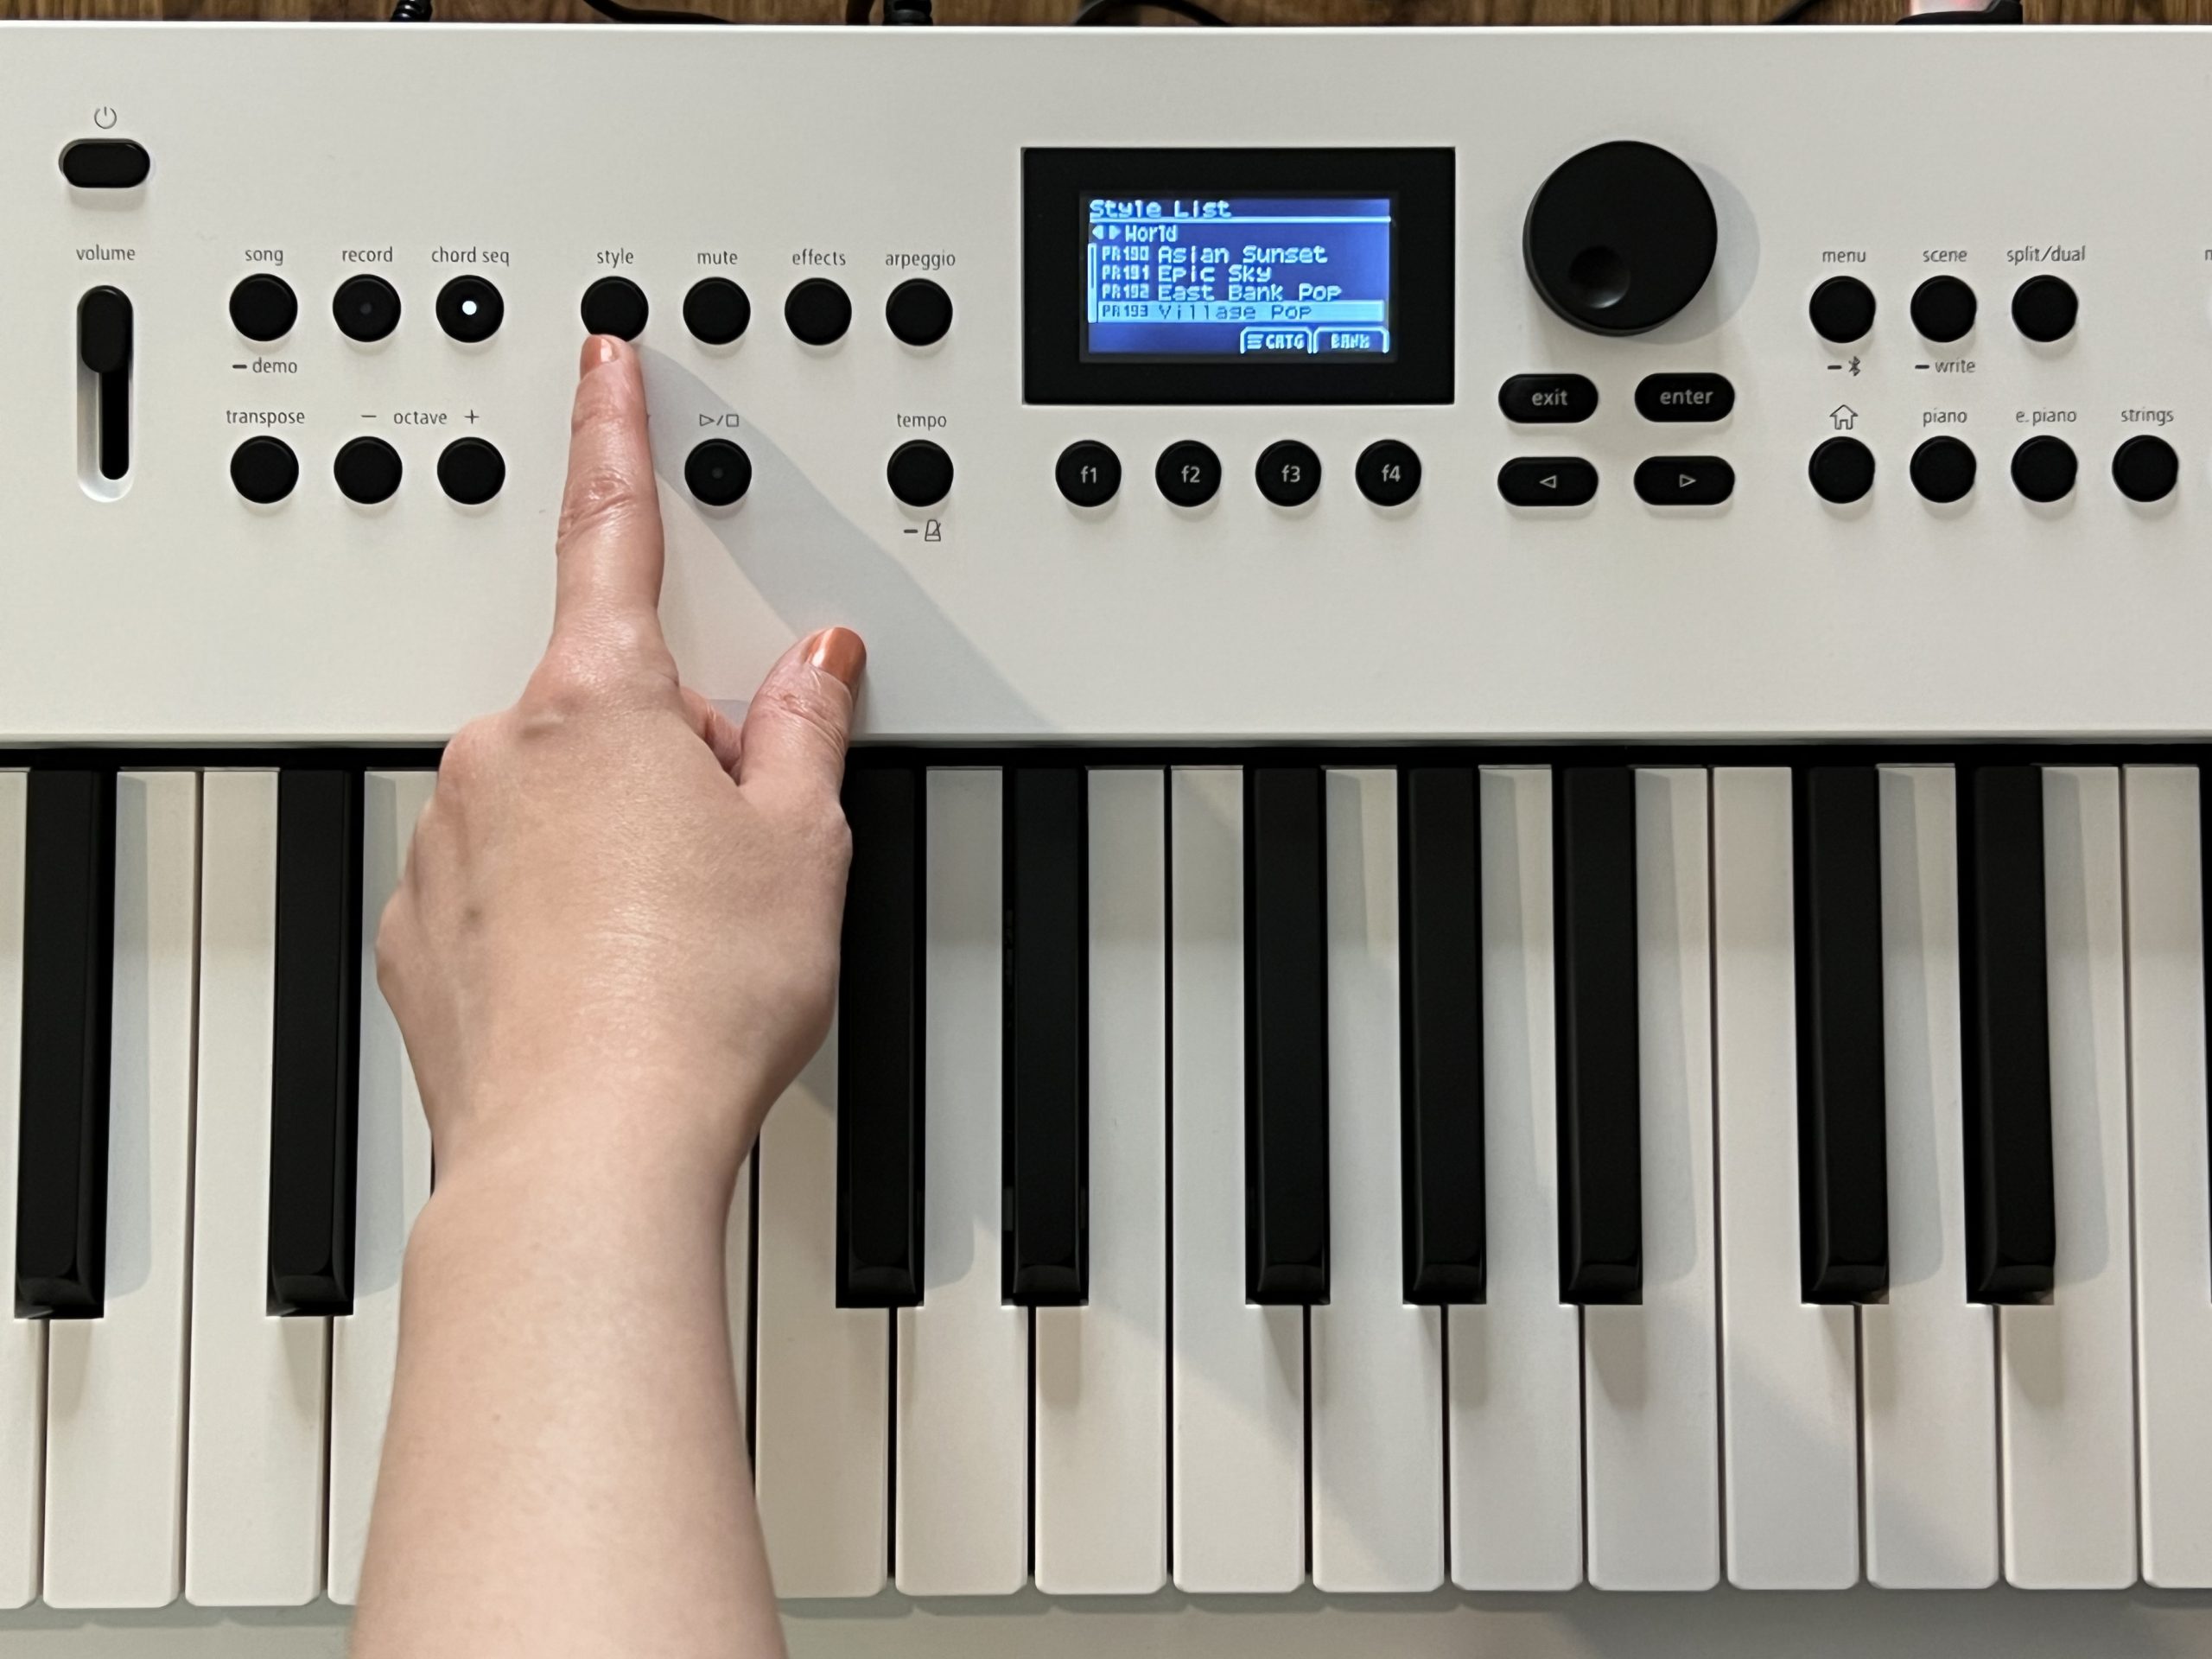
Turn on your GO:KEYS 5 and push the Style button to view the list of instrumentals. The Pop category has many options, but I decided to work with a Latin-inspired preset under the World category: PR 193 Village Pop.
Step 2: Choose a Variation
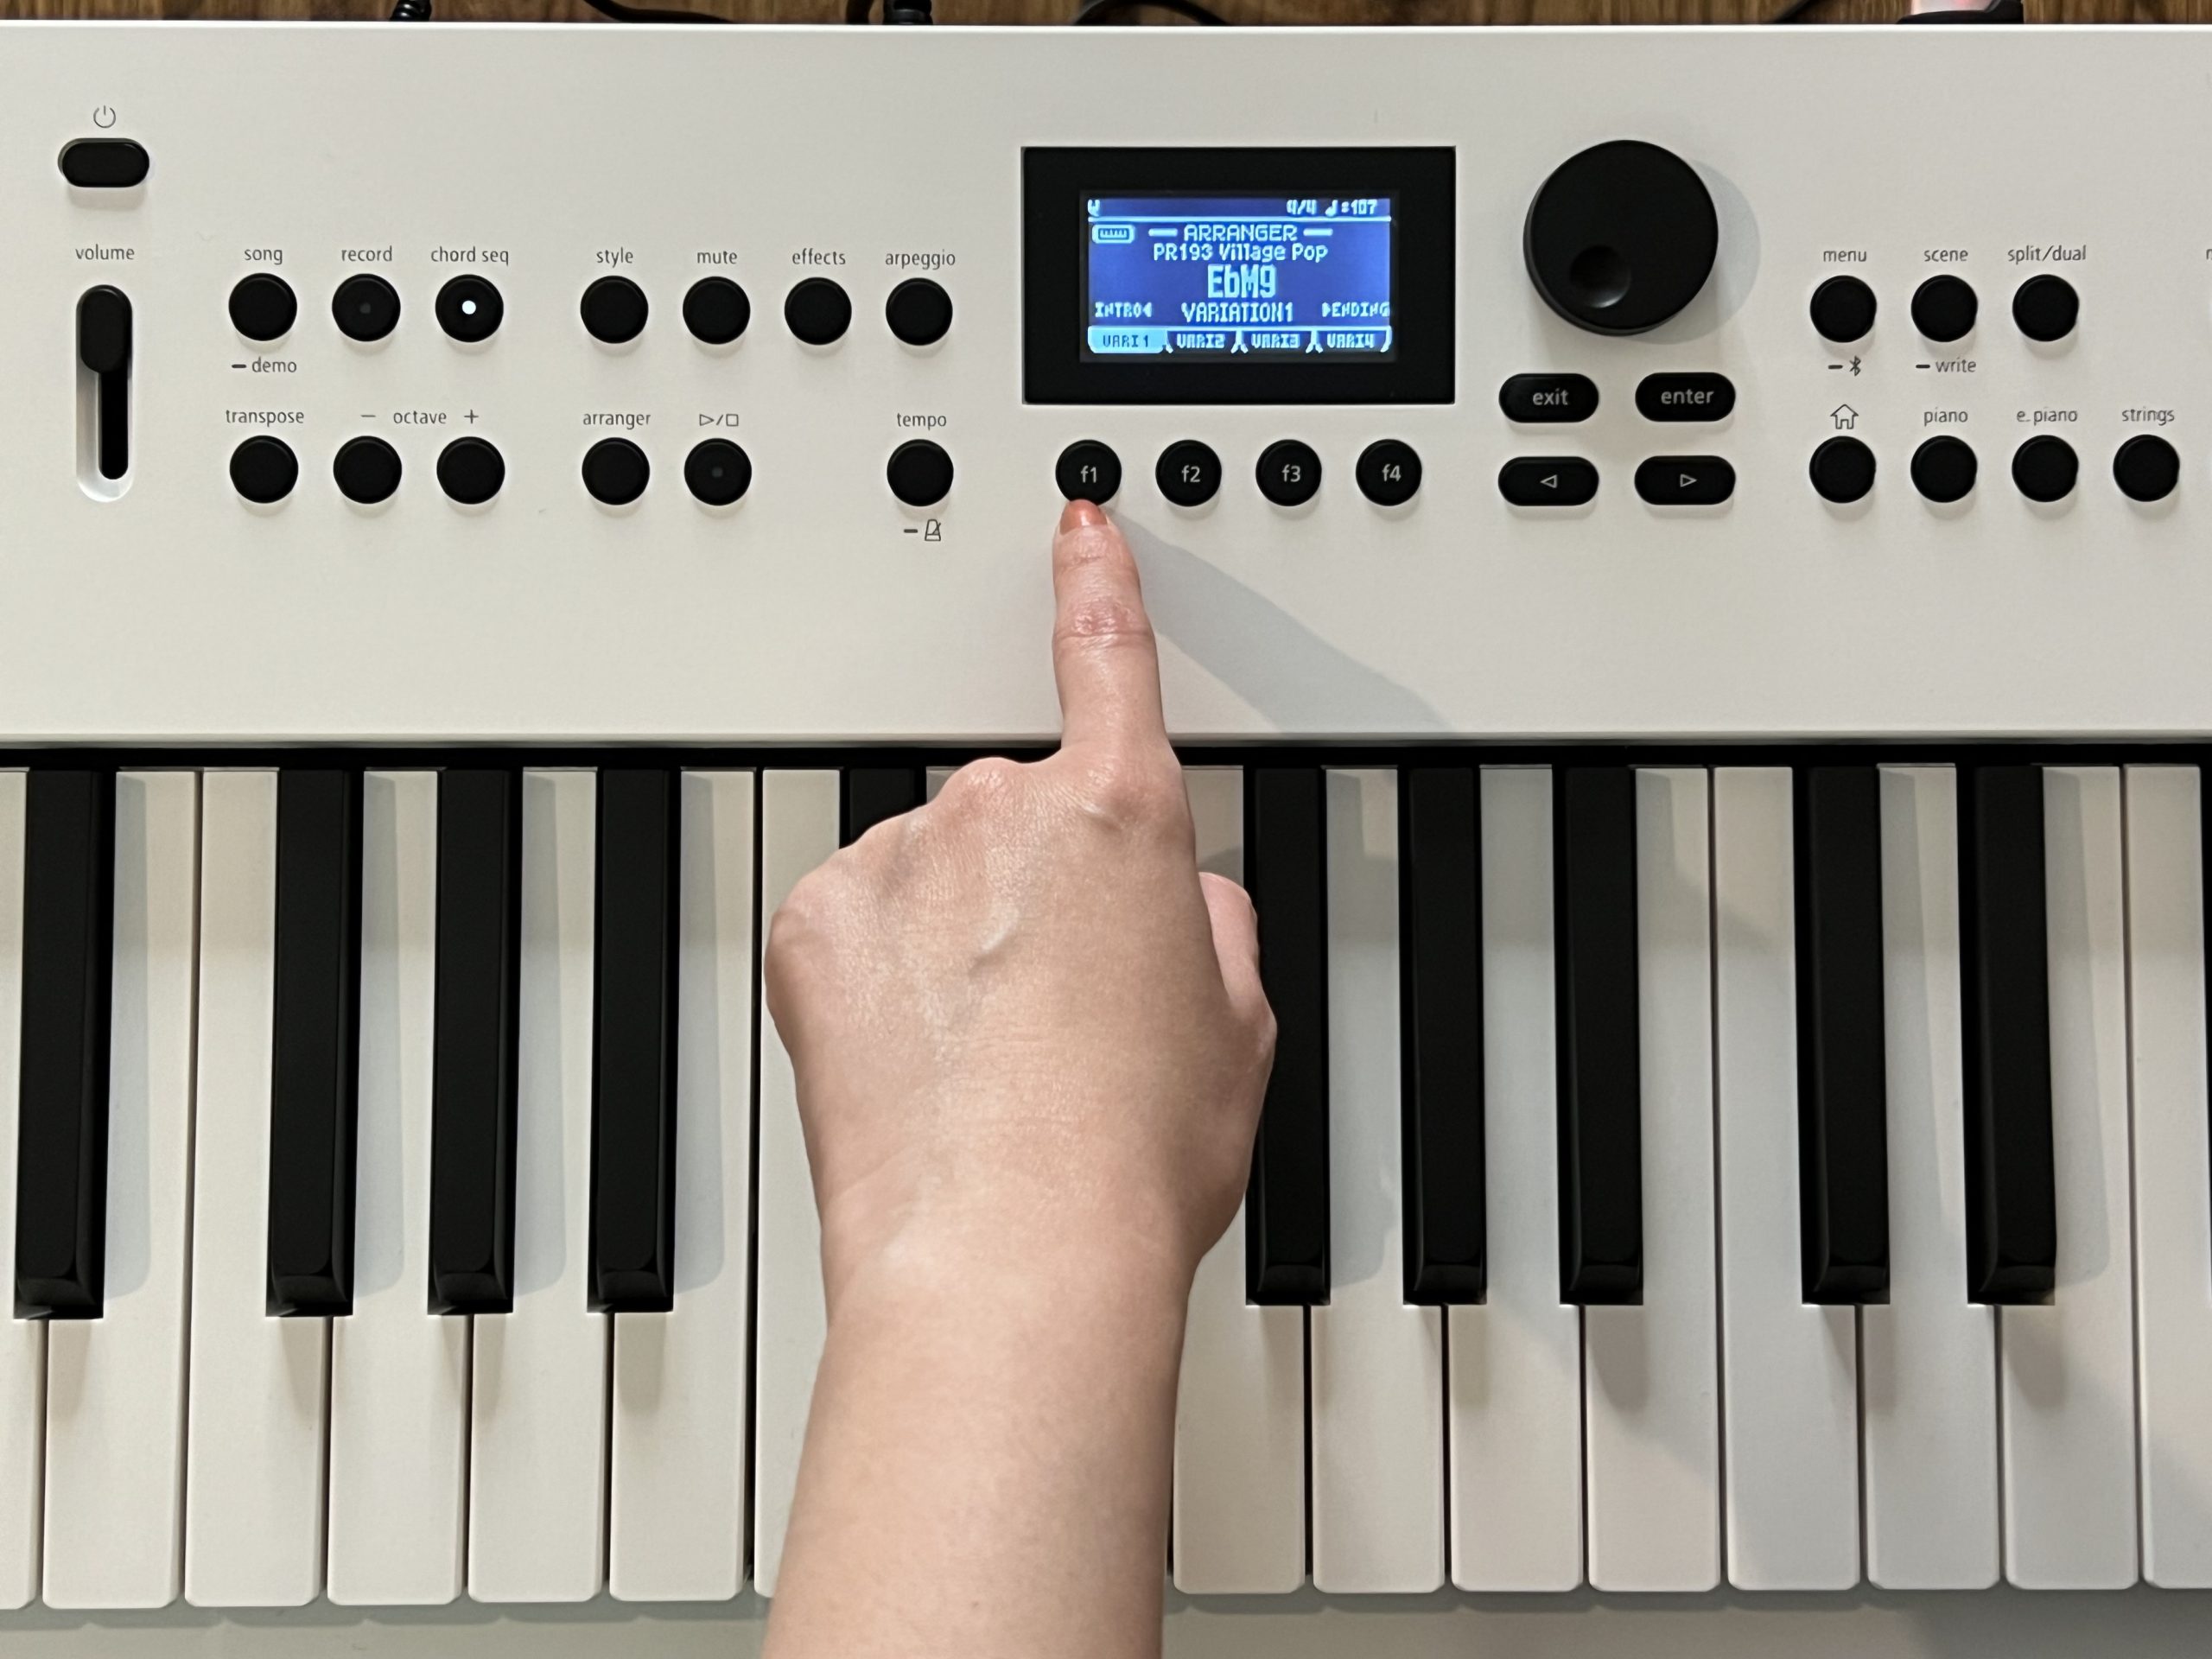
Once you press Enter to select the Style, hit the Arranger button to view the instrumental’s variations. As with all the GO: KEYS instrumentals, the Village Pop preset has four variations. I pushed the Play button and switched between variations to see which one I liked best. In the end, I settled on Variation 1.
Step 3: Choose a Chord Pattern
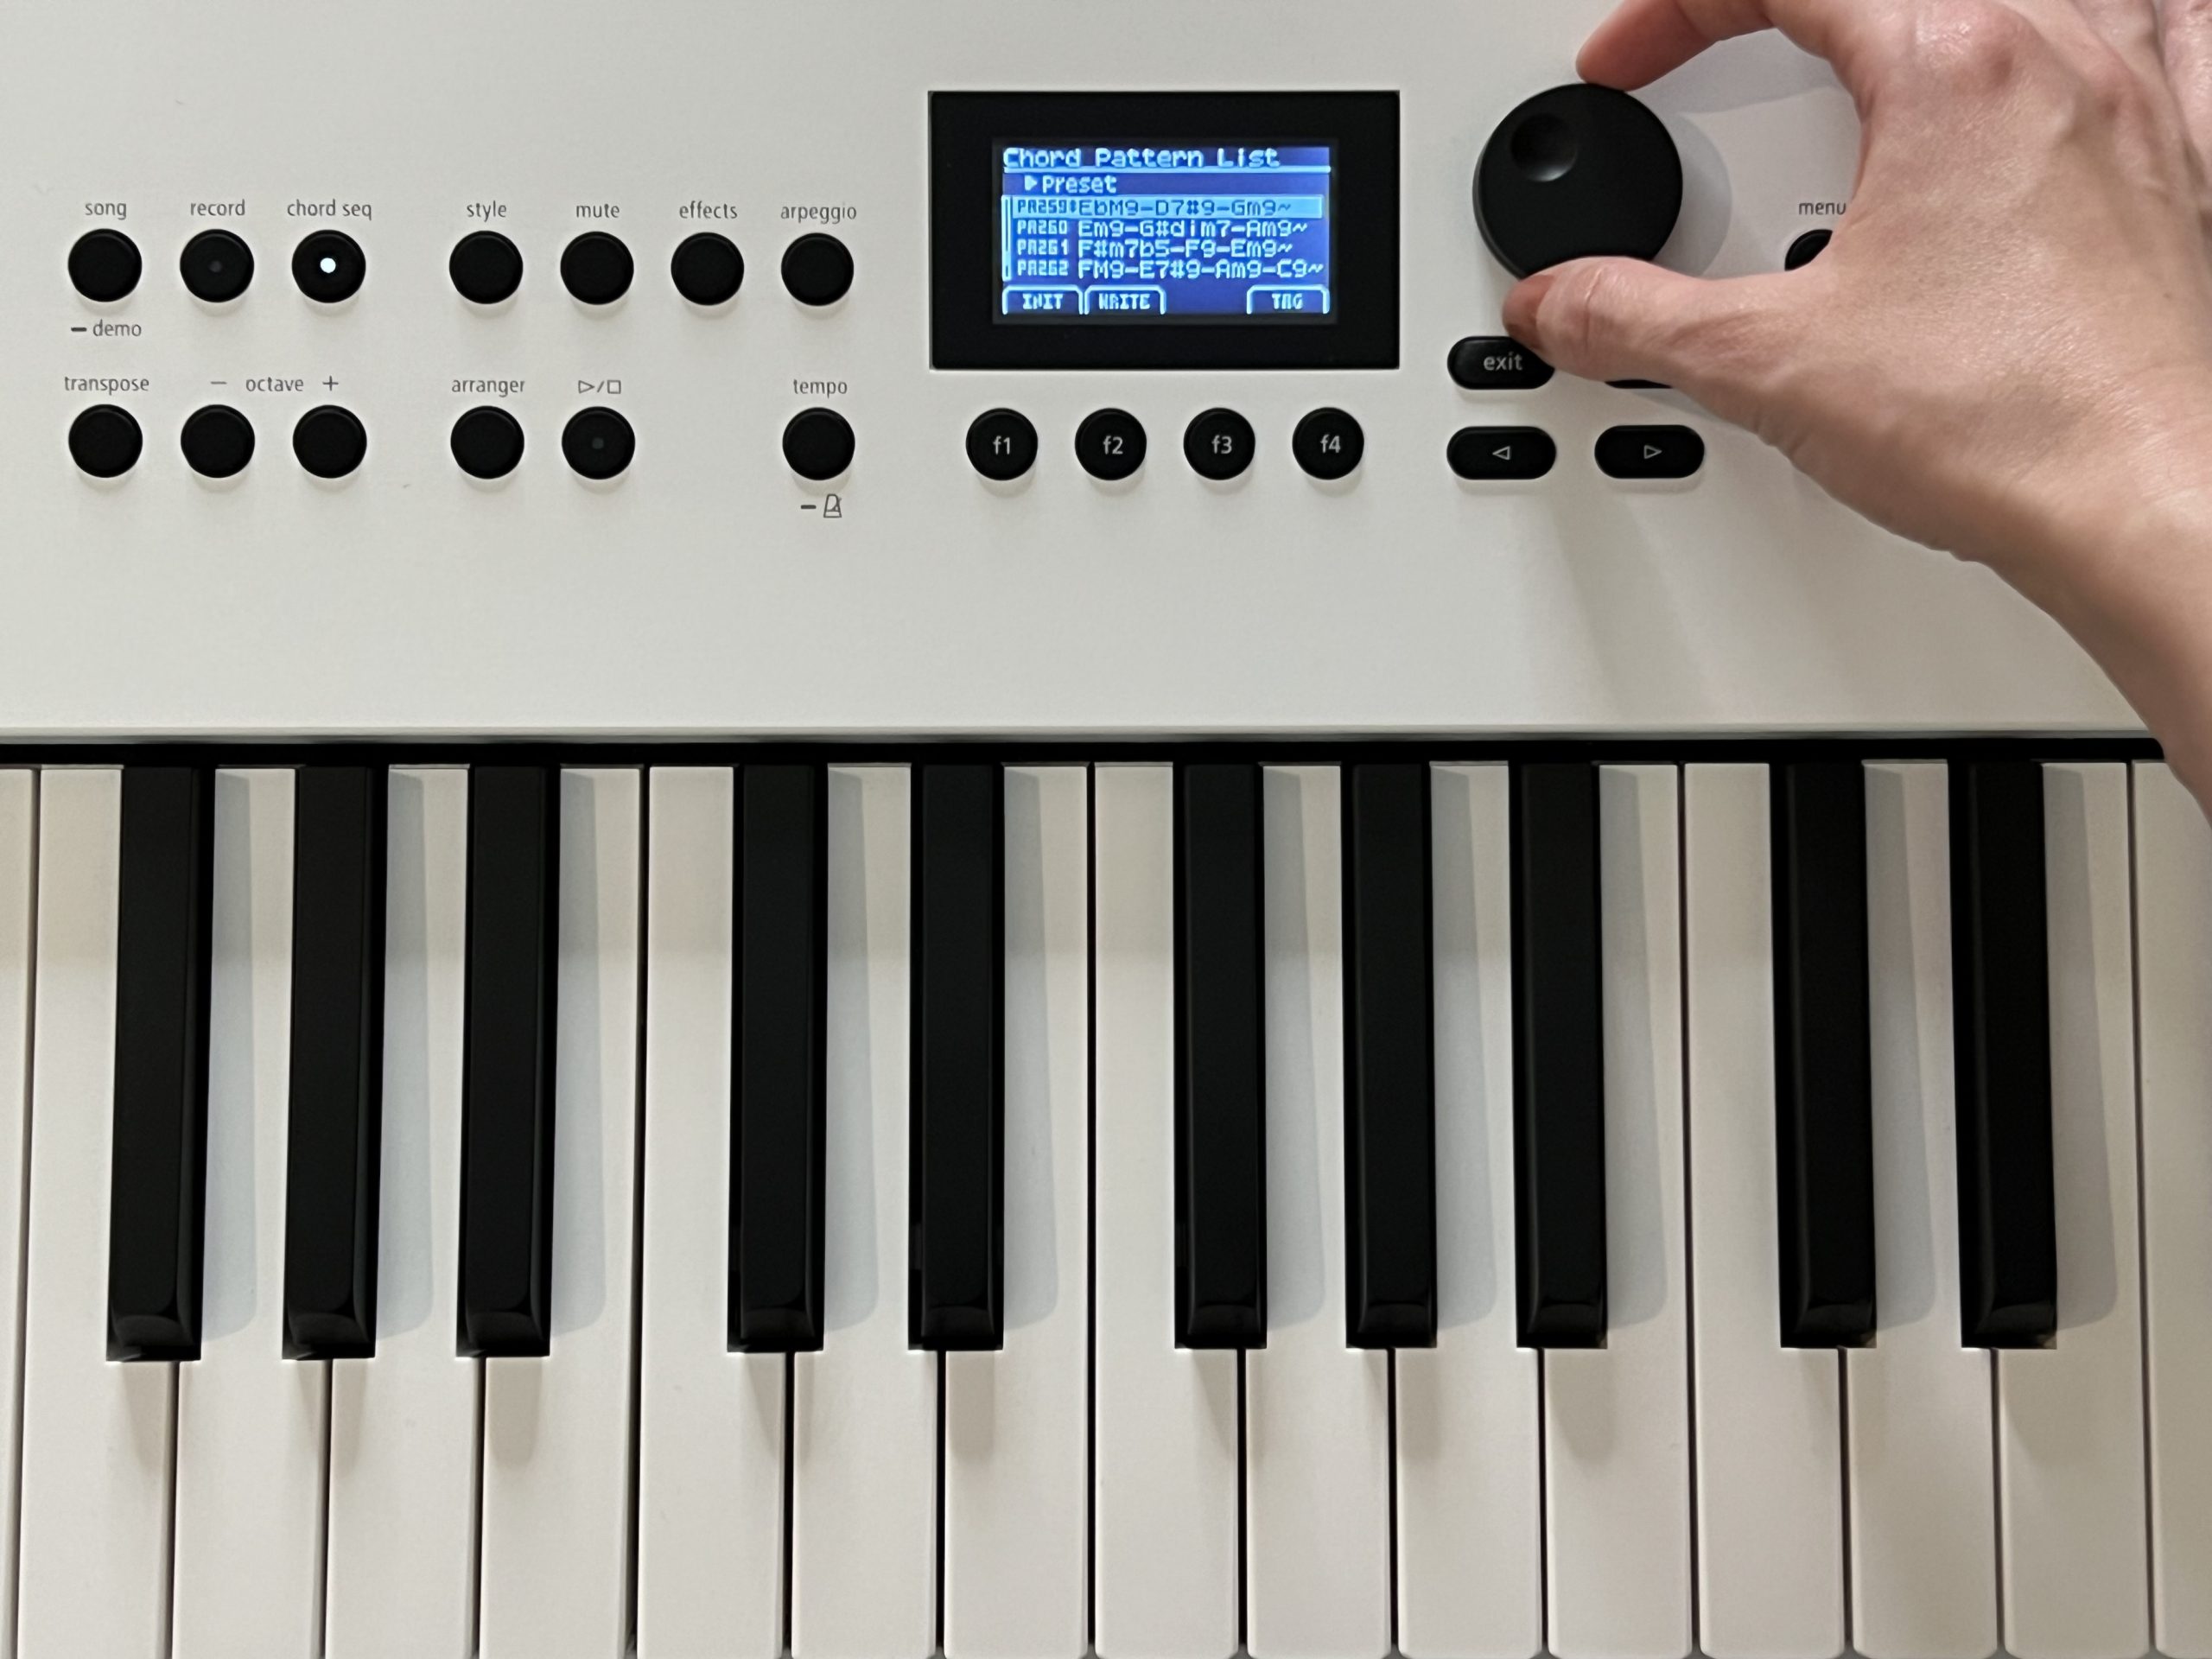
One of the features I like the most about GO:KEYS 5 is the vast Chord Pattern library. The customizable Chord Sequencer helps you preview different chord progressions very quickly. Each instrumental from the Style List adapts to the pattern of your choice seamlessly.
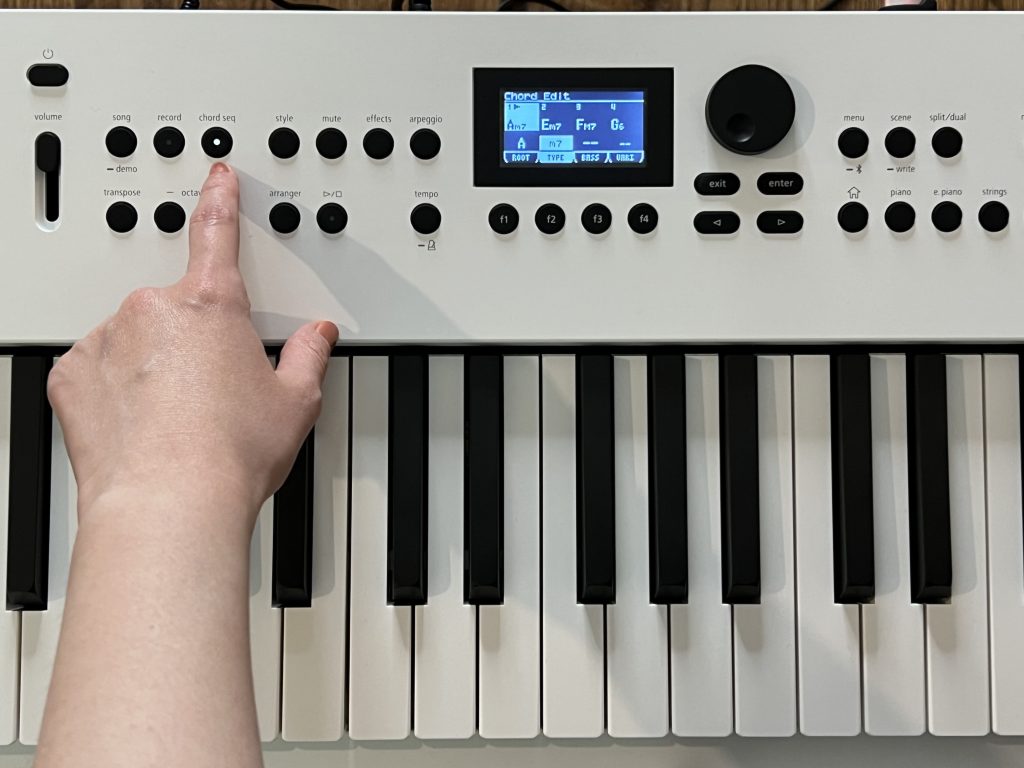
After pushing the Chord Seq button and pressing F3 to view the Chord Pattern List, I turned the Dial knob to browse through. Hearing the Village Pop beat playing back various chords finally led me to the pattern, PR005.
The chords in that preset sounded great, but I wanted to change their order. I used the Enter button and Dial knob to edit each chord. The sequence I ended up with was FM7 – G6 – Am7 – Em7.
I find that an instrumental that instantly captures my attention usually leads to a rapid songwriting process. The chord progressions are just as important as the groove for me to get in the mood. Unsurprisingly, this was the moment when I felt the initial ideas for my song emerging.
Step 4: Choose Tone
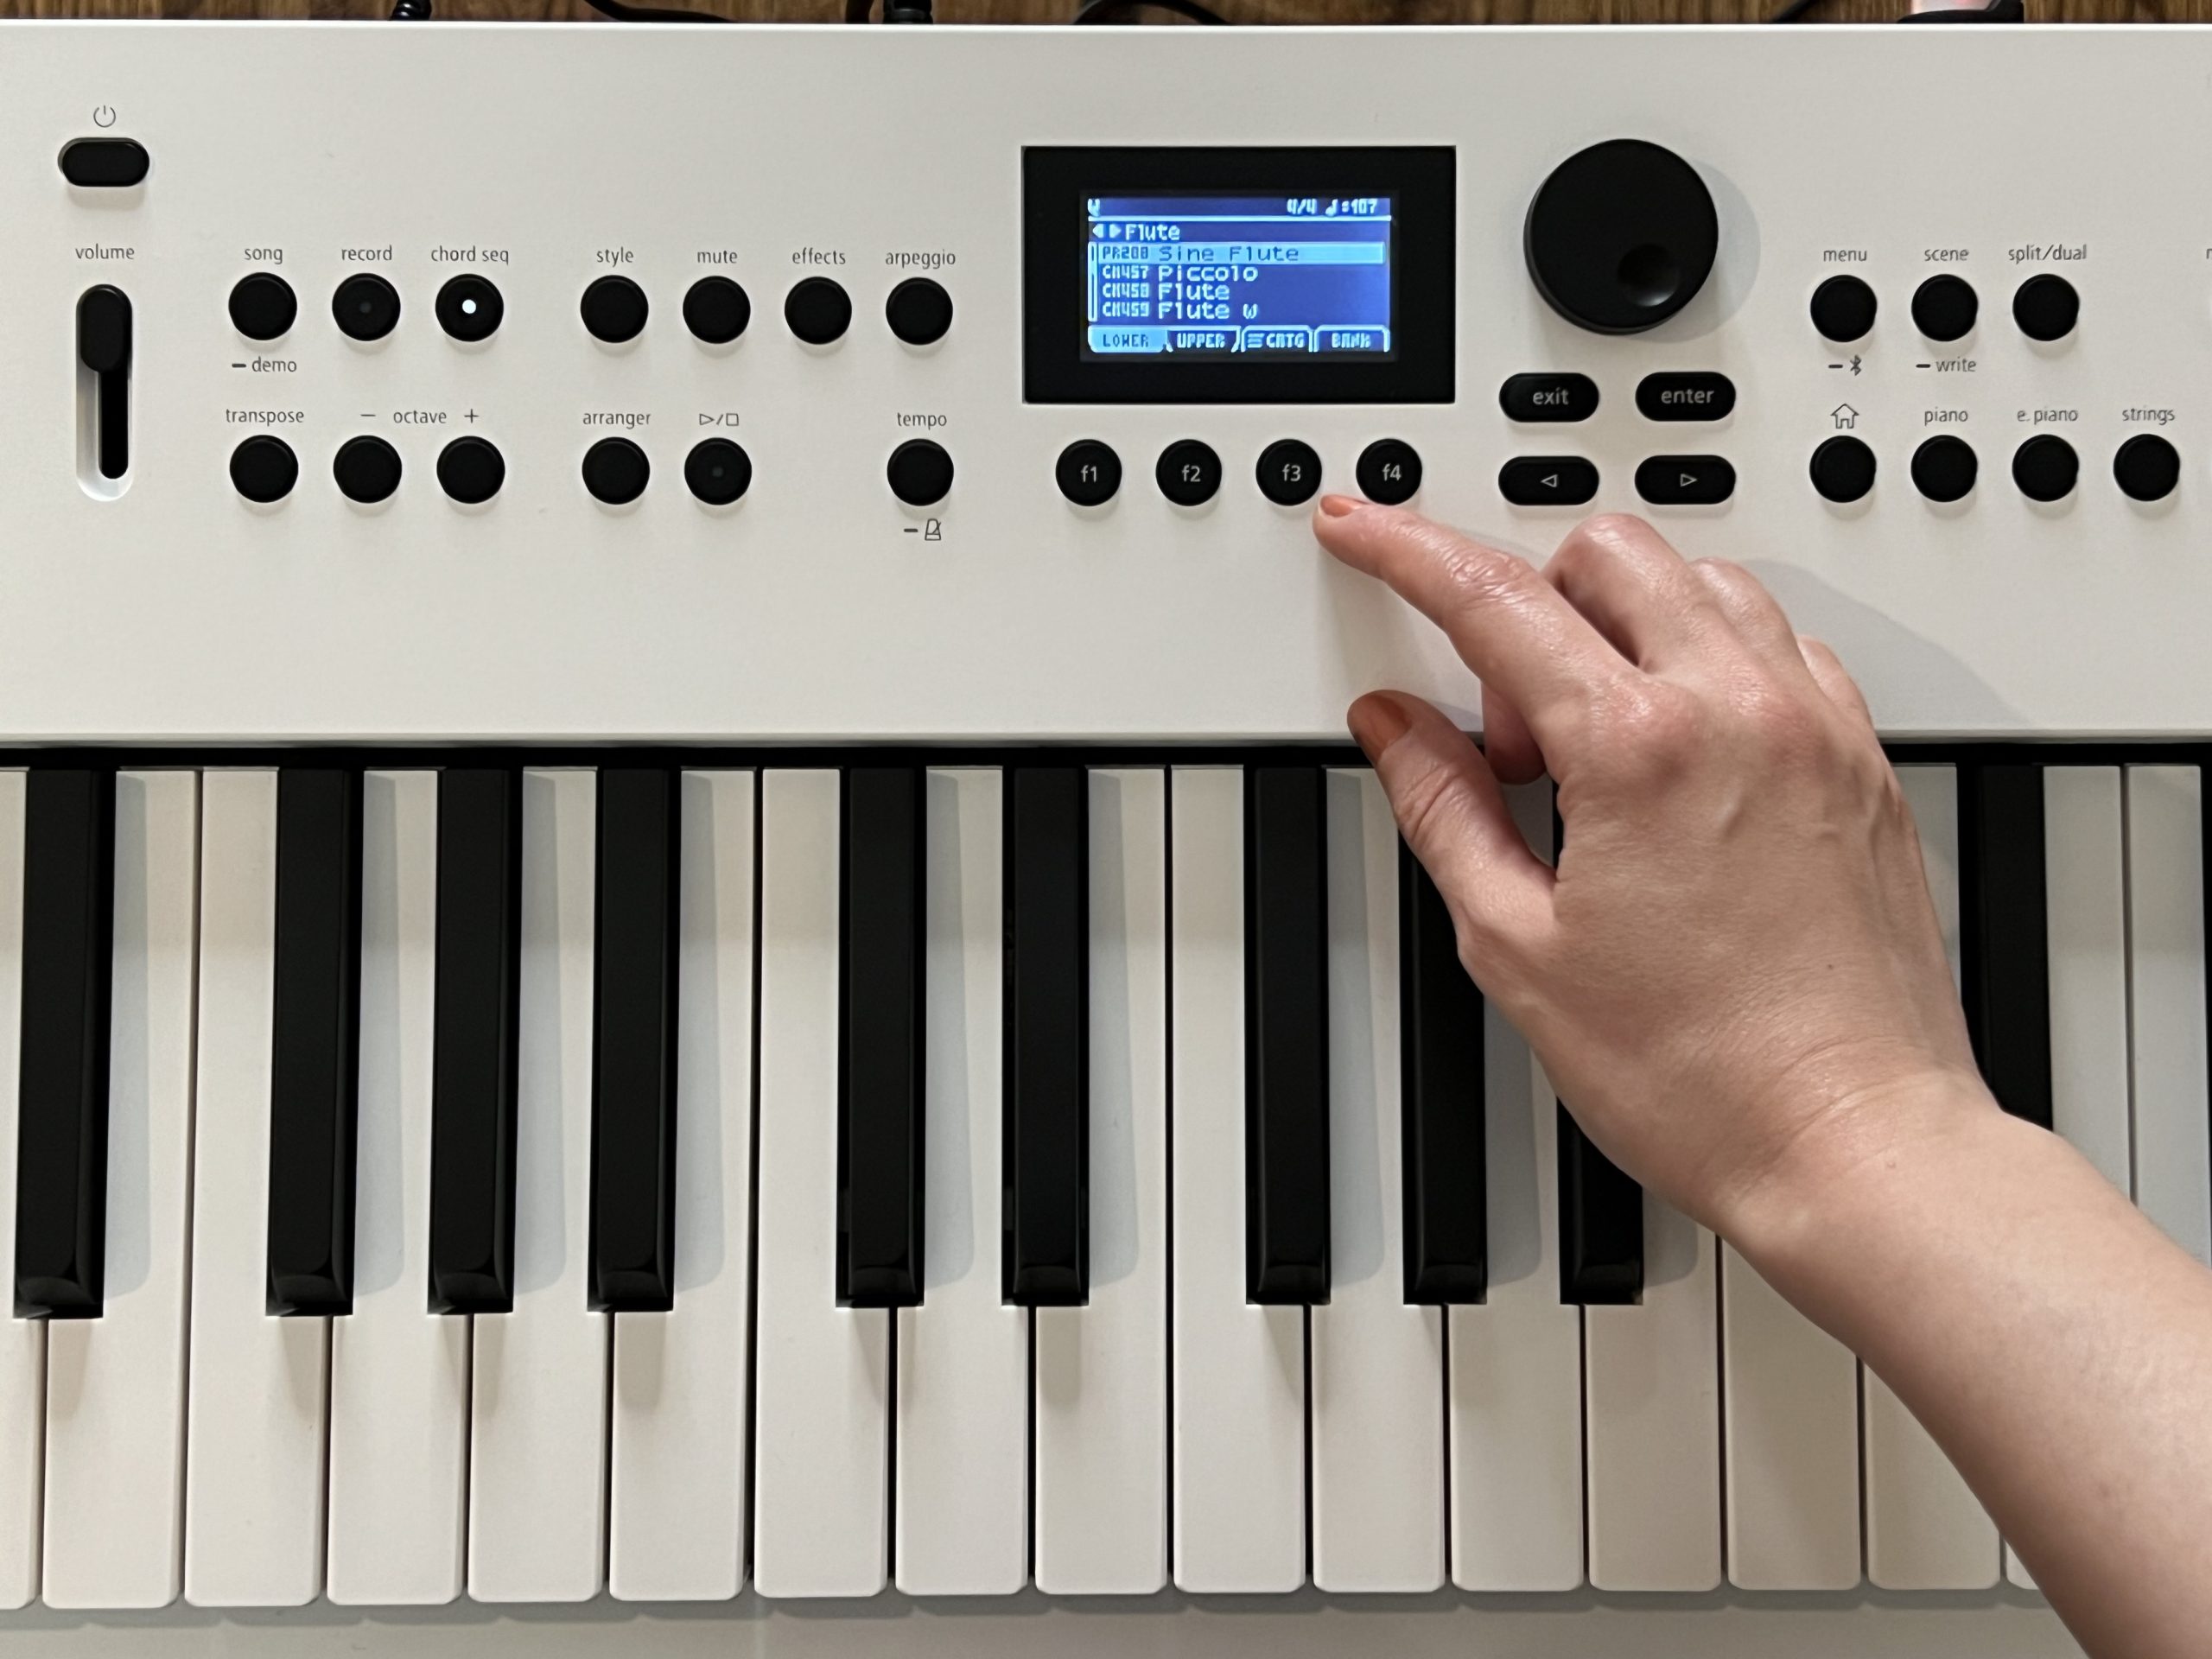
I decided a wind instrument would work well with the Village Pop Style. I pushed the Other button and pressed F3 twice to view the Tone Category List. Under the Flute selection, I found the PR288 Sine Flute preset. It was tailor-made for Village Pop but wasn’t rhythmically exciting enough for my taste.
Step 5: Edit Tone
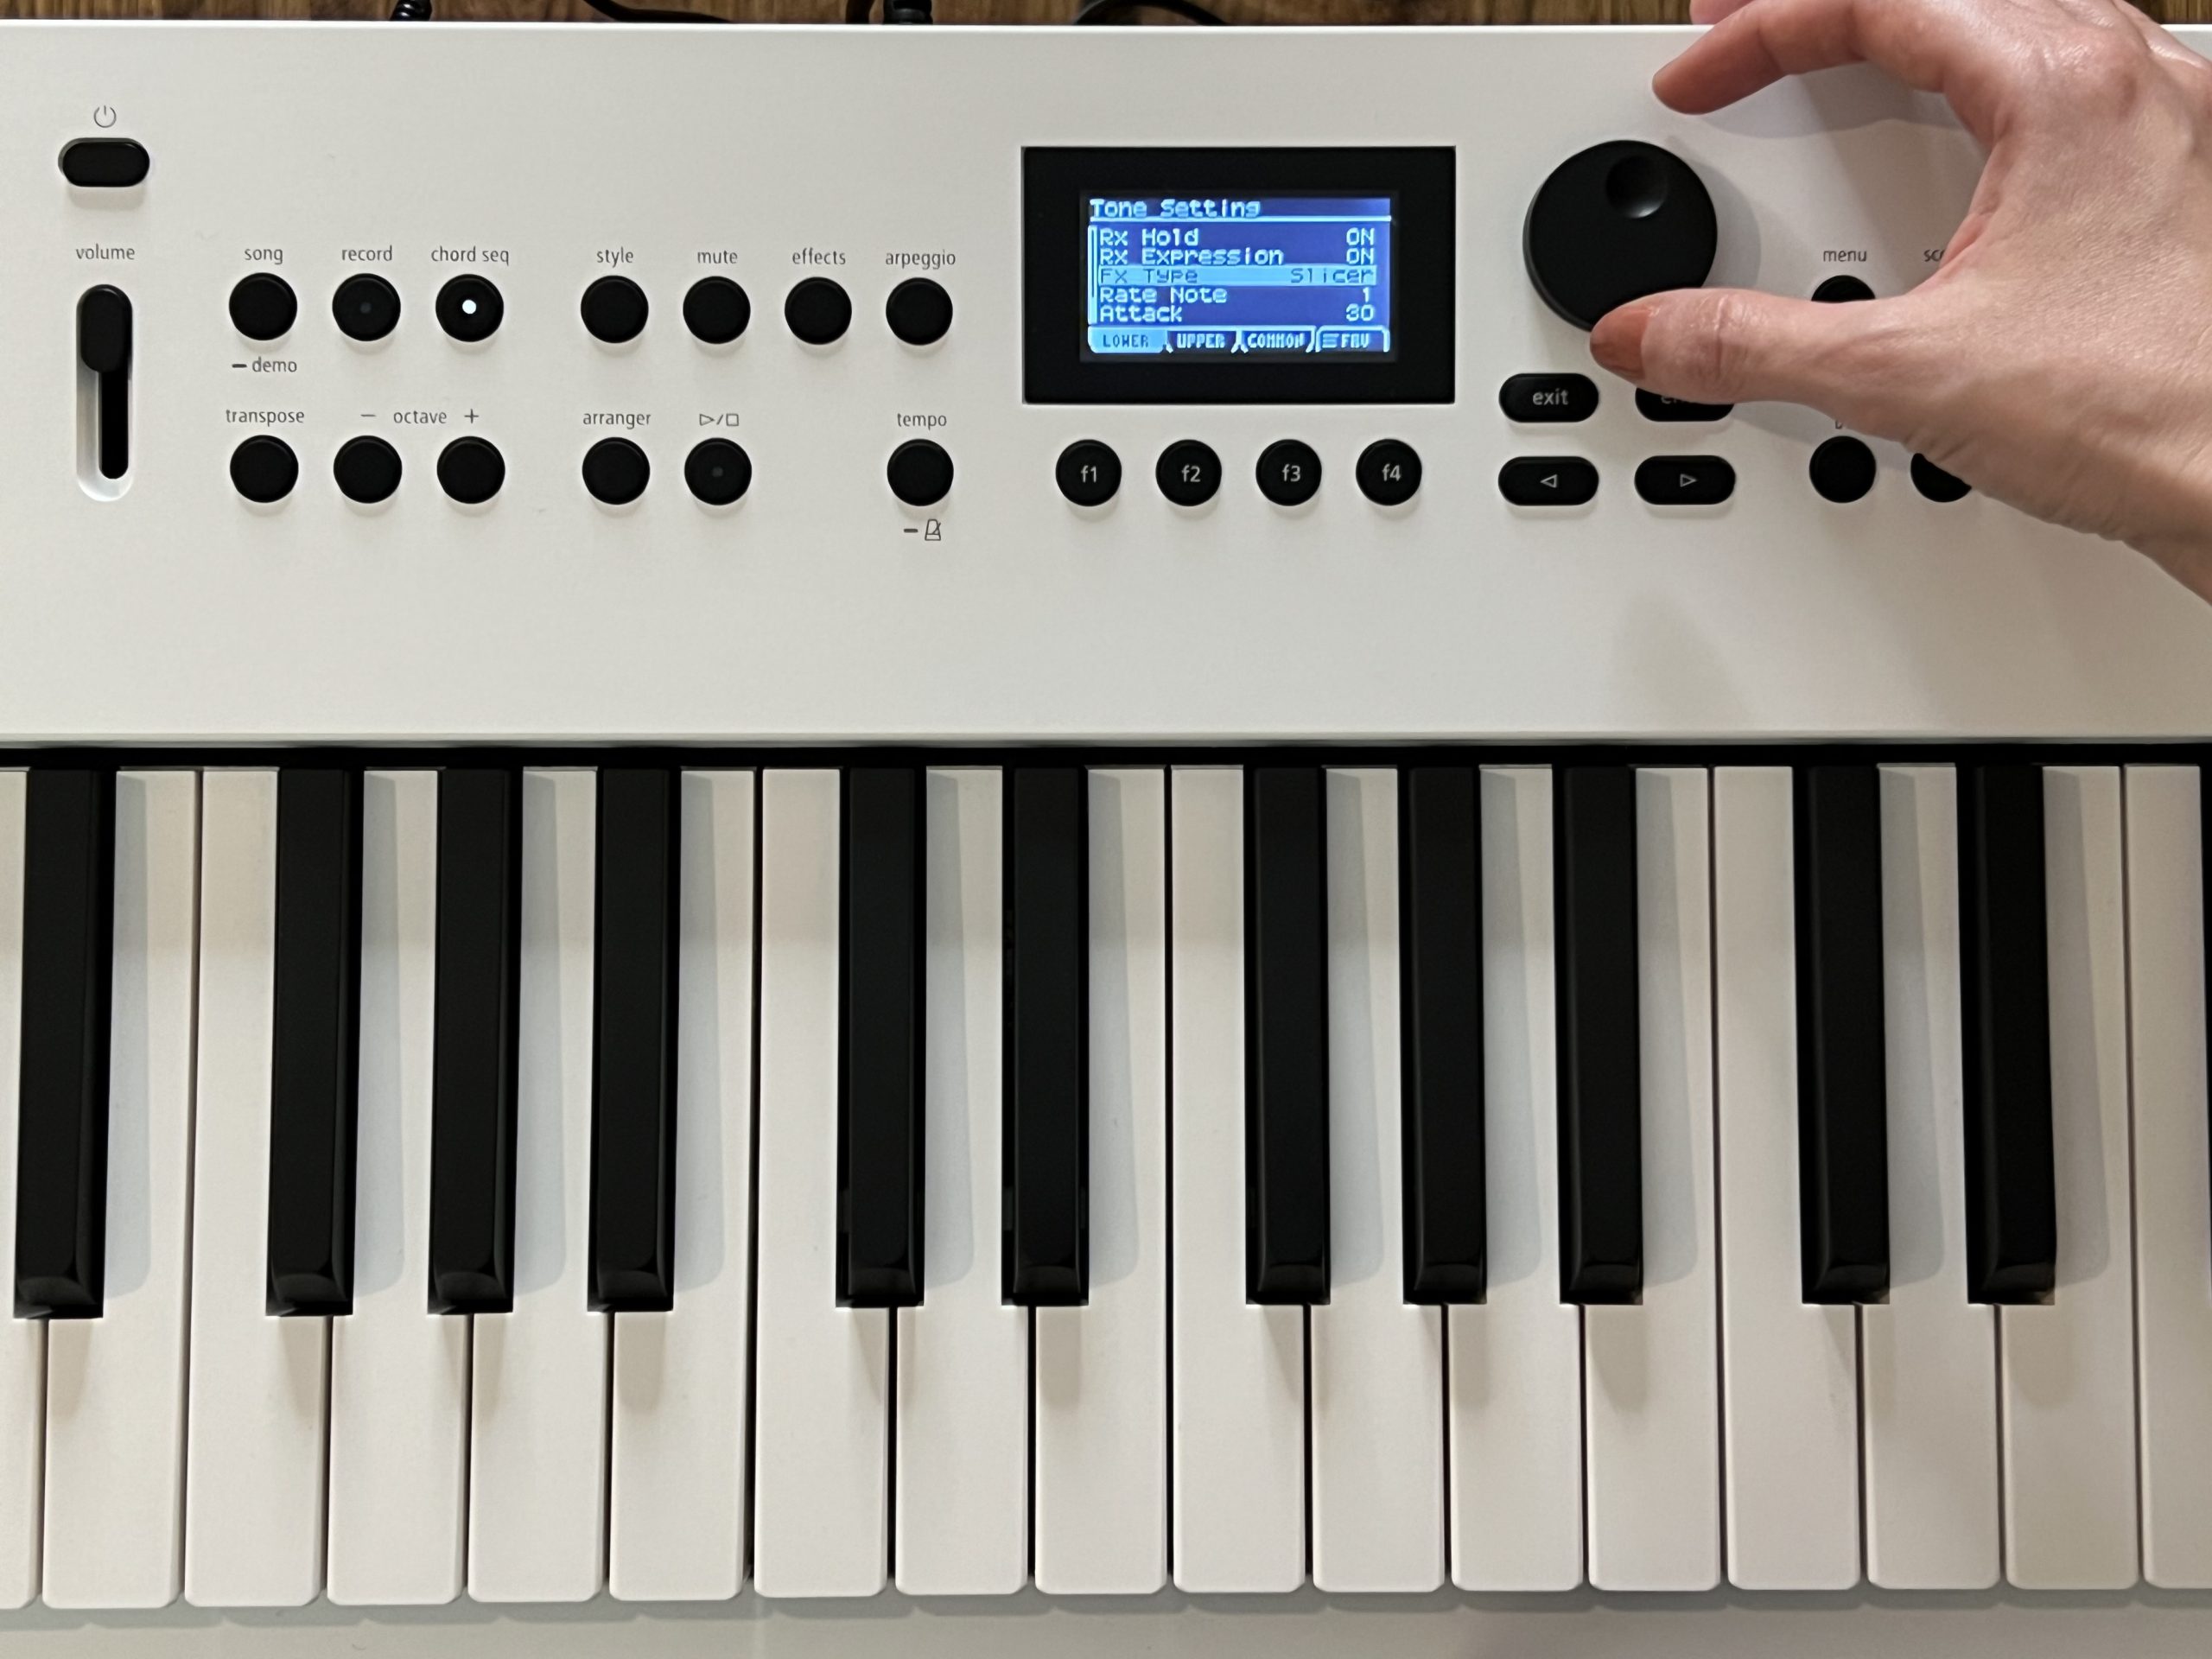
After selecting Sine Flute, I pressed F4 to view the Tone Setting. I moved the Dial knob to reach the FX Type line and hit Enter. I turned the Dial knob until I found the Slicer effect. The chopped-up movement of the Sine Flute blended nicely with the rest of the instrumentation of the Village Pop beat. I adjusted the attack time from 80 to 30, which made the slicing effect work even better with the groove.
Step 6: Split Keyboard
At this point, I was happy with the density of the harmony. Still, I wondered what the drums would sound like with some additional percussion elements sprinkled on top.
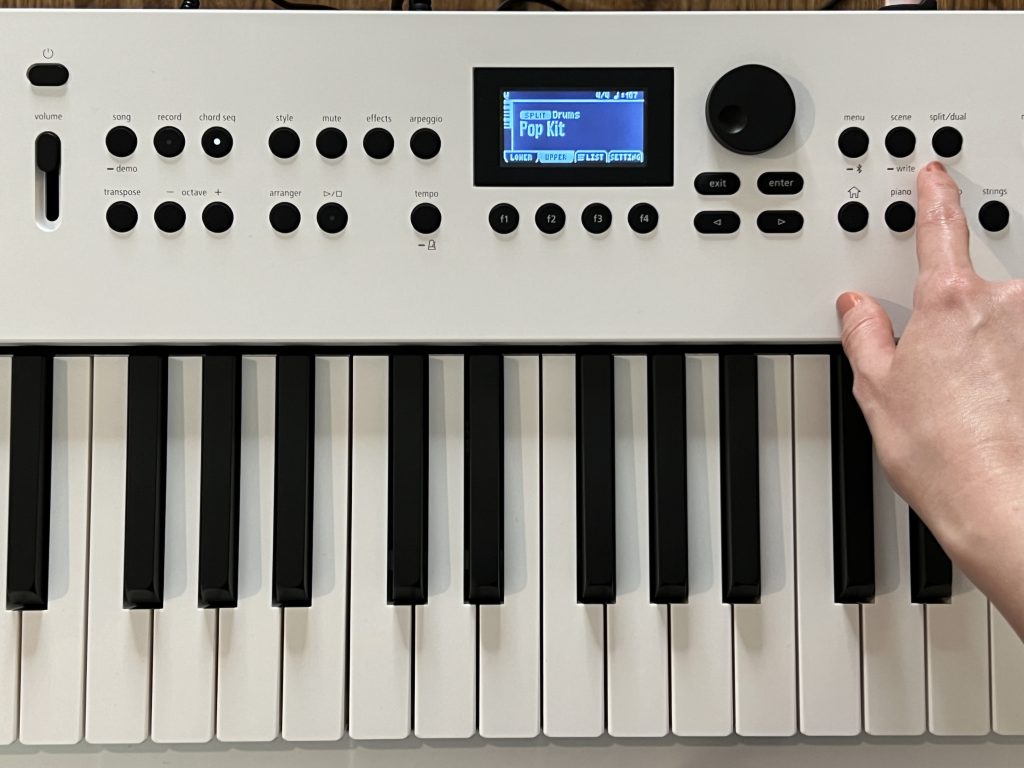
I pressed the Split/Dual button several times until I saw the Split Mode indicator on the screen. This way, I could assign the Sine Flute to the Lower half of the keyboard and use the upper register to play a different instrument.
Retracing my steps, I hit F1 to highlight Lower on the screen and pressed F3 to view the Category List again. I selected Sine Flute and applied the Slicer effect like I did before. But this time around, I hit the F2 button to select the Upper register and assign it a different Tone. Under Category, I selected Drums and found the preset CD021 Pop Kit.

Step 7: Put the Arrangement Together
Now, I had the Village Pop beat and two instruments I could easily play over it. I just needed to figure out the order of events that made the most sense for the song. I decided to begin with just the accompaniment and Sine Flute, which I played with my left hand. I hit the Mute button and pressed F1 and F2 to mute the drums and bass.
I began singing the song’s first few lines with the same instrumentation. Halfway through the verse, I unmuted the bass with the F2 button. Then, I sang the chorus once and repeated it with only the drums and bass playing in the background. This required me to mute the accompaniment and unmute the drums simultaneously. Near the end, I played a straightforward rhythm with a shaker on the upper half of the keyboard.
This variety of musical events kept the arrangement interesting throughout. Still, I thought the chorus vocals could benefit from a vocoder effect.
Step 8: Apply Mic Effects
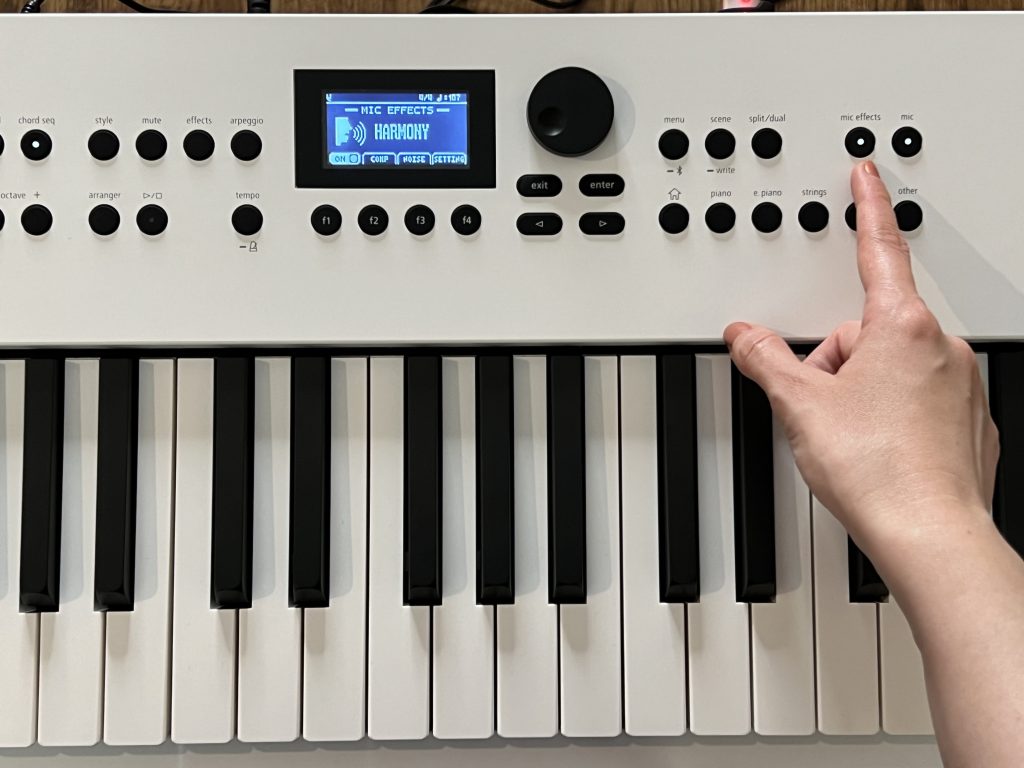
I pressed the Mic Effects button and turned the Harmony on. I pushed F4 to access the Harmony Setting and hit Enter. As I sang the chorus with the Chord Sequencer playing in the background, I moved the Dial knob to hear the harmonizer’s different modes.
For this song, I found Quintet to be the most suitable option. I adjusted the Harmony Level to 6 and Chorus Send to 0 to mix the stack with my own voice to taste.
Step 9: Save Your Scene
Once I ran the arrangement again and performed the chorus section with the Harmony effect, I was content. This demo is one I’d like to revisit in the future.
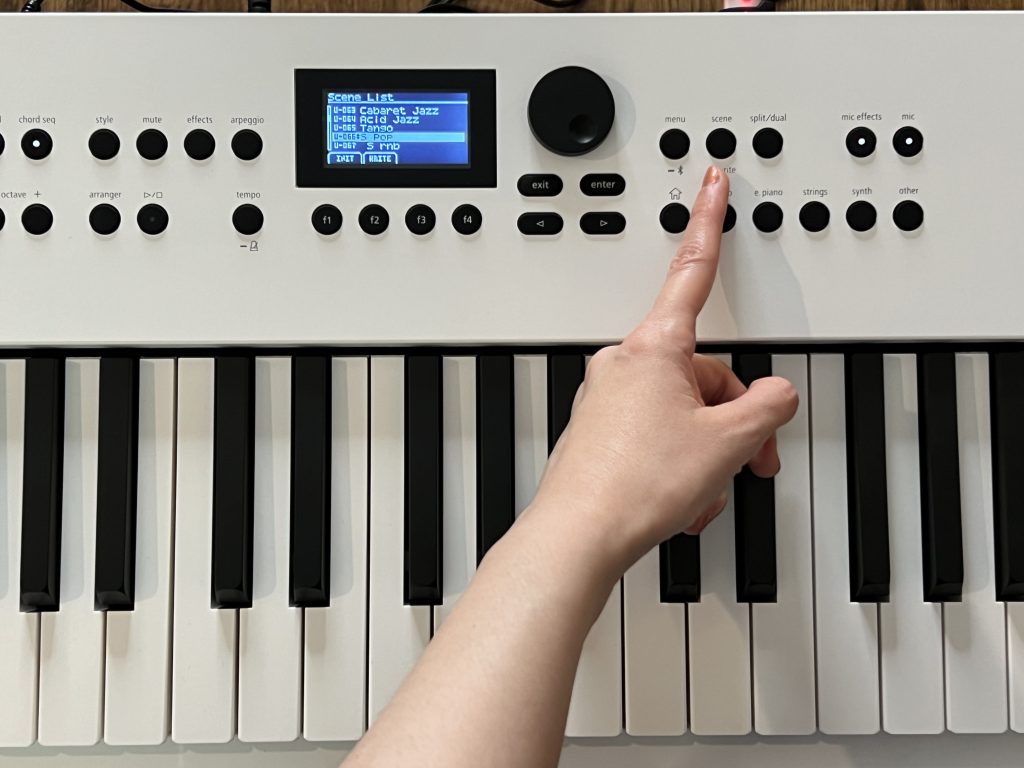
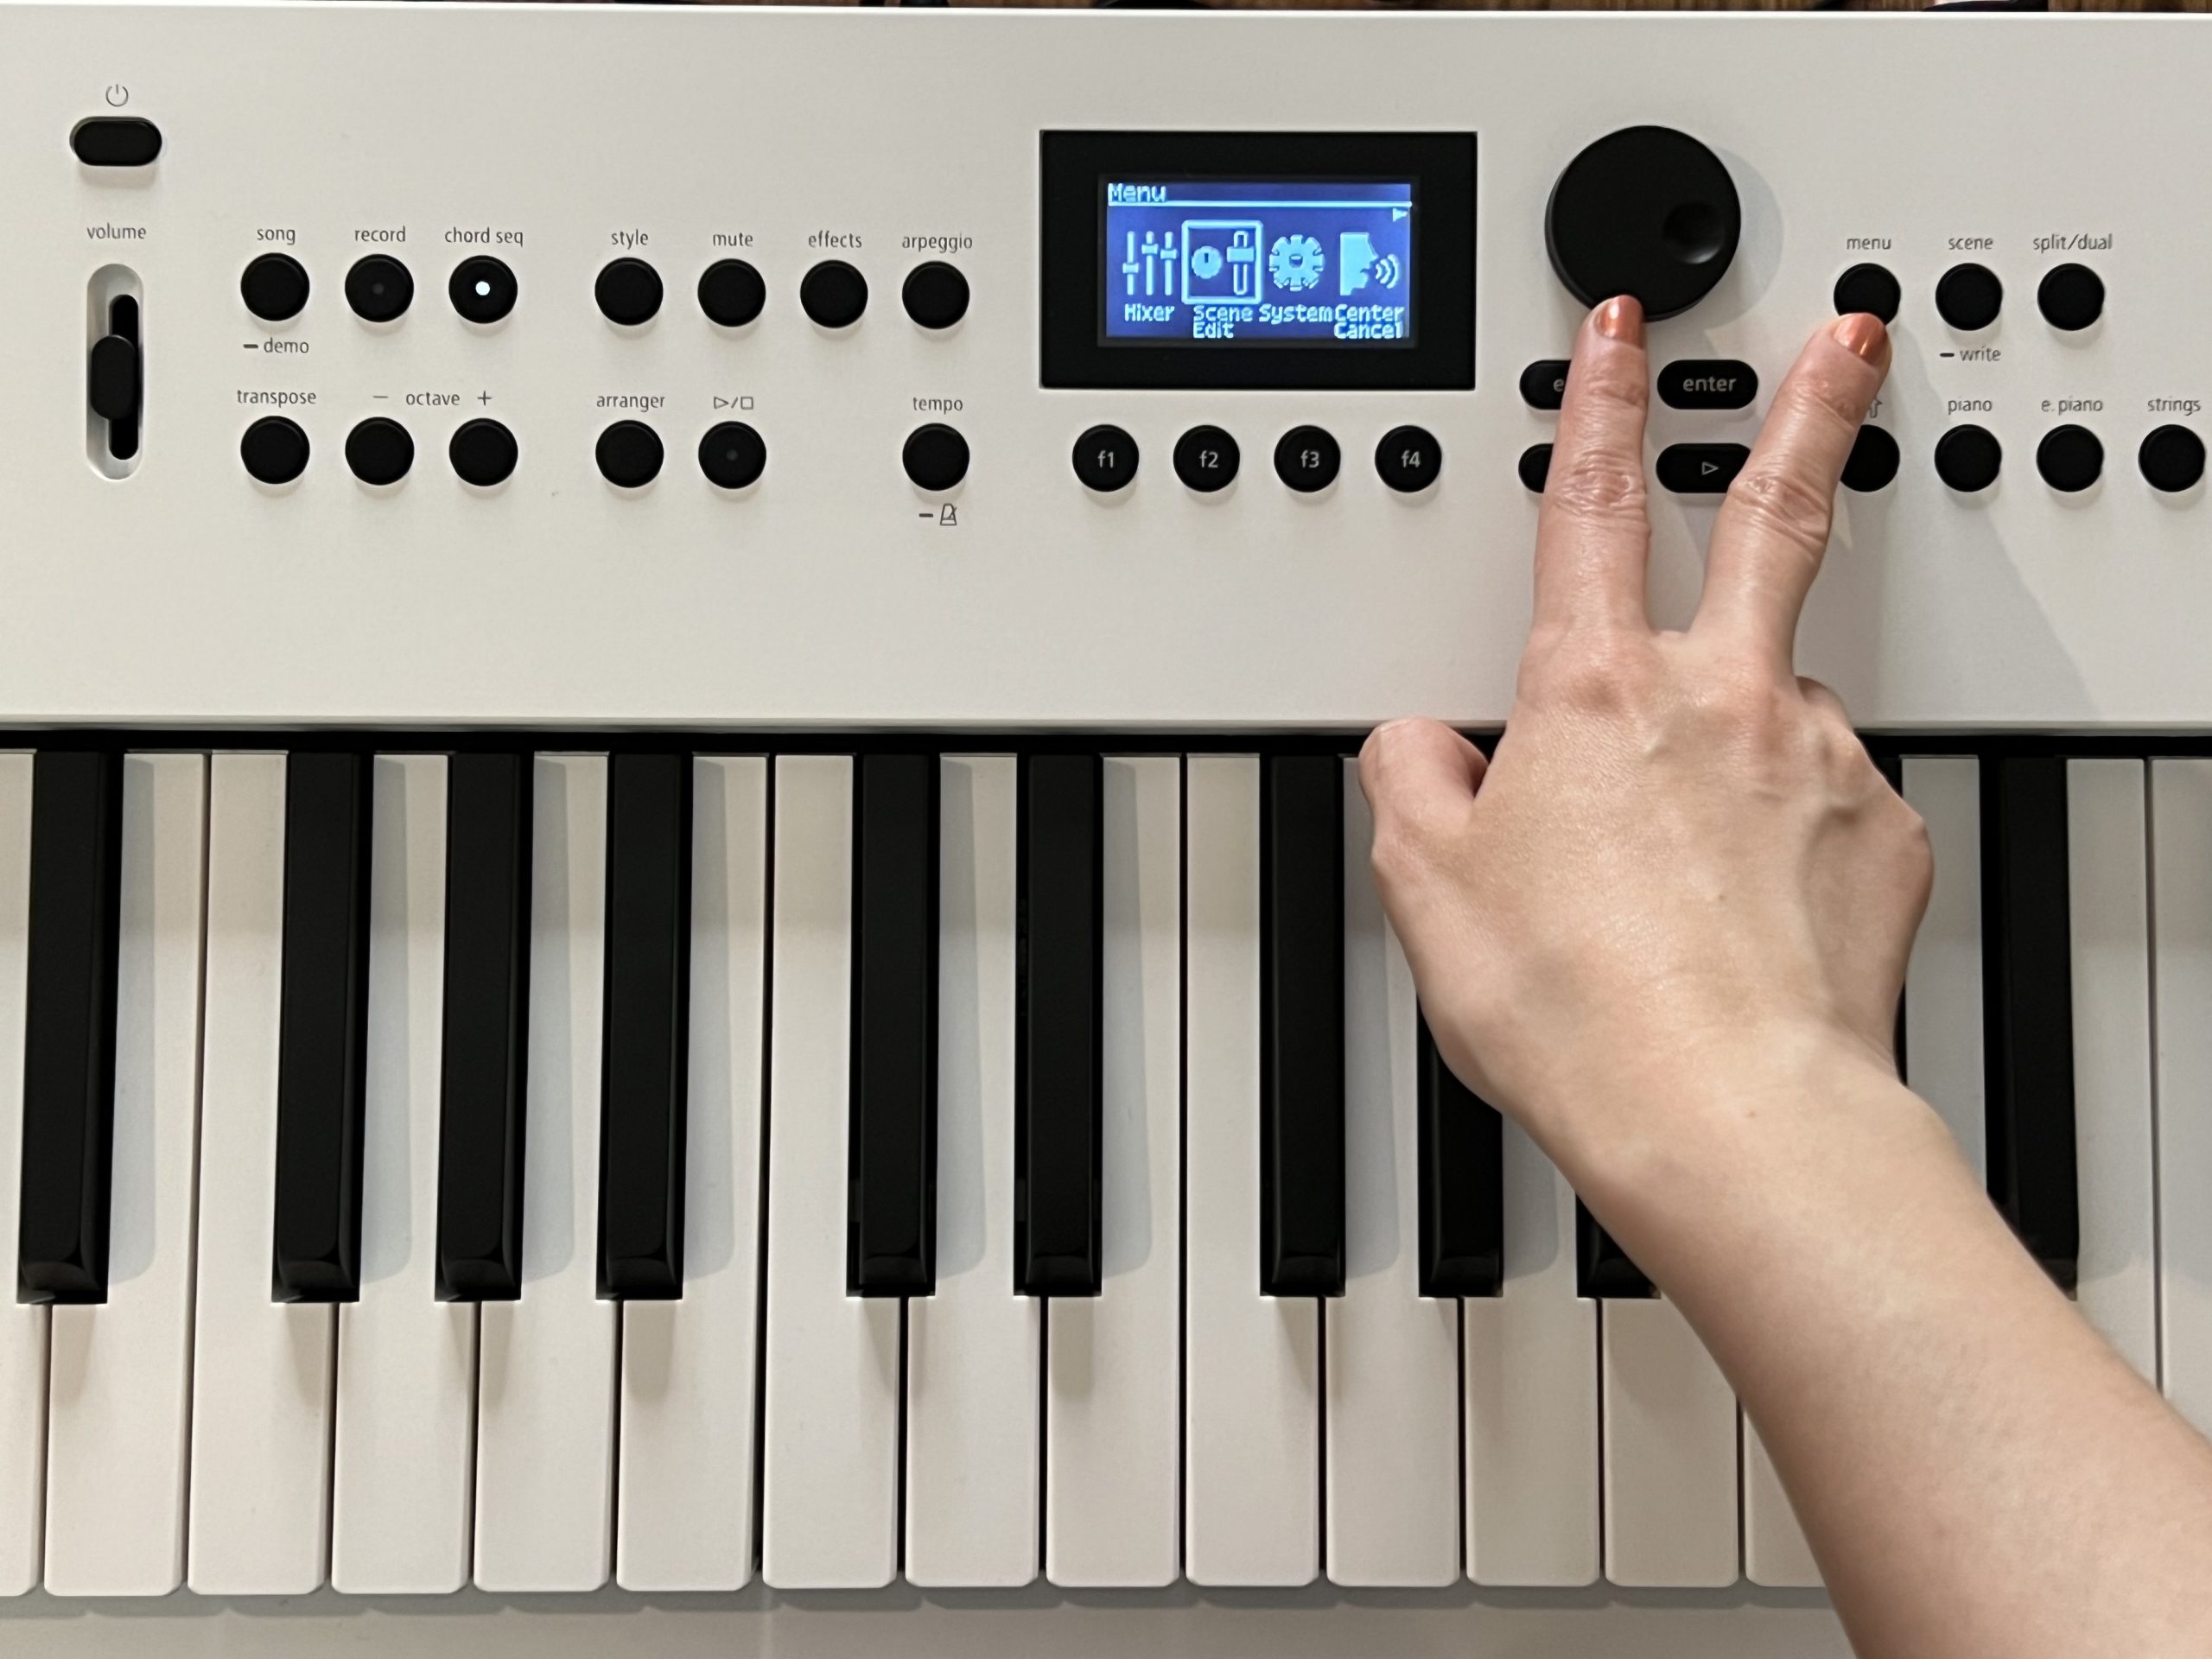
I decided to save my settings in a new scene to ensure I had access to all the adjustments I had made. I hit the Scene button and pressed F2 to select Write. Moving the Dial knob to the right, I found an available slot.
After selecting the Initial Scene line with the Enter button, I named the Scene “S Pop” and hit F4 to execute. This way, the next time I wanted to work on this song, I could go directly to the Scene List to select S Pop, and everything would be exactly where I left it.
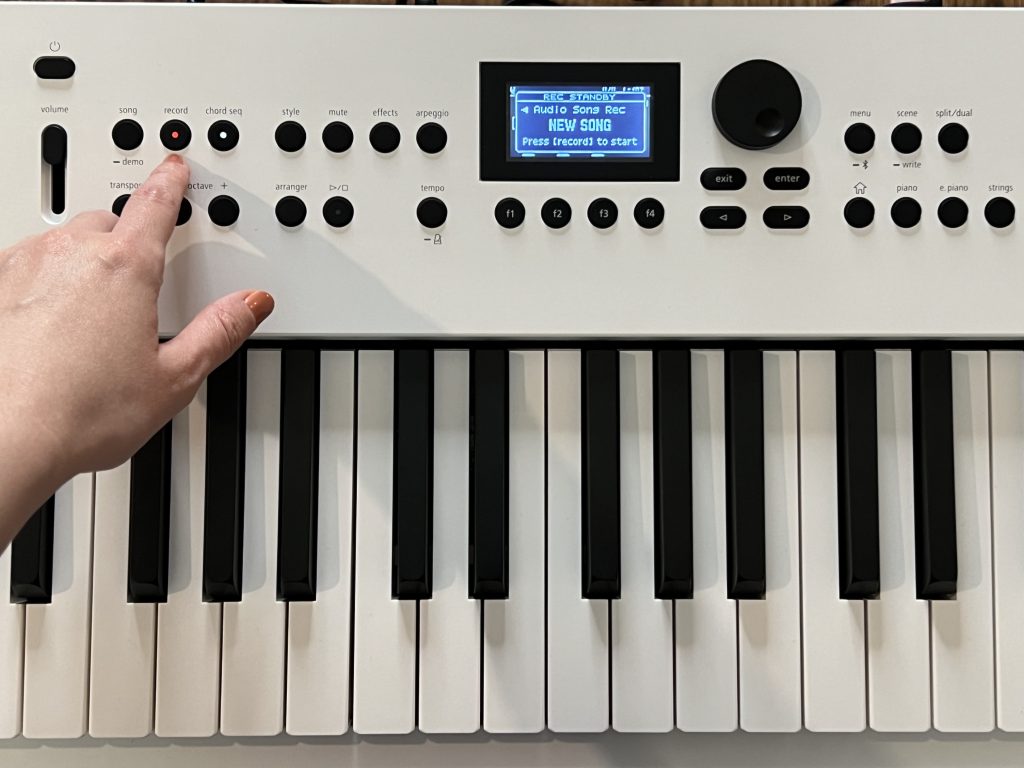
Step 10: Record
Even though saving the Scene made me feel at ease, I still wanted to make sure that I had a recording of the latest draft of my song. So, I plugged in my USB flash drive, which I formatted to use with the GO:KEYS 5, and hit the Record button. Instead of selecting the MIDI option, I chose audio recording to capture all the sounds and vocals in the performance.
Songwriting with GO:KEYS is refreshing and fun. Writing while performing urged me to focus on the big picture instead of getting lost in the details.


